


Day 3: Tinsel Town
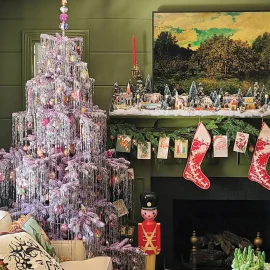
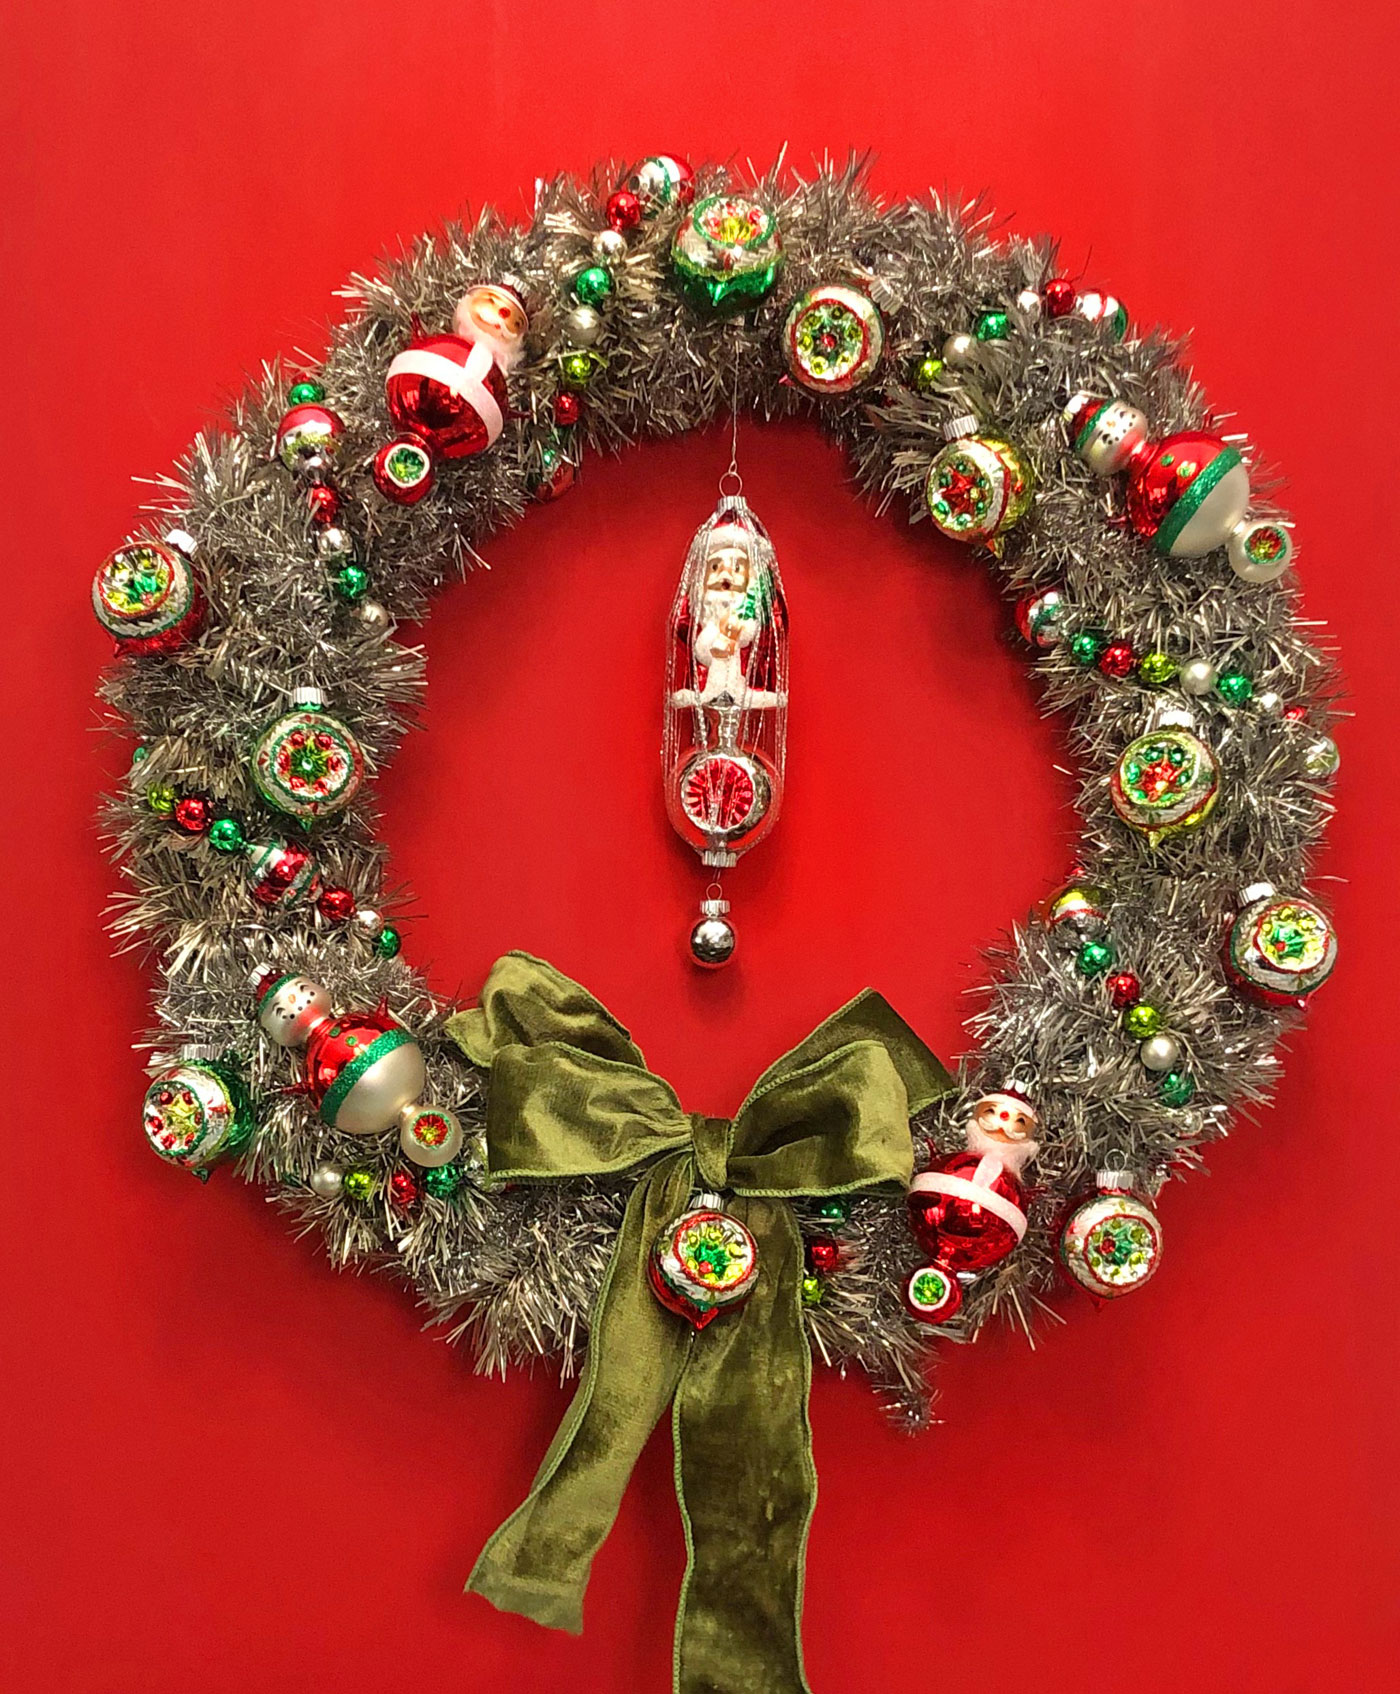
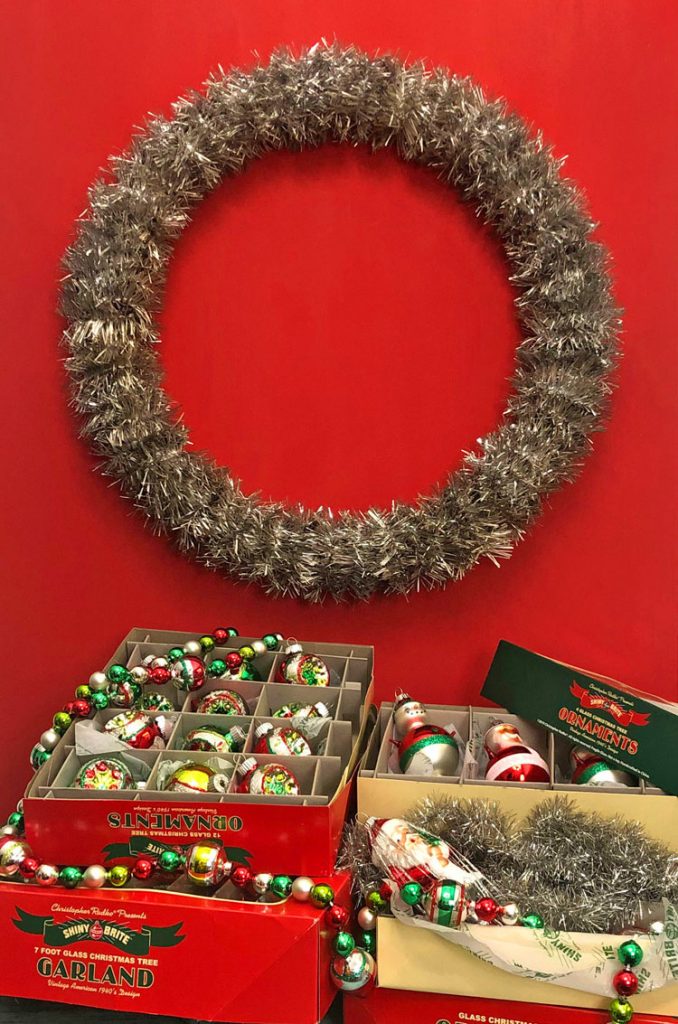
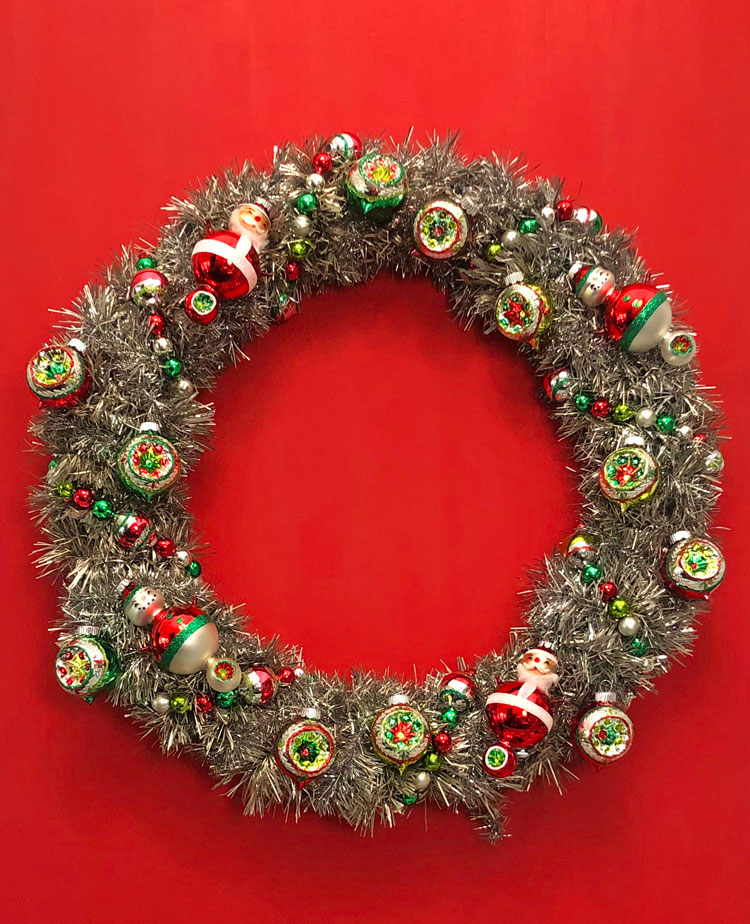
Nothing says “vintage holiday” like the glitter of tinsel and the glimmer of Shiny Brite ornaments. Although the origins of silvered glass baubles and tinsel both date back over 100 years, the Shiny Brite brand and the trend of tinsel as an alternative to evergreen branches have their hey-day rooted in the mid century era. This vintage wreath combines the two for a retro-chic decoration that is sure to make your front door merry this Christmas!
The best part about this craft is that it’s so easy to customize for your own decor! Choose your own color palette and feature baubles in any theme for a finished product that fits your unique holiday style. Want to make your own? Here’s how!
How to Make Your Own Vintage-Inspired Wreath
At Flea Market Decor, we love to curate and share our favorite finds from across the web with you. Some of the products you’ll see on this page are affiliate links, which means that if you click through and make a purchase, FMD will earn a small commission at no extra cost to you!

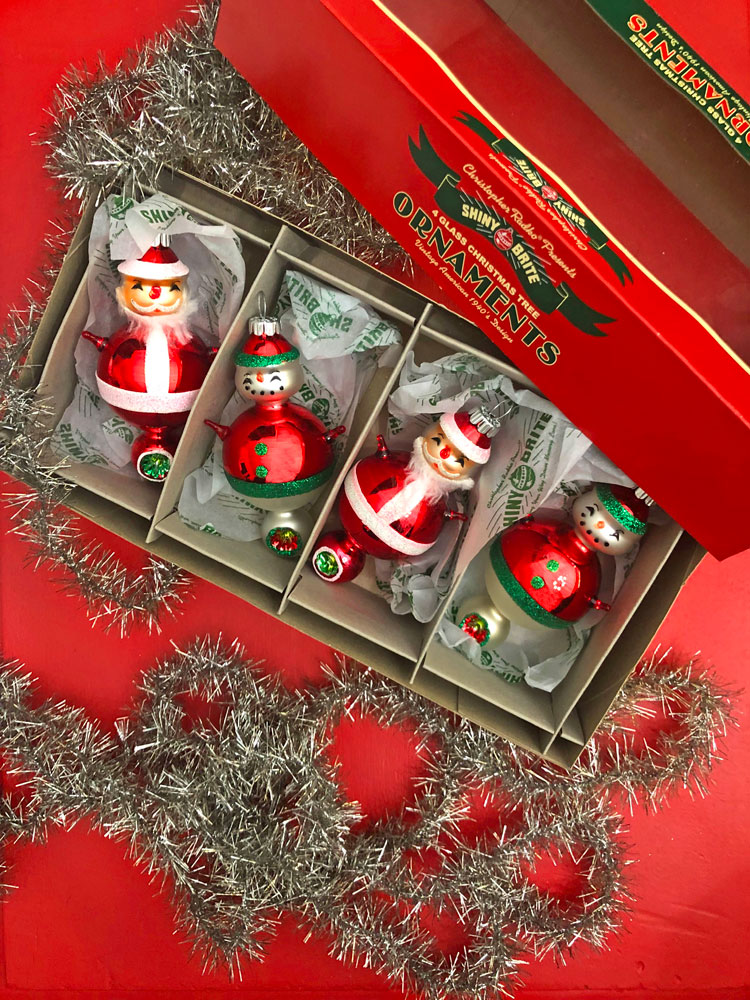
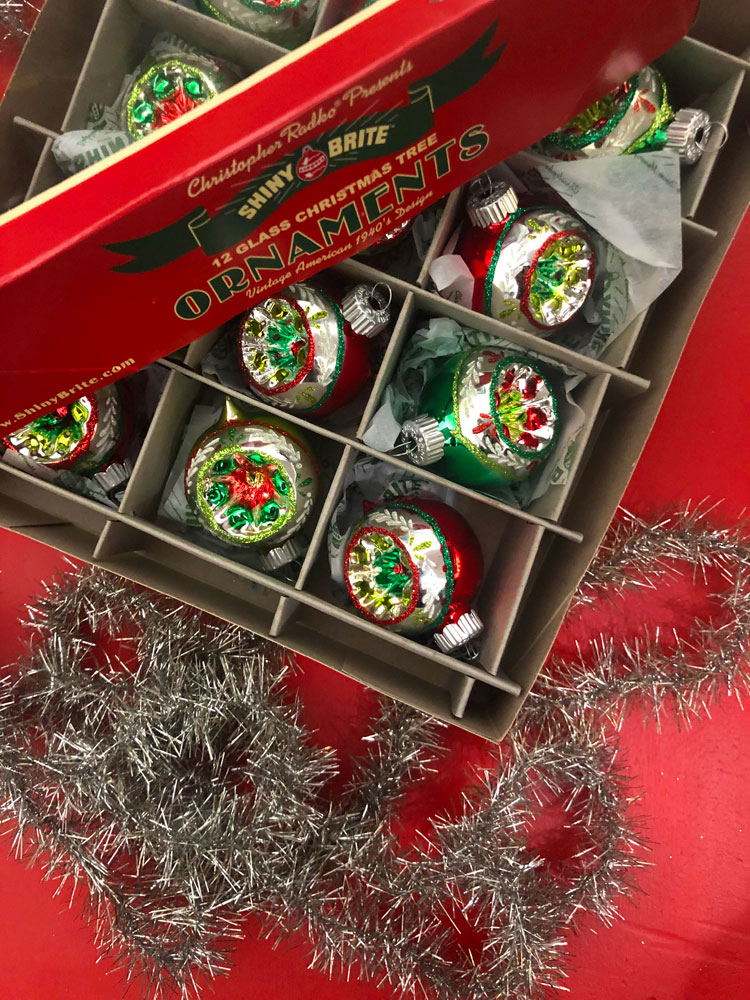
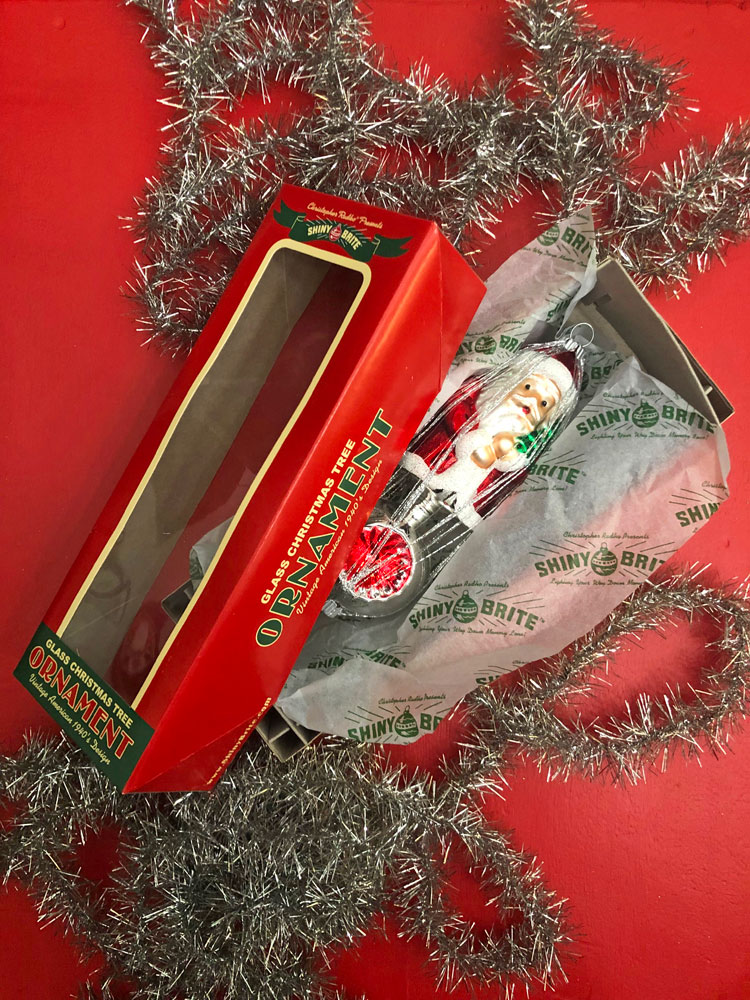
Christopher Radko Shiny Brite Holiday Splendor 4 Count 4.25″ Santa & Snowman Figure Ornaments Christopher Radko Shiny Brite Holiday Splendor 1.75″ Reflector Rounds Christmas Ornaments Christopher Radko Shiny Brite Holiday Splendor 7″ Santa Reflector Christmas Ornament
What You’ll Need:
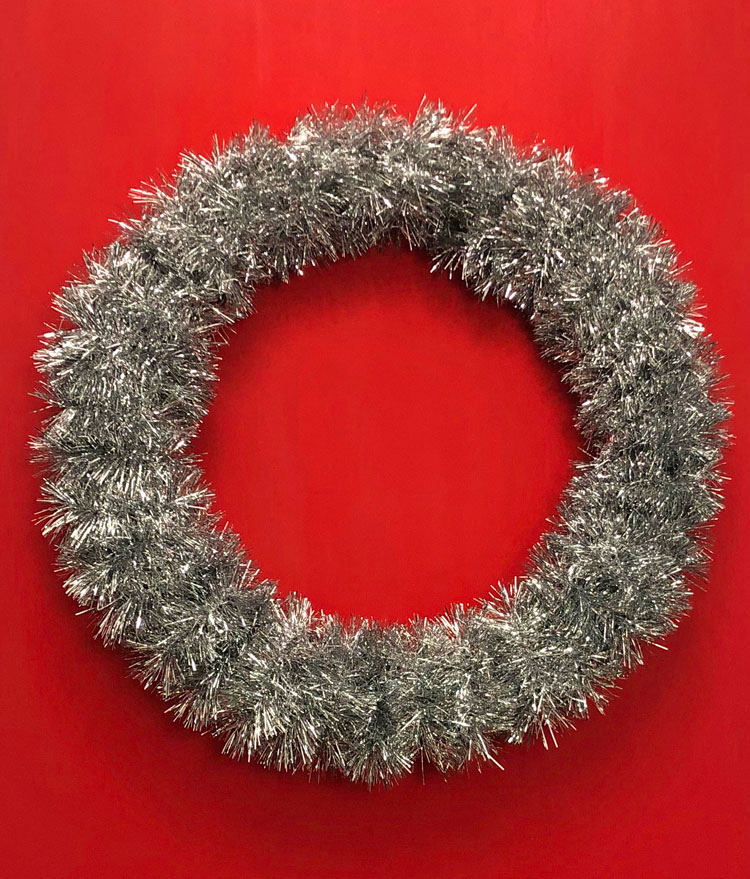
- Wreath form. Make sure to measure the space where you intend to hang the wreath before purchasing the foundation for your project. You’ll want to make sure that the size of your wreath is a good fit for it’s intended display spot. I chose a wire form, similar to this one. You can also find tinsel wreath forms with more naturally-shaped branches like these and skip ahead a few steps in the process.
- Tinsel Garland. Vintage tinsel was made with foil, unlike today’s PVC or mylar versions, and develops a gorgeous smoky golden patina over time. This version by Smile Mercantile is the inspiration for the color of my wreath, and I incorporated this fine tinsel into it to add some variety to the wreath’s texture. However, I recommend starting with around 50-75 ft of the thickest and fluffiest tinsel you can find. The density of “needles” on your tinsel and size of your wreath form will also factor.
- Shiny Brite Ornaments. Thankfully, these old fashioned ornaments are still produced today! I used this garland, these reflector ball ornaments, these Santa and Snowmen figures, and the centerpiece is this Santa Claus reflector ornament. You can find these at The Jolly Christmas Shop.
- Optional: Spray paint. I wanted that smokey golden patina found on vintage tinsel to be recreated on the inexpensive tinsel I purchased. To do this, I purchased Rust-Oleum’s Universal spray paint in Flat Antique Nickel and Champaign Mist.
- Hot Glue Gun. To secure ornaments to the wreath.
What You’ll Do:
Step 1: Wrap Your Wreath
If you’ve purchased a wreath form with branches made of tinsel, skip ahead to step 3.
Start by wrapping the tinsel around the frame. You’ll want to keep the tension loose enough that the garland doesn’t loose its fluffiness and securely enough that it doesn’t move around on the frame. I like the look of ornaments nestled in among the tinsel, so I wrapped my tinsel in three layers to achieve a suitable bulk.
Tip: To avoid getting your tinsel in a tangle, cut pieces in 10 foot lengths. You can tie these together from end to end as you go.
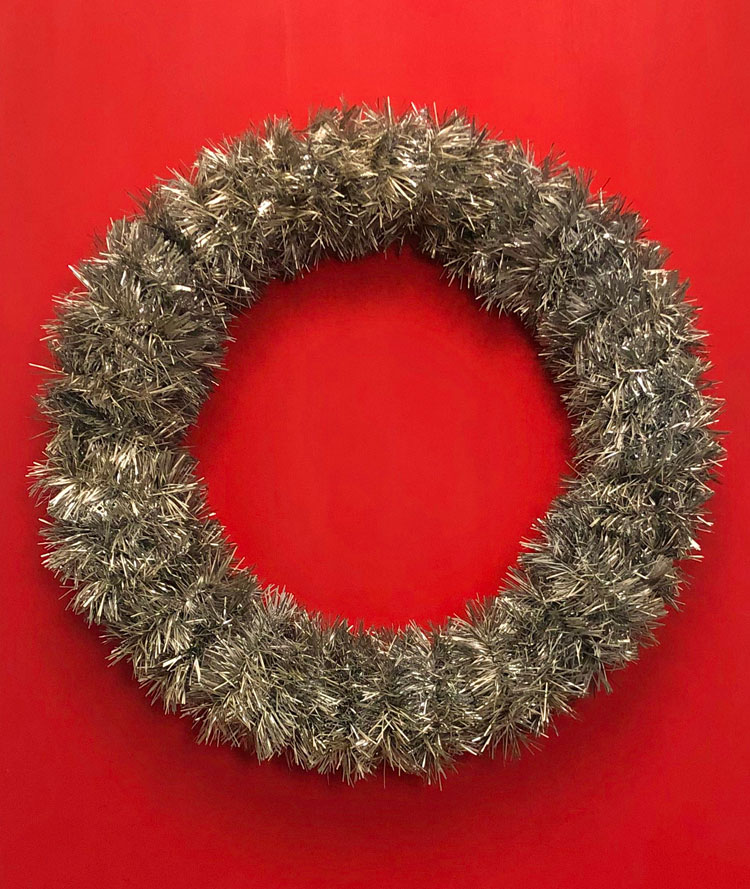
Step 2: Antique The Tinsel
This step is optional, and you can skip it if you like the look of your tinsel as-is. I felt the mirror finish of modern tinsel would look out of place among my vintage Christmas decorations, and I love the patina of the authentic product.
Once I had secured the wrapped garland around my wreath, I took it out to my spray paint station. Here, I misted the whole thing first in Rust-Oleum’s Universal spray paint in Flat Antique Nickel to dull the shininess and give it that vintage smoky color, and then I used Champaign Mist to give it just the right touch of gold.
I recommend wearing a mask while spray painting to avoid inhaling air-born paint particles
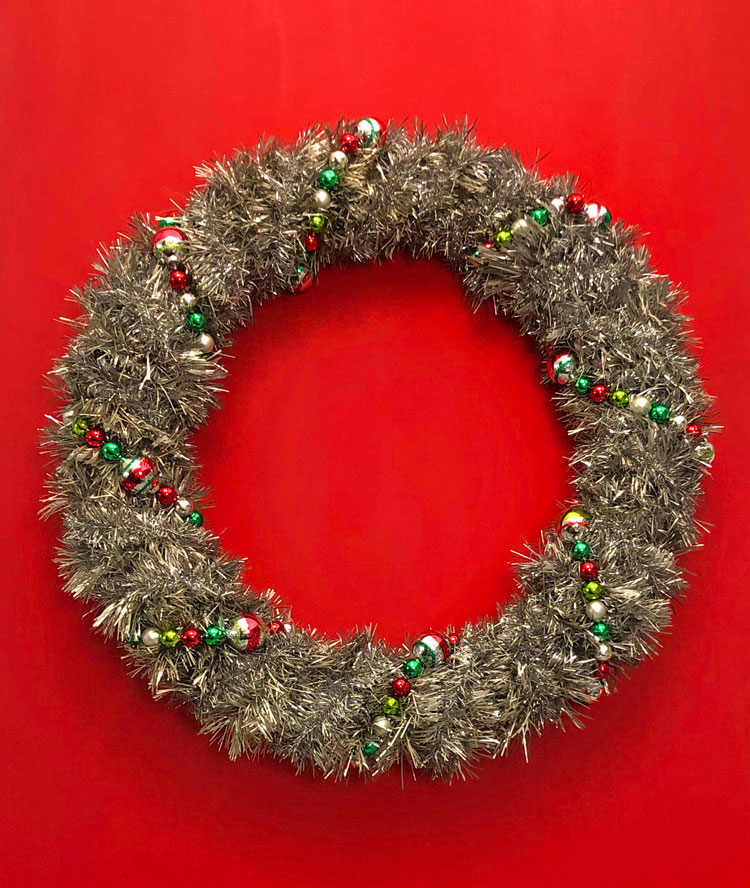
Step 3: Add the Garlands
A string of glass Shiny Brite baubles is the perfect touch for adding color to the piece. The smaller size of these beads compliments the larger balls I’ll add later.
I also wrapped a smaller, finer tinsel garland around the form at this point. I color-matched the two tinsel garlands well enough that they blend together, but smaller version adds textural variety and extra fluff (always a good thing in my book!)
Step 4: Arrange Your Ornaments
For this step, I’m glad I opted for ornaments of different shapes to help me decide where to place each piece. Once I’d positioned the four figural baubles along the circle, I had an easy time deciding where to place the balls. These are secured with hot glue to make sure they don’t fall down.
Tip: Hot glue is a more permanent fixative, so you’ll want to be confident in your arrangement before committing to it. While you’re just trying things out, use double stick tape to temporarily hold a ball in place.
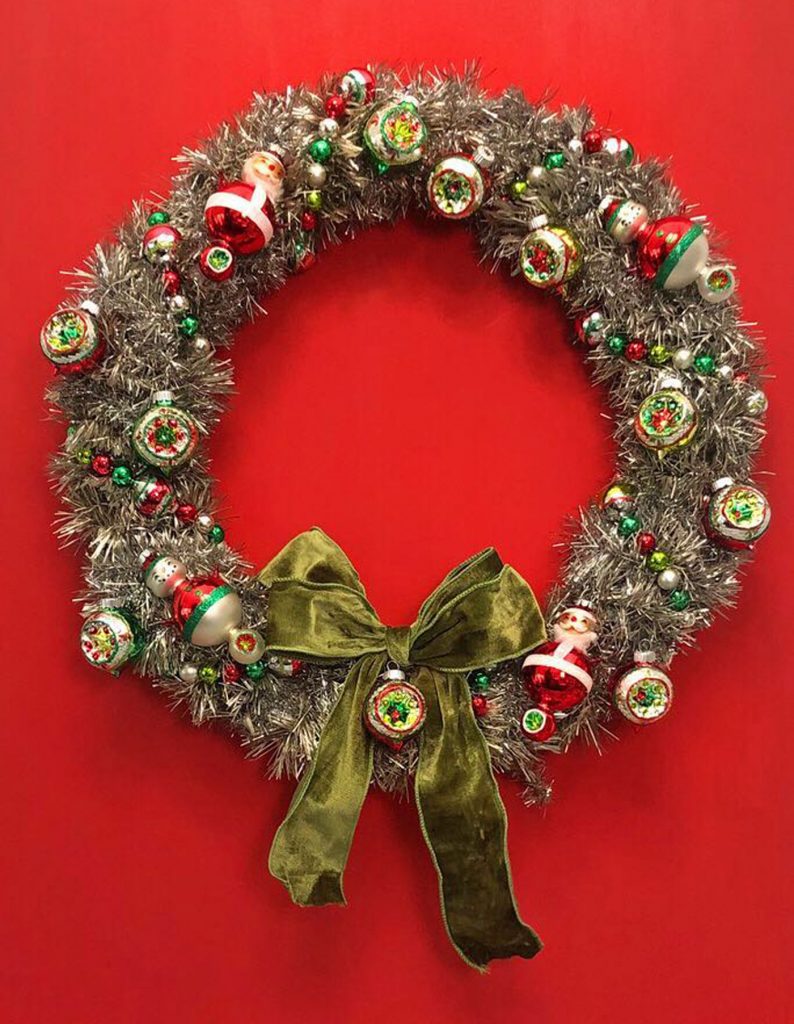
Step 5: Add A Bow
The right ribbon makes the wreath, in my opinion, and this deep green specimen beautifully enhances the other green elements and contrasts with the red hues in the space.
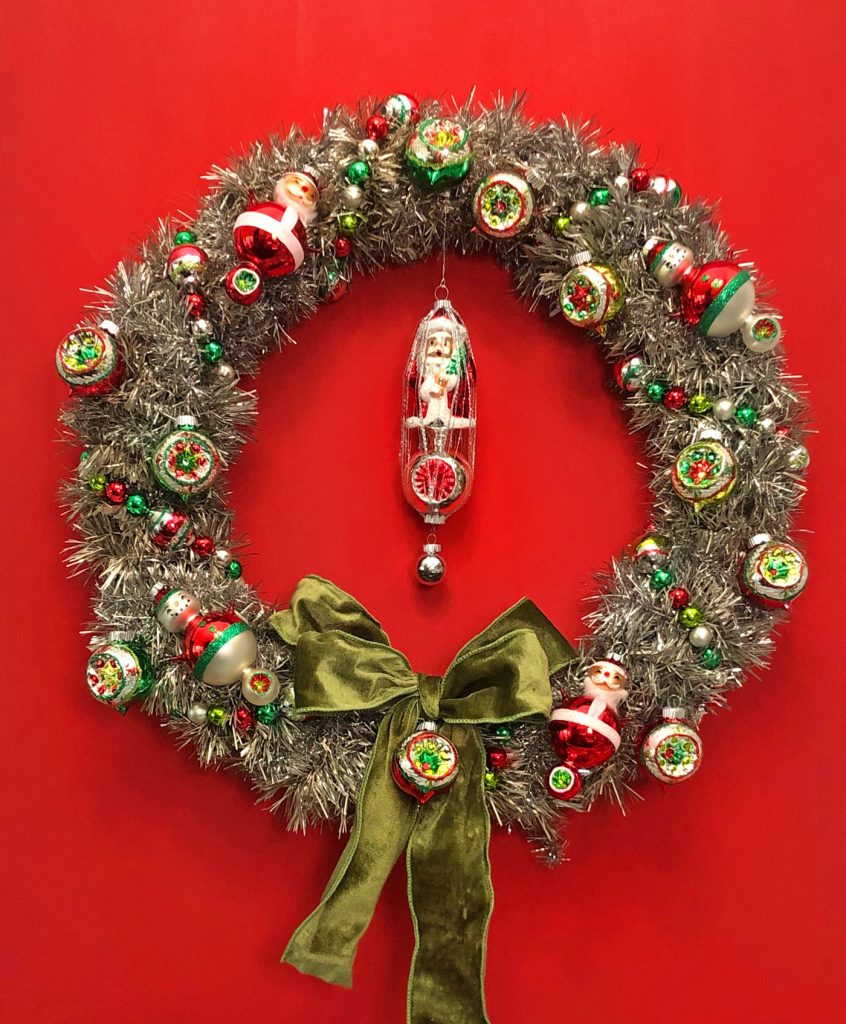
Step 6: The Finishing Touch
The final touch is this Santa Claus figure! Hanging down from the center, he closes the negative space in the center of this vintage inspired wreath.

If you didn’t catch yesterday’s post on upcycled wrapping paper ideas, check it out here.
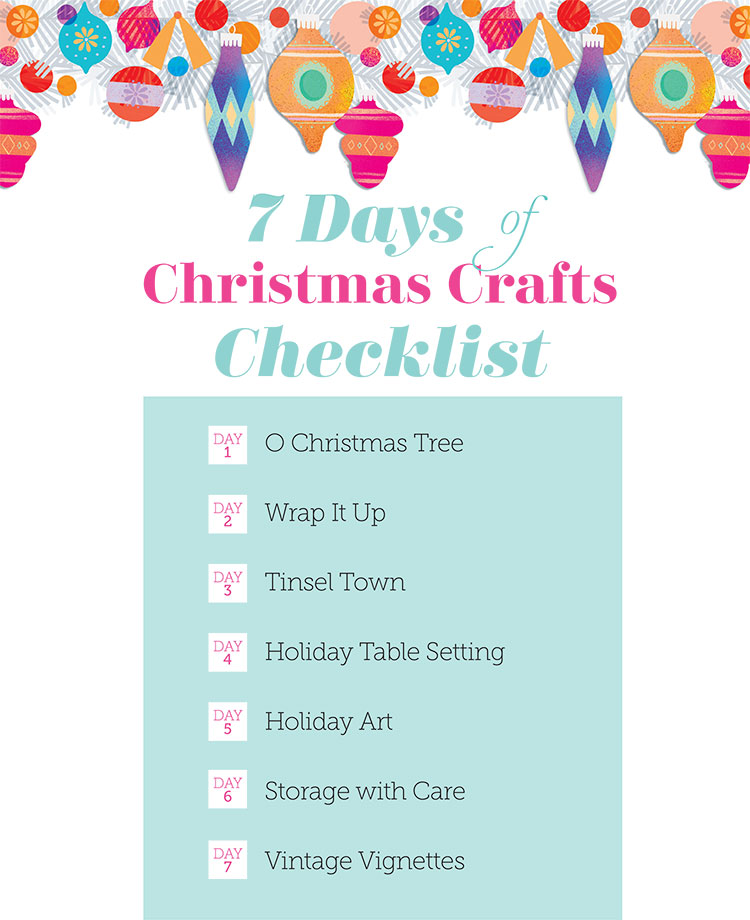
Want a sneak peek at what’s ahead in our 7 Days of Christmas Crafts? Take a look at our checklist below. And if you haven’t already, sign up for our 7 Days of Christmas Crafts newsletters to receive all our printables! And don’t forget to follow our Facebook, Instagram, and Pinterest for some fresh flea market inspiration!