


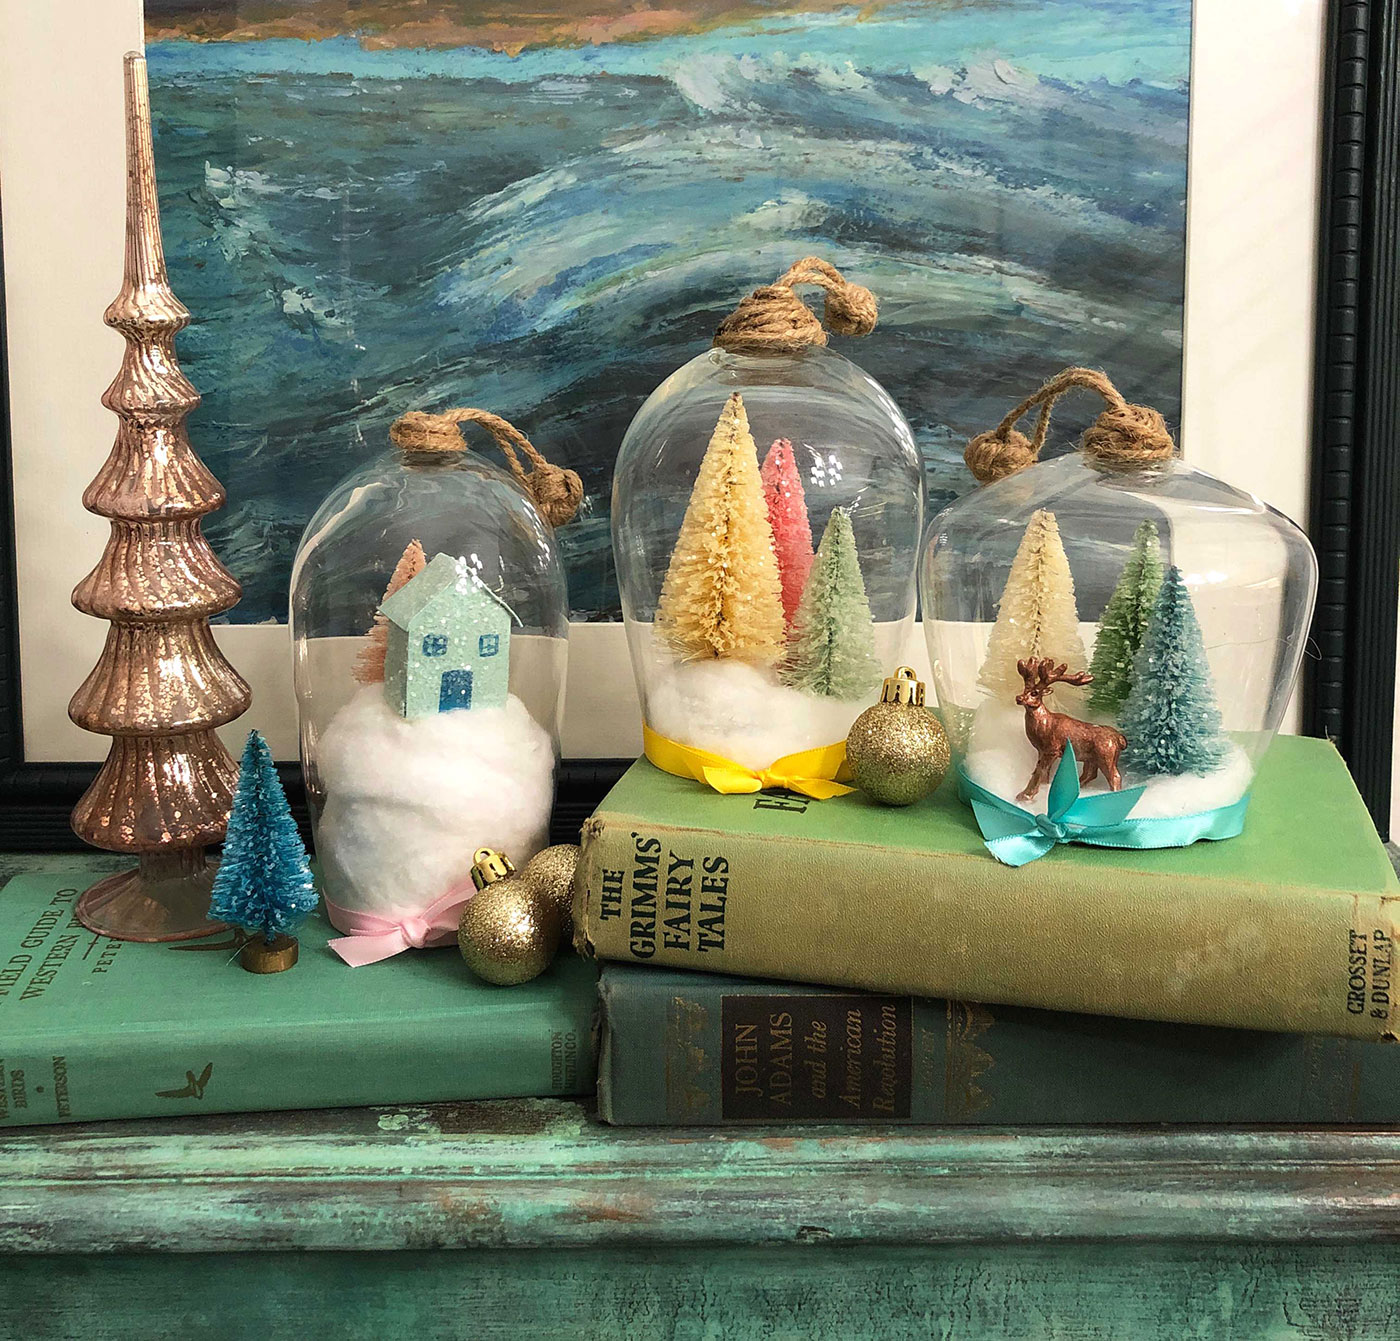

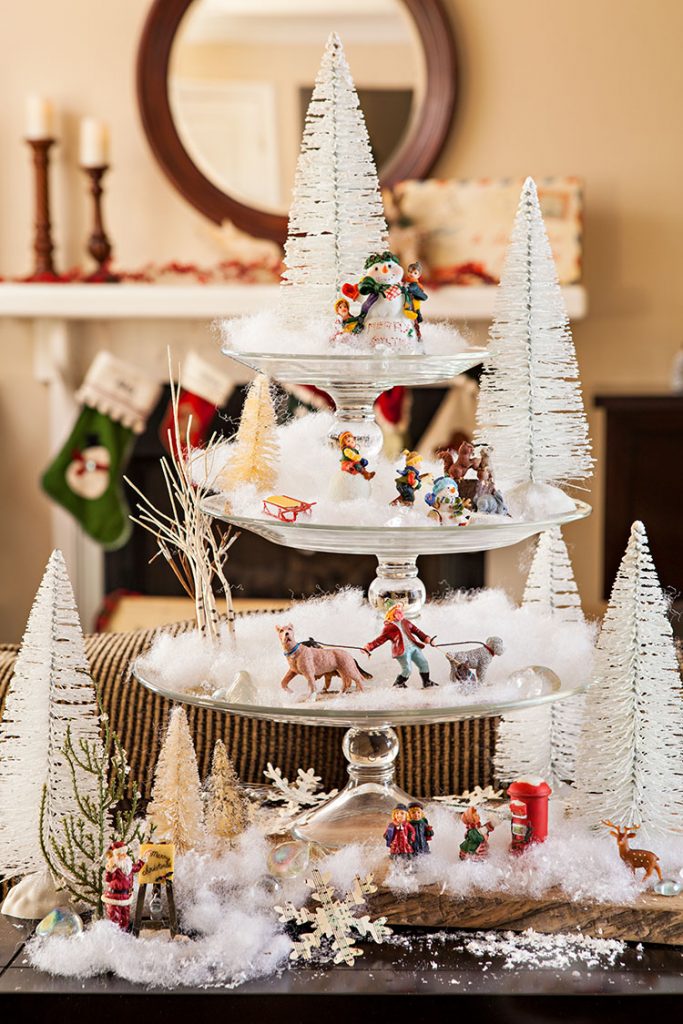
Day 7: Holiday Vignettes
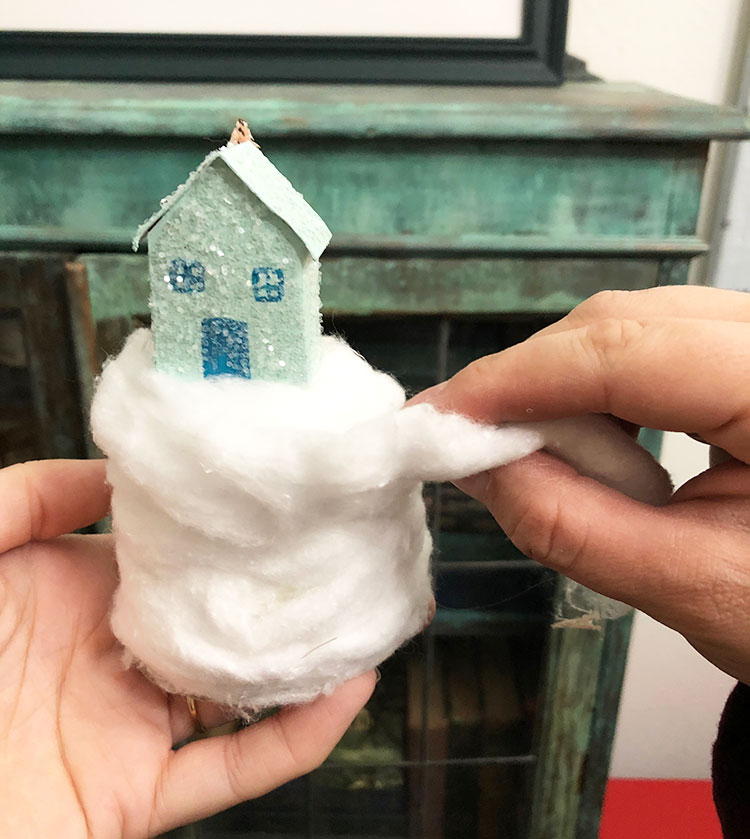
It’s the little things in life that count, and the same can be said for holiday décor. Bottlebrush trees, tiny reindeer and miniature houses can get lost in a display without the proper presentation, and we found an easy solution: create a scene with a wine glass cloche!
Wine glasses come in a variety of shapes and sizes, and best of all, you can find them at your local Goodwill for around $1 each. With your favorite vintage miniatures, a cereal box, cotton balls and some twine, you can create little snowy scenes to display on your mantel, side tables or shelves for a bit of Christmas magic.
At Flea Market Decor, we love to curate and share our favorite finds from across the web with you. Some of the products you’ll see on this page are affiliate links, which means that if you click through and make a purchase, FMD will earn a small commission at no extra cost to you!
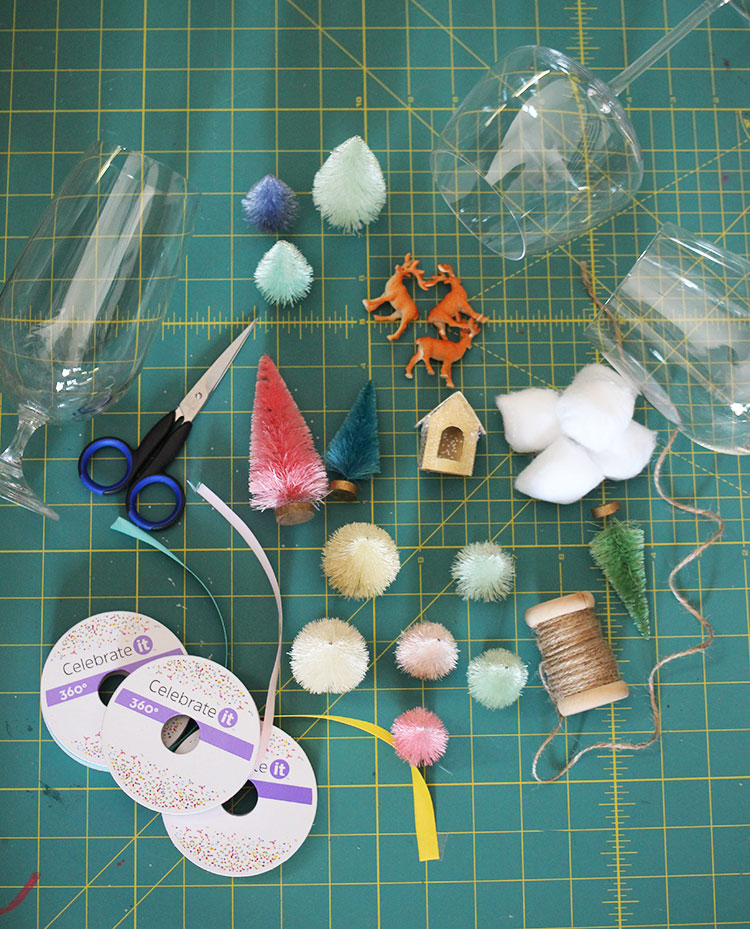
What You’ll Need
- 3 wine glasses (from your local Goodwill). Choose sizes that will fit the scene you want inside. A wider mouth means a larger base to work with.
- Thin ribbon
- Twine
- Bottlebrush trees
- Miniature deer
- Miniature house
- Knife (straight-edge)
- Masking tape
- Cereal box (or any kind of thin cardboard)
- Cotton balls
- Pencil
- Scissors
- Hot glue gun/glue sticks
- Glitter (optional if you want to glitter your bottlebrush trees)
- Clear Glue (optional)
- Small paint brush (optional)
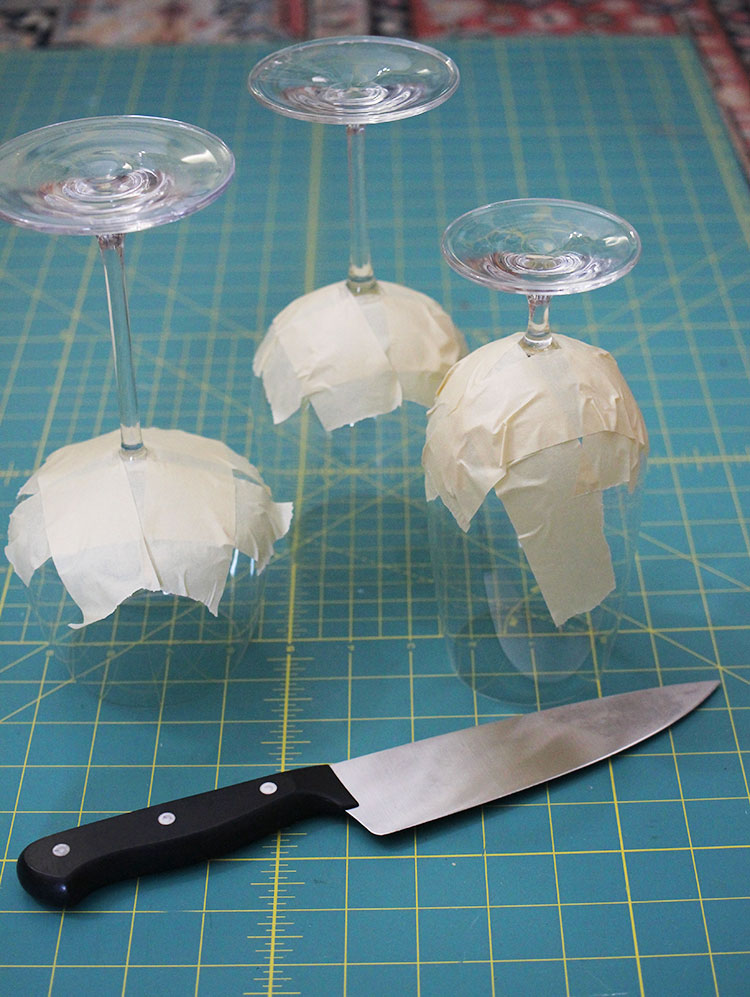
Step 1: Prep the Wine Glasses
Wear protective eyewear and gloves for Step 1
After you’ve gathered your supplies, the first step is de-stemming the wine glasses. It looks scary, but it’s easier than it looks. Simply tape around the base of the stem to help bolster the bottom of the glass and catch any loose glass shards after breaking.
With a quick/sharp tap away from your body, bring the knife down on the base to disconnect the stem into a trash can. It’s okay if it’s not a perfect cut. You’ll be covering what’s left at the next step. Remove the tape and ensue no glass shards are left on the glass.
Step 2: Cover What’s Left of the Stem
You most likely didn’t get the entire stem off the wine glass, so the next step is to cover what’s left with twine to ensure the piece is safe to handle. We tied a monkey fist knot for a decorative finish and then wrapped the rest around what was left of the handle and hot glued it in place.
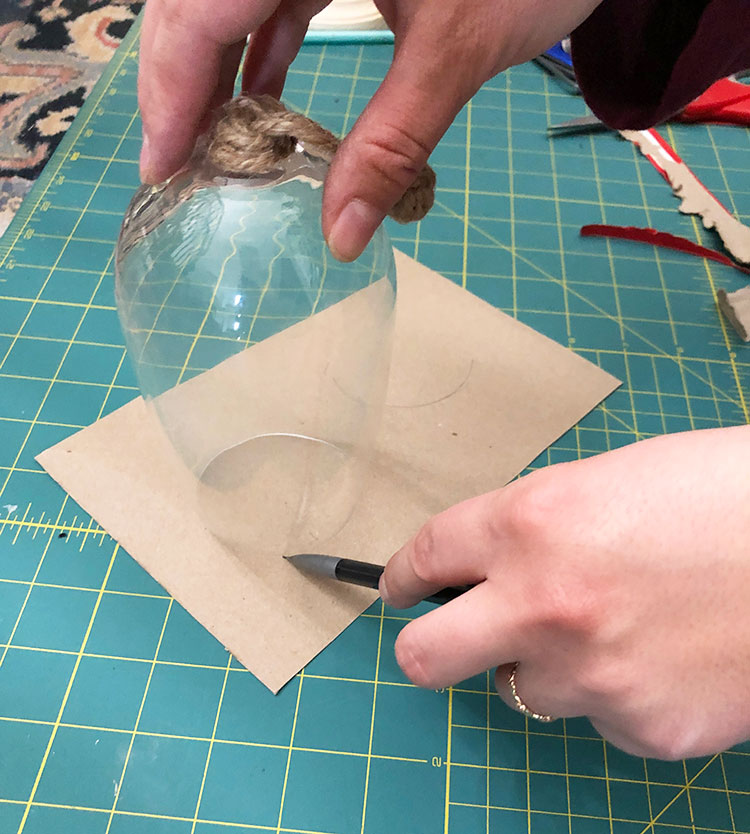
Step 3: Make Your Base
Trace the rim of your wine glass cloche onto your cardboard piece to measure your base and cut it out. Before you start gluing your scenery pieces onto the base, we recommend placing them under your wine glass cloche without adhesive to ensure everything fits before you commit.
Now is the time to prep your scenery pieces before you start gluing them down, if you want to make changes. We added some embellishments to our miniatures to get the look we wanted.
We used a paint brush to coat our bottlebrush trees with clear glue and sprinkled on glitter for a sparkly effect. We also spray painted our reindeer in Lucky Penny by COLORSHOT Premium Spray Paint for a darker finish.
Step 4: Set Your Scene
Now you’re ready to fill your wine glass cloche with cute miniatures! Glue your trees and any other figures to your cardboard base and wrap the bottom with unraveled cotton balls to look like snow. We used styrofoam to create a height variance in our trees.
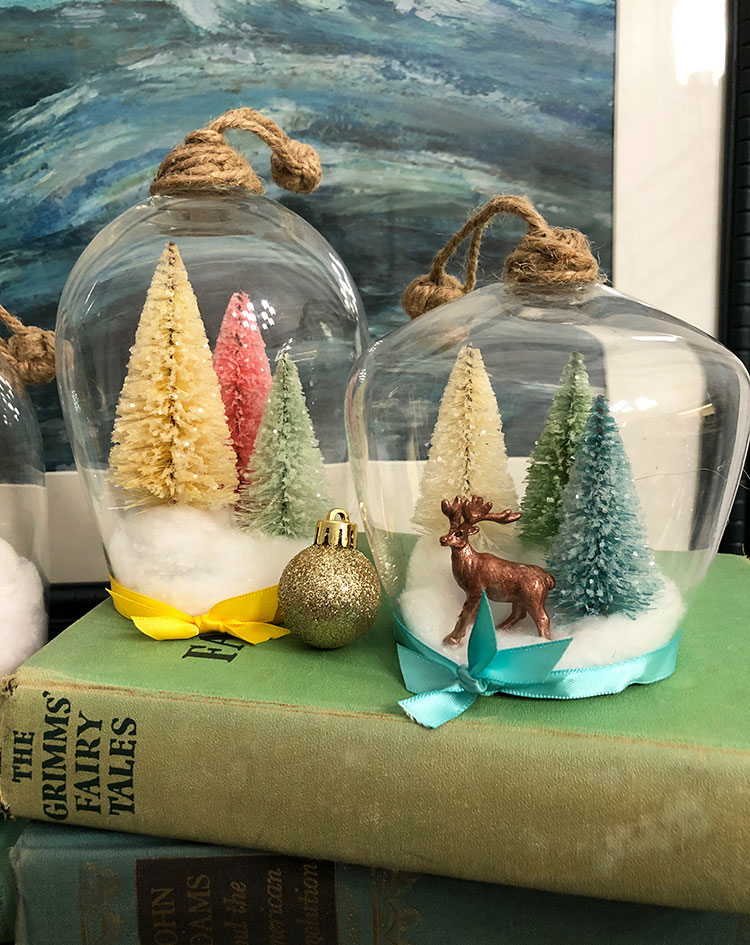
Once you’re happy with the way it looks, hot glue the cardboard base to the rim of the wine glass cloche and hot glue your ribbon around the bottom to cover up any imperfections and provide a pop of color.

Place them on your table as a centerpiece, on a side table or a bookshelf for a cute Christmas vignette!
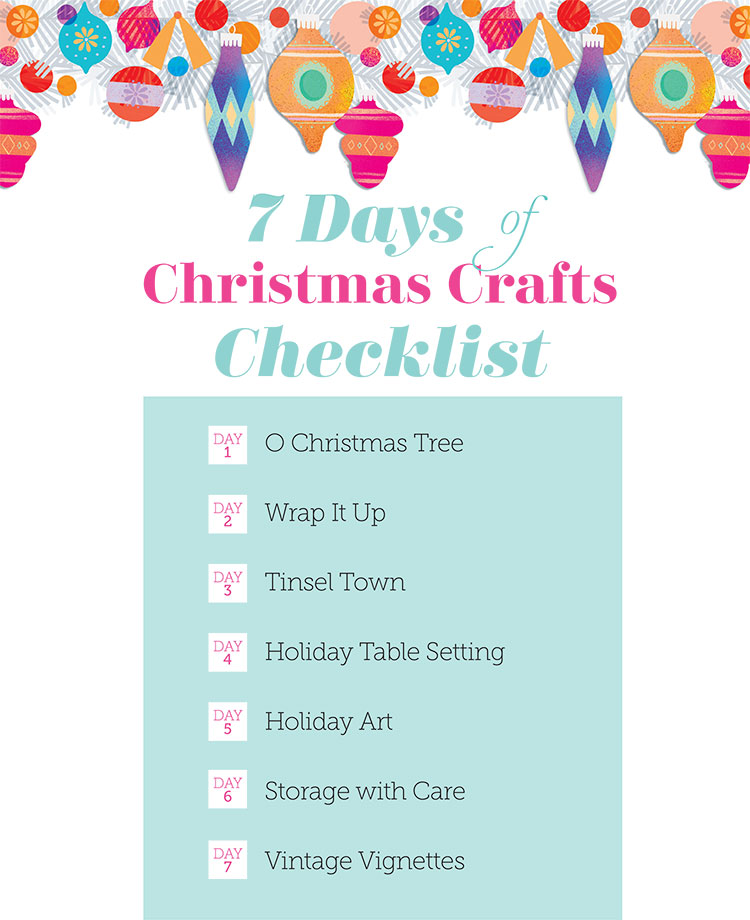
If you haven’t seen our post on DIY ornament storage, check it out here. This is the last day of our 7 Days of Christmas Crafts, but see the checklist below to get caught up on other days you might have missed! If you sign up, you’ll receive holiday craft inspiration and our collection of holiday printables right to your inbox!
Don’t forget to follow our Facebook, Instagram, and Pinterest for some fresh flea market inspiration!
