Leah Daehling
Supplies:
- Book(s)
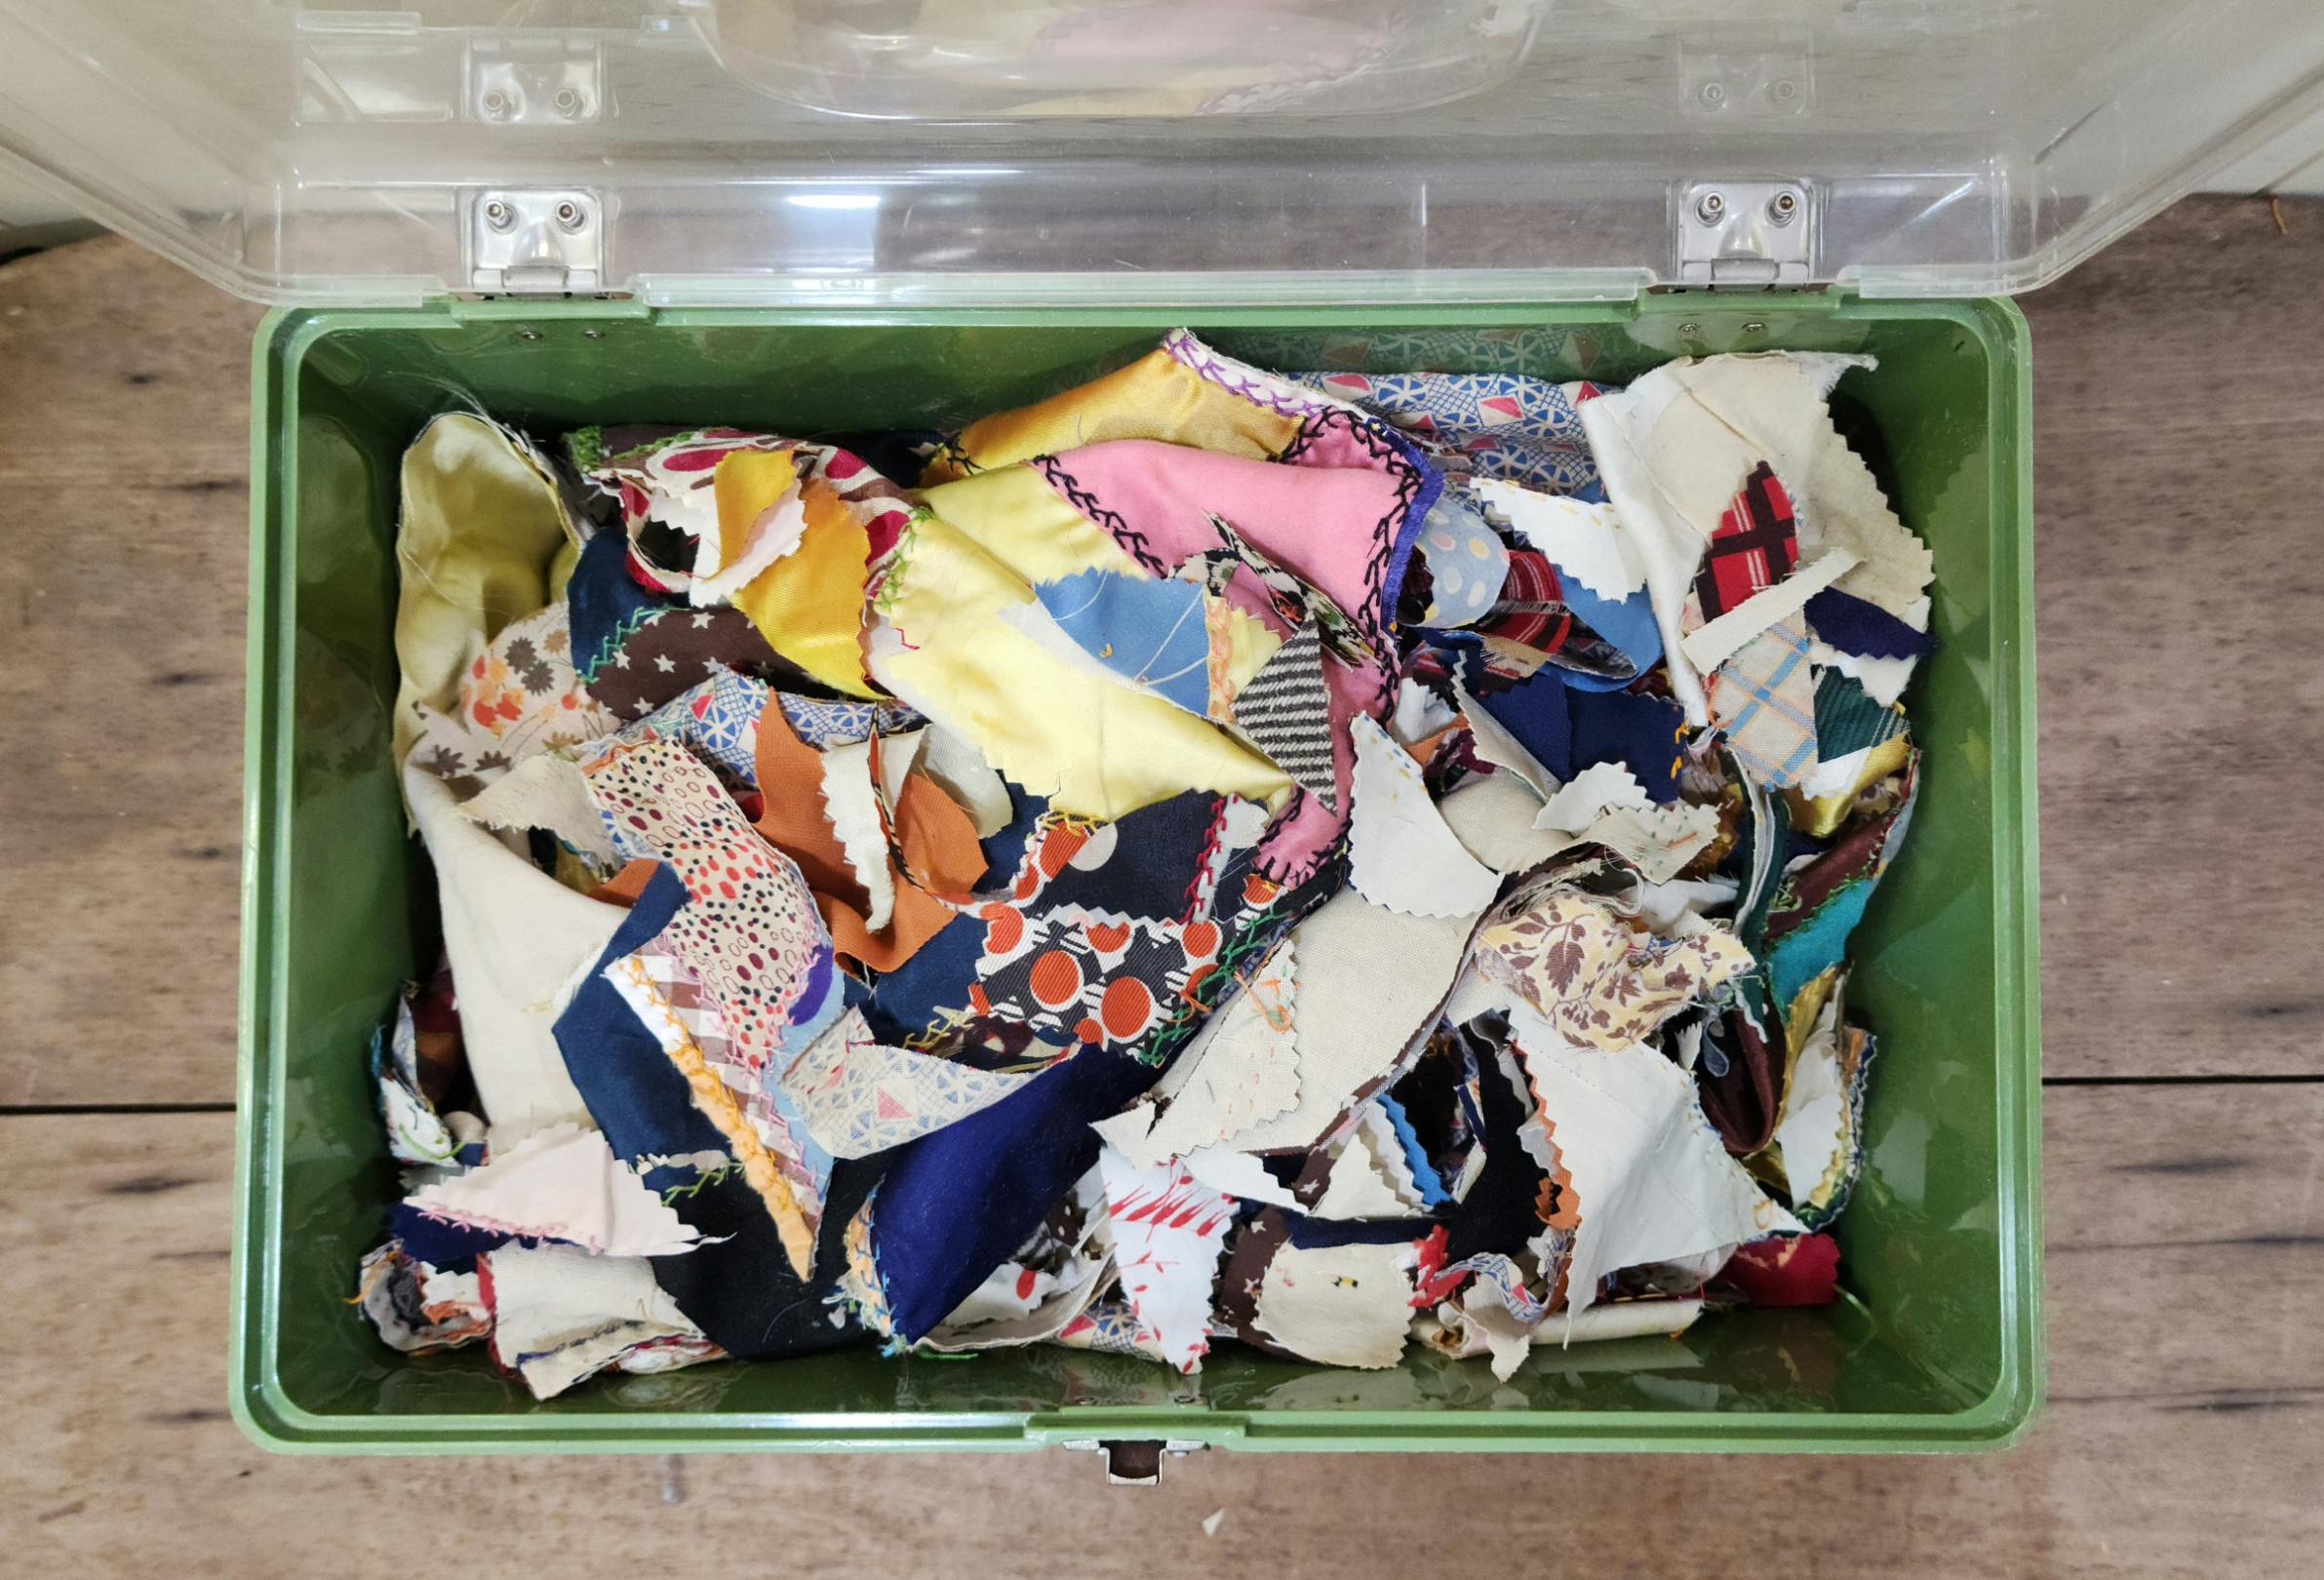
- Fabric Scraps (All my scraps are the stitching from a Neck Tie Cutter Quilt)
- Kraft Paper
- Scissiors (Pinking Shears, optional)
- Craft Bond Adhesive
- Mod-Podge
- Paint Brush
Before you start:
This craft has you permanently altering books by adhering fabric to the cover(s).
Notes:
The scissors you use is purely preference. I used pinking shears because the zig zag cut compliments the stitching and adds to the collaged and layered look.
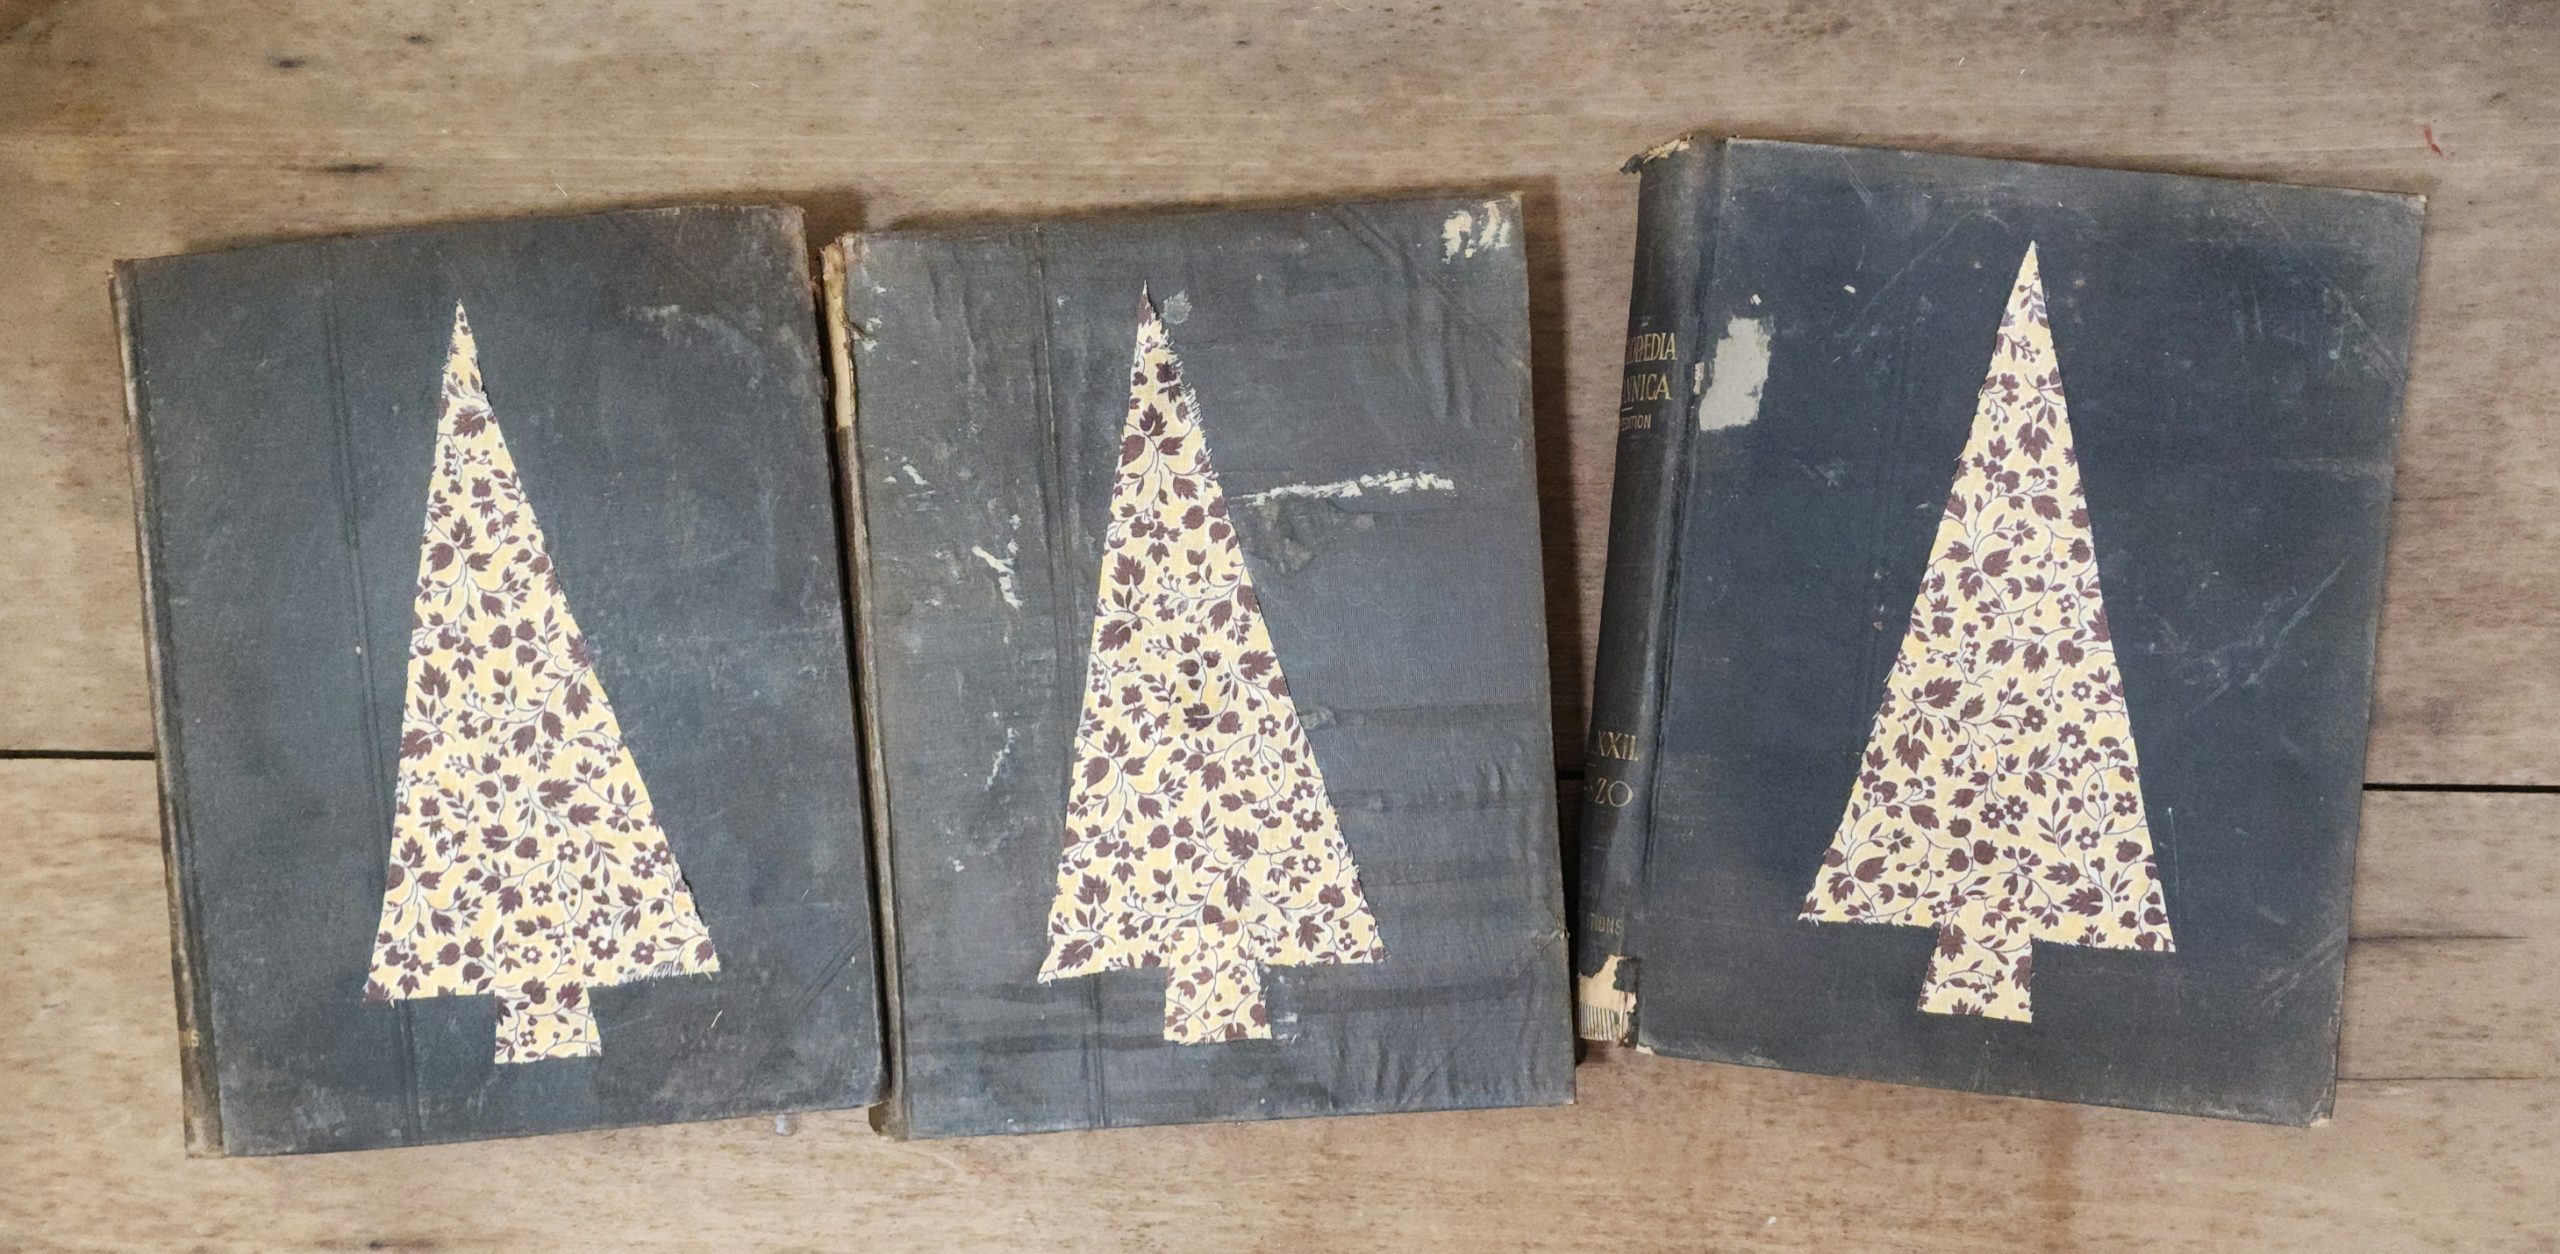
Step 1
On kraft paper, draw/trace then cut out the tree shape you want on your book cover. Spray a light coating of craft bond adhesive on the kraft paper tree shape and place it on a piece of fabric. Cut the tree shape out. This tree will be the guide and will be covered up eventually, so don’t use your favorite scraps yet.
Step 2
Spray a light coat of craft bond adhesive on the back of the fabric tree then place it on your book cover. Brush a thin layer of Mod-podge over the top of the fabric tree. (Tip: If you are making multiple book cover trees and want a cohesive look, repeat Steps 1 and 2 for each book before you move on to Step 3).
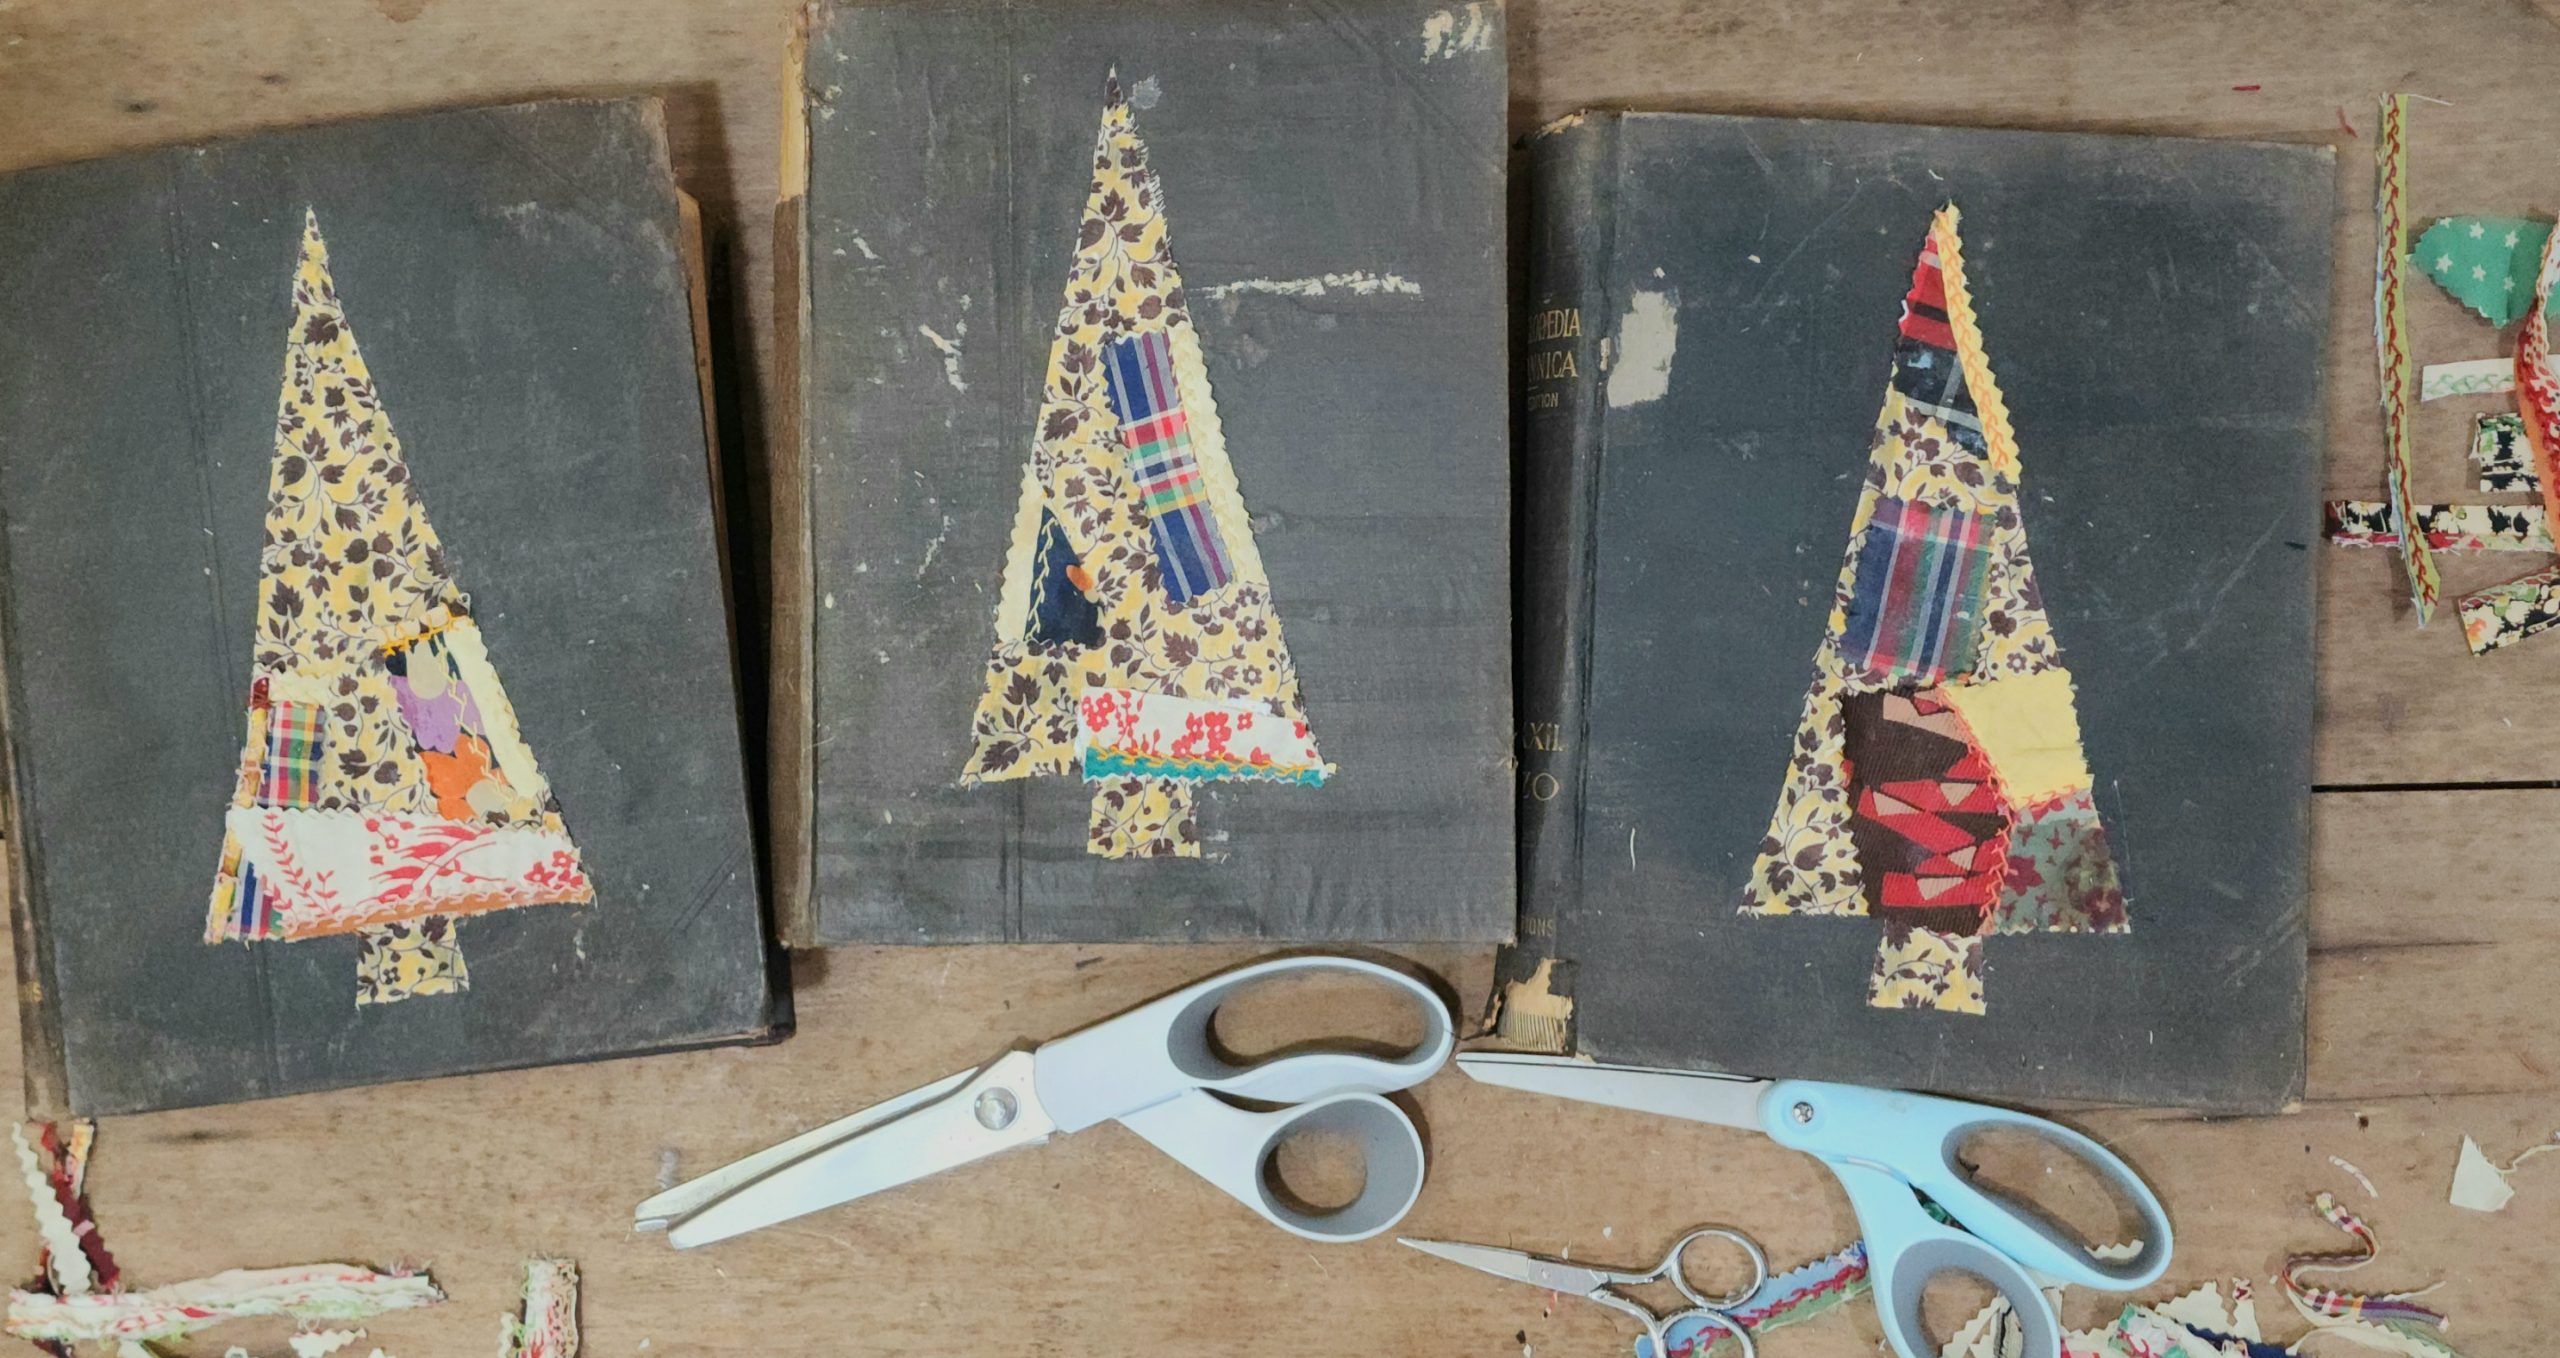
Step 3
Select some scraps and begin Mod-podging them over the fabric trees (not the tree bases) on the book cover. If you are making multiple trees, you will get a more unified look by working on all the trees at the same time. Layer and trim scraps as needed. Repeat until the tree is completely covered with scraps. You can always come back and add more.
Step 4
Consider your color scheme and find a complimentary scrap for the tree bases. If you are making multiple trees at once, use the same fabric for all the tree bases, this will further unify the group. Mod-podge your scraps to the tree bases on the book covers. (Tip: use a fabric you did not use in the tree itself. This will give a visual separation between the tree and the bases).
Step 5
Let the cover(s) dry for 1 hour.