Carrie Hansen
With the holidays approaching, now is the perfect time to get your Christmas decoration’s prepped for the upcoming
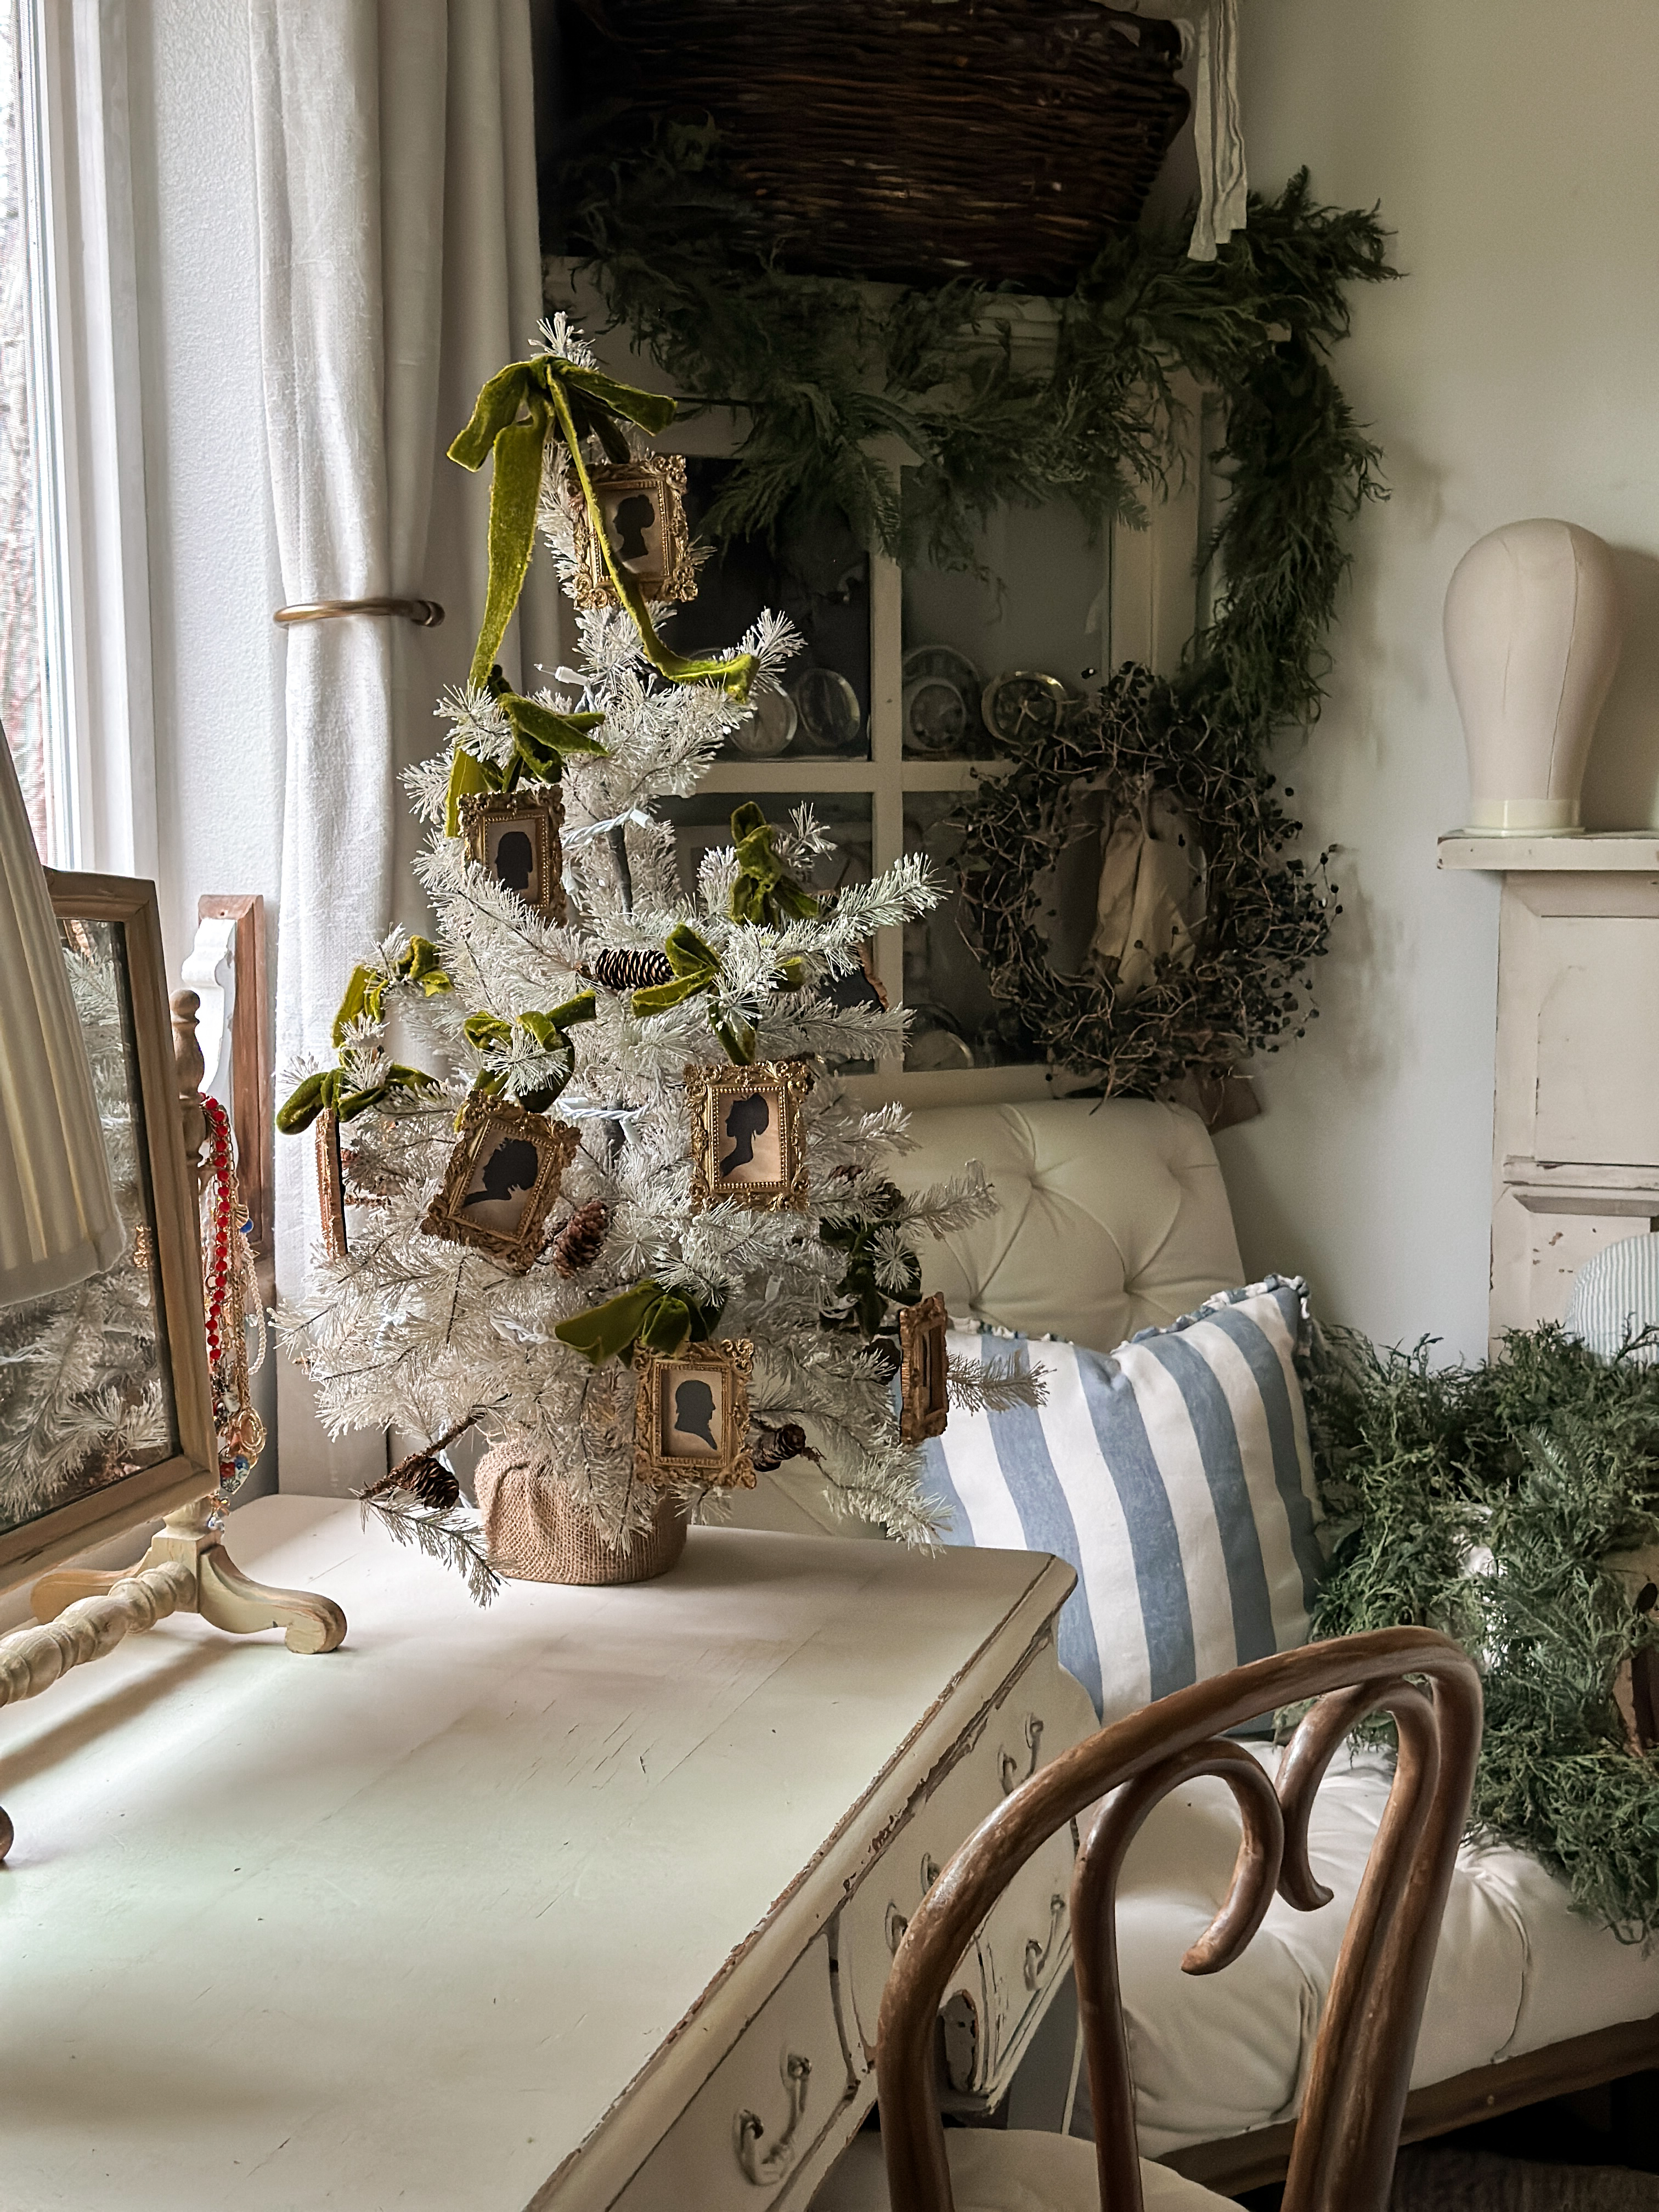
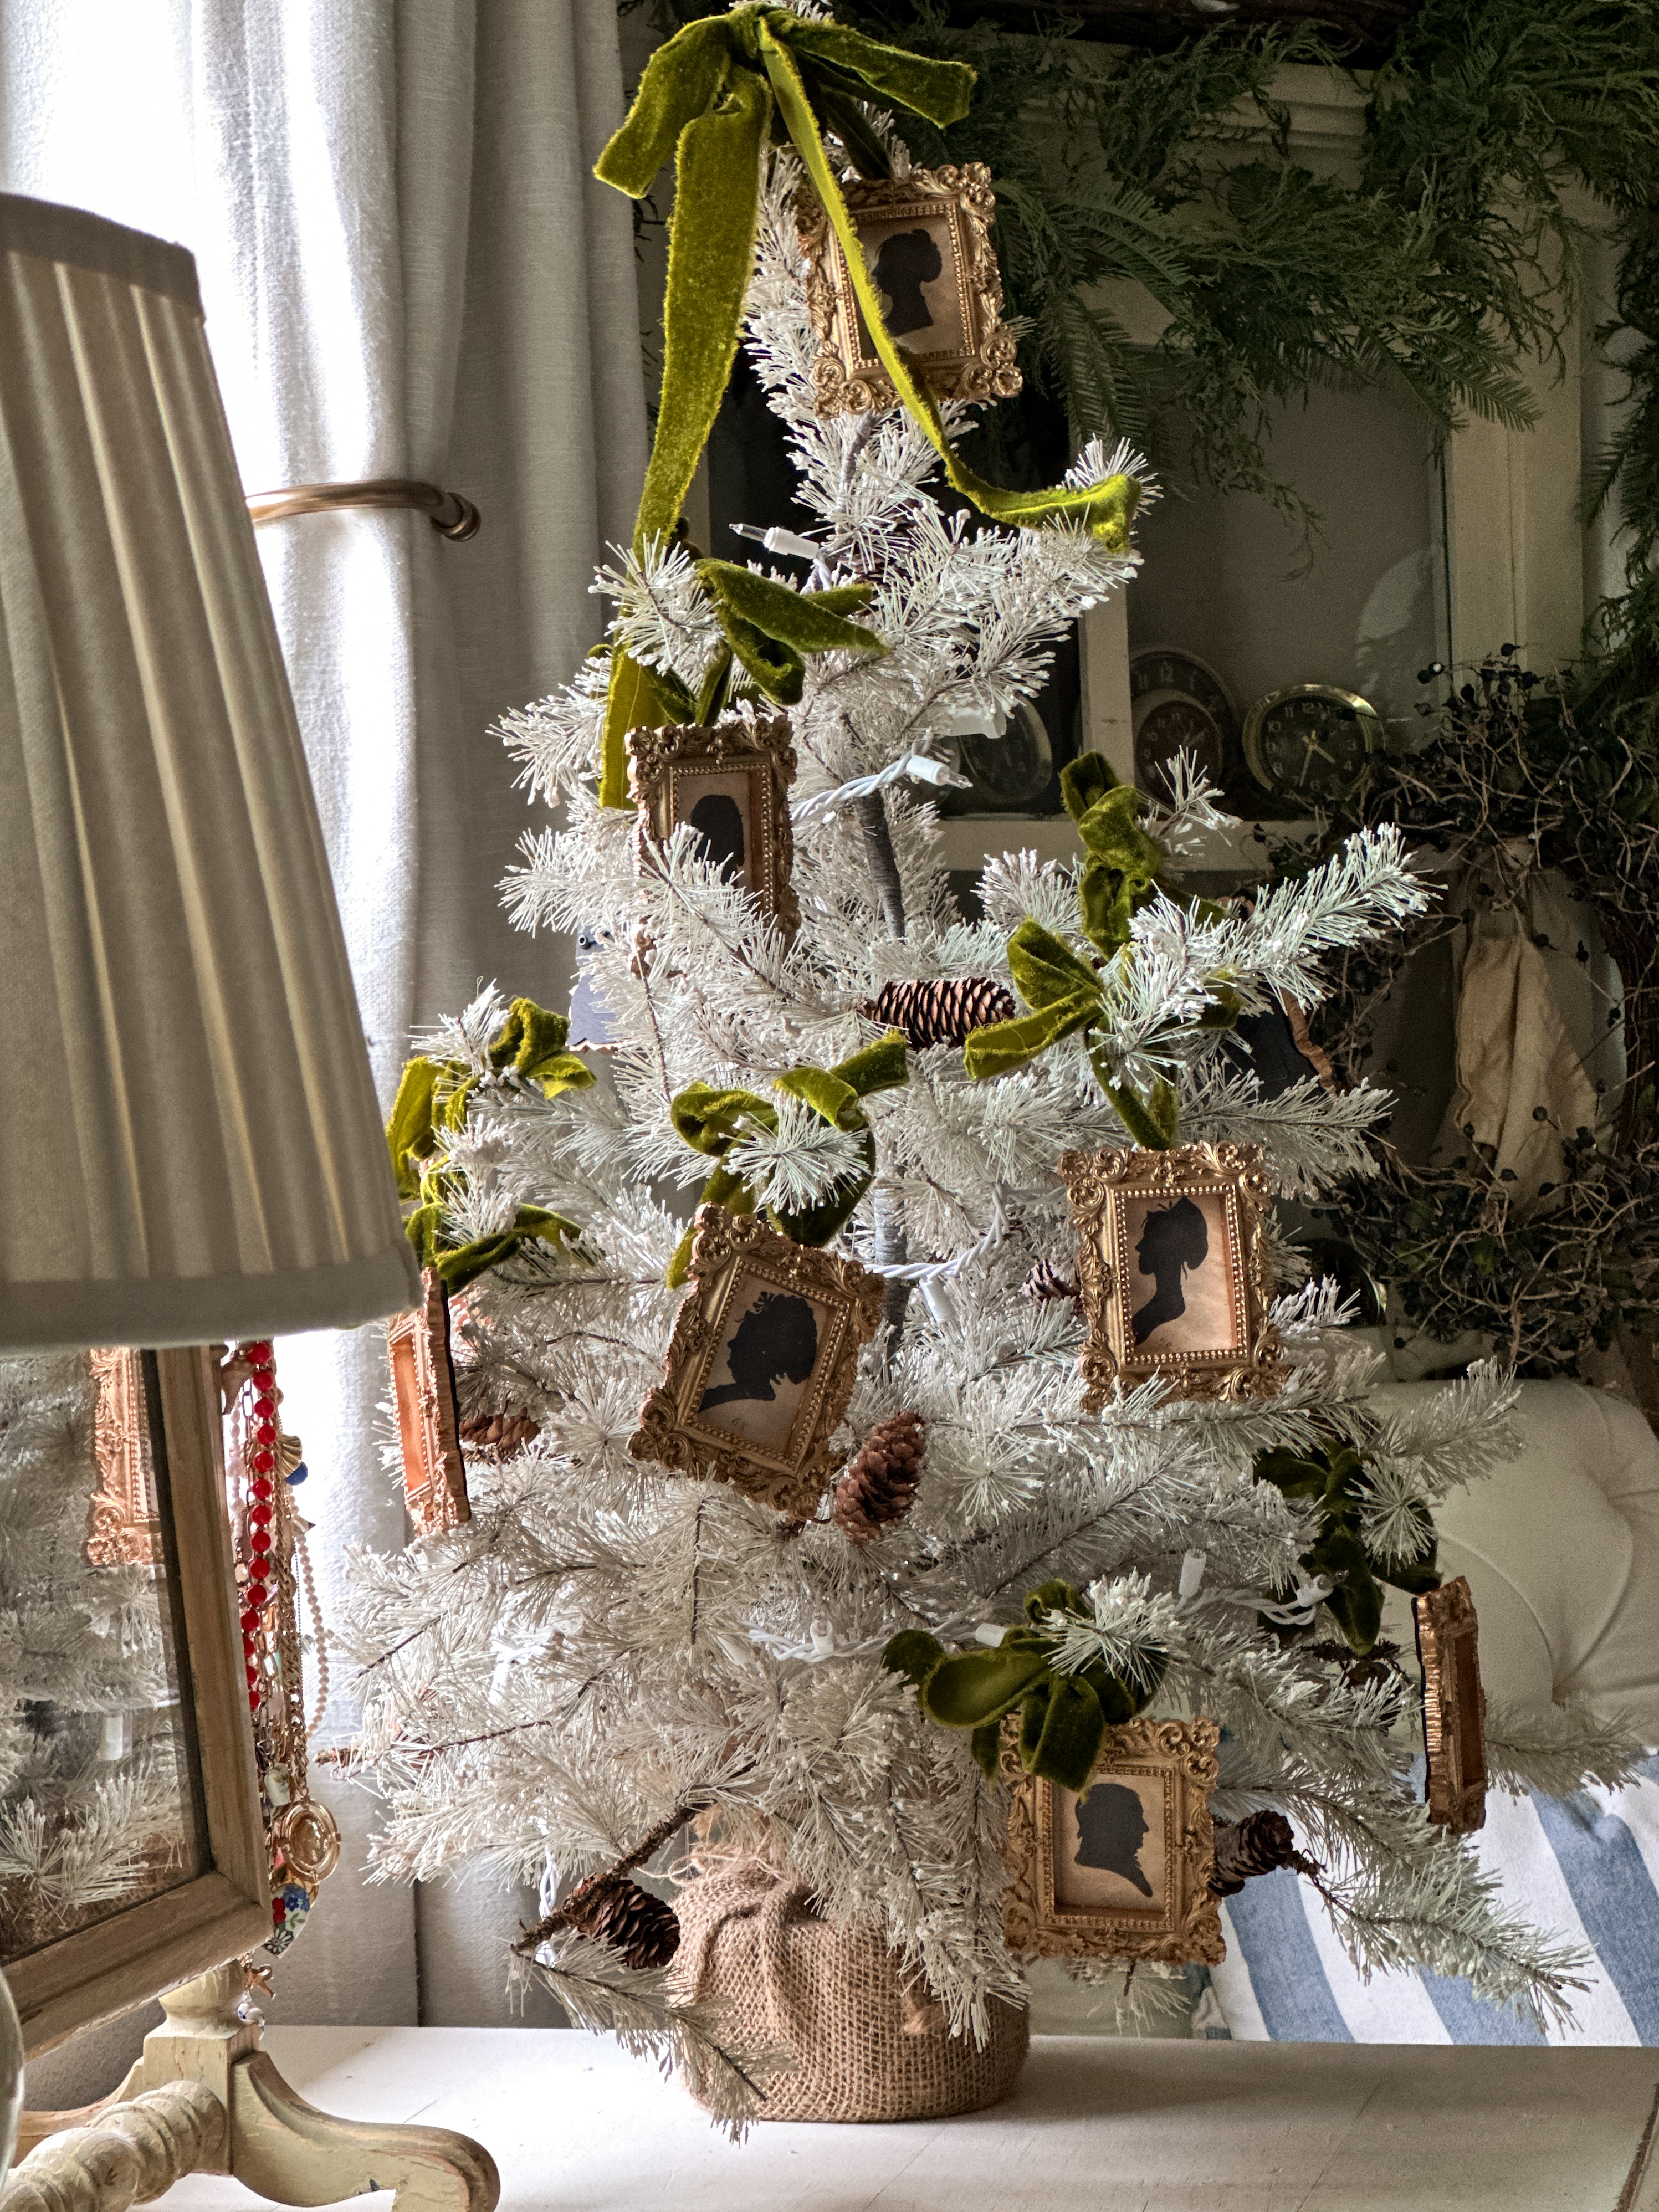
season! Every year, I love looking for creative ways to add as much vintage charm to our Alaskan rental as possible. This holiday season, I decided to diy these vintage silhouette ornaments for our Christmas tree. They’re so easy to make!
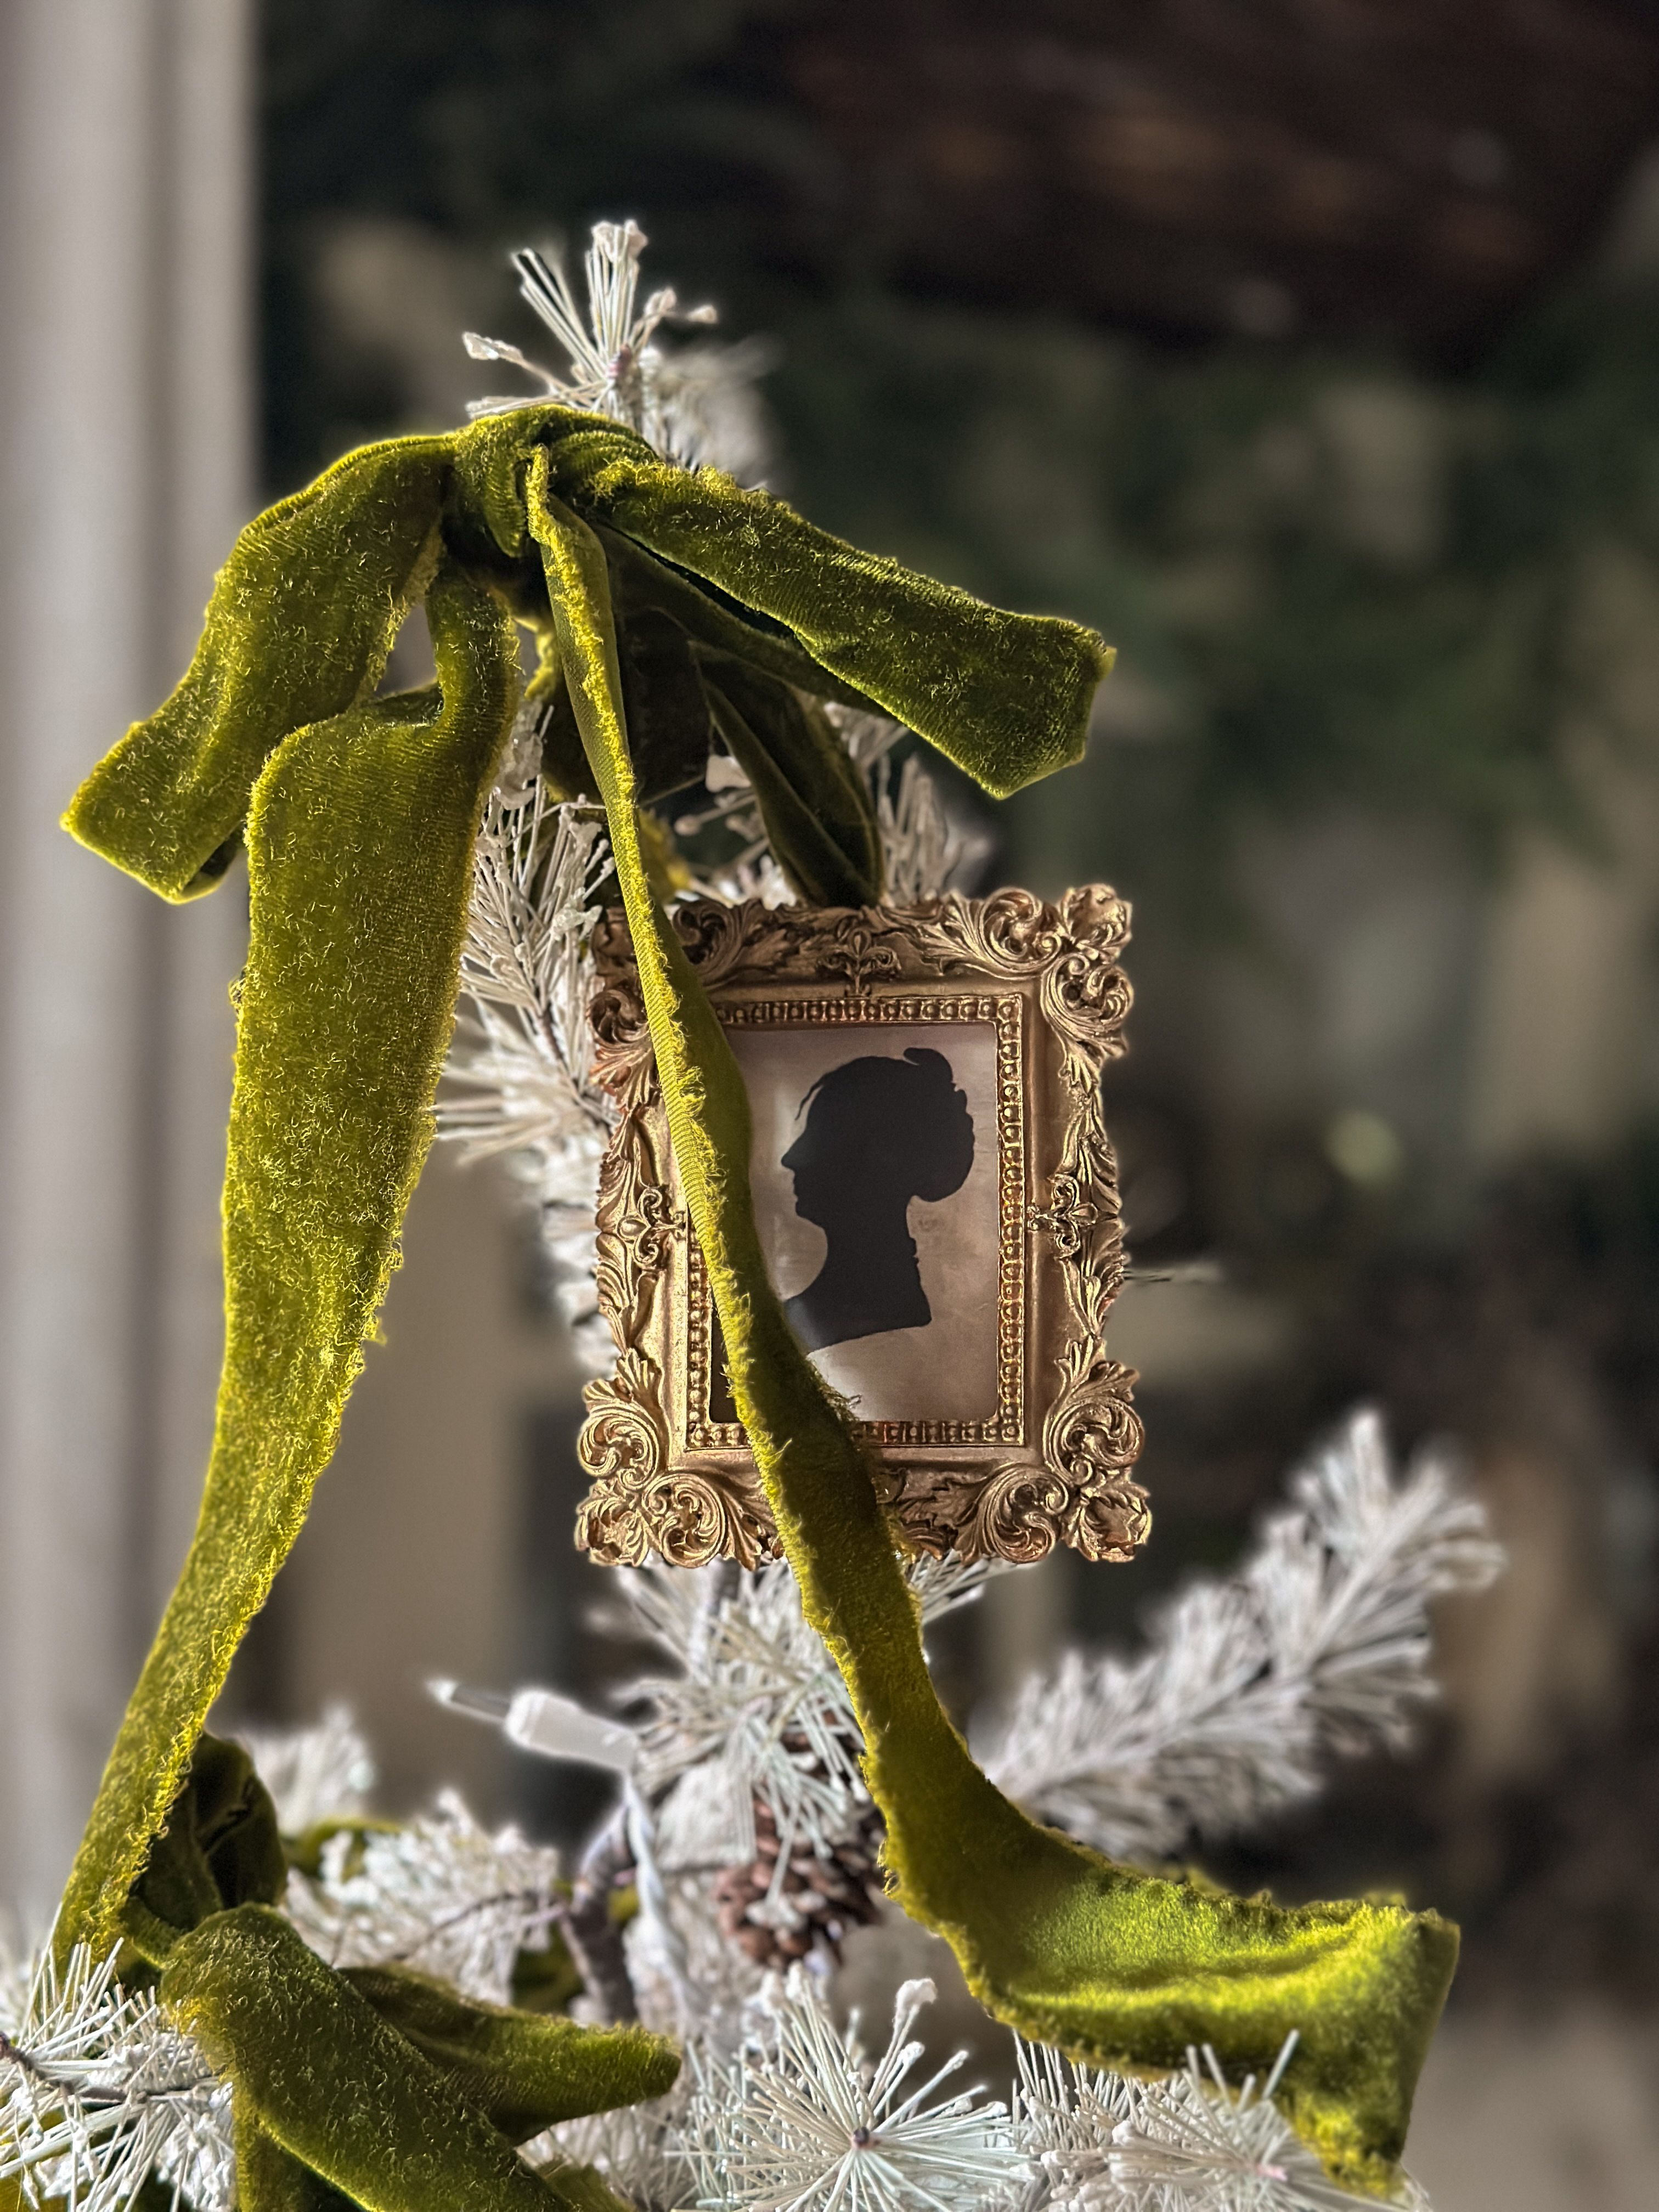
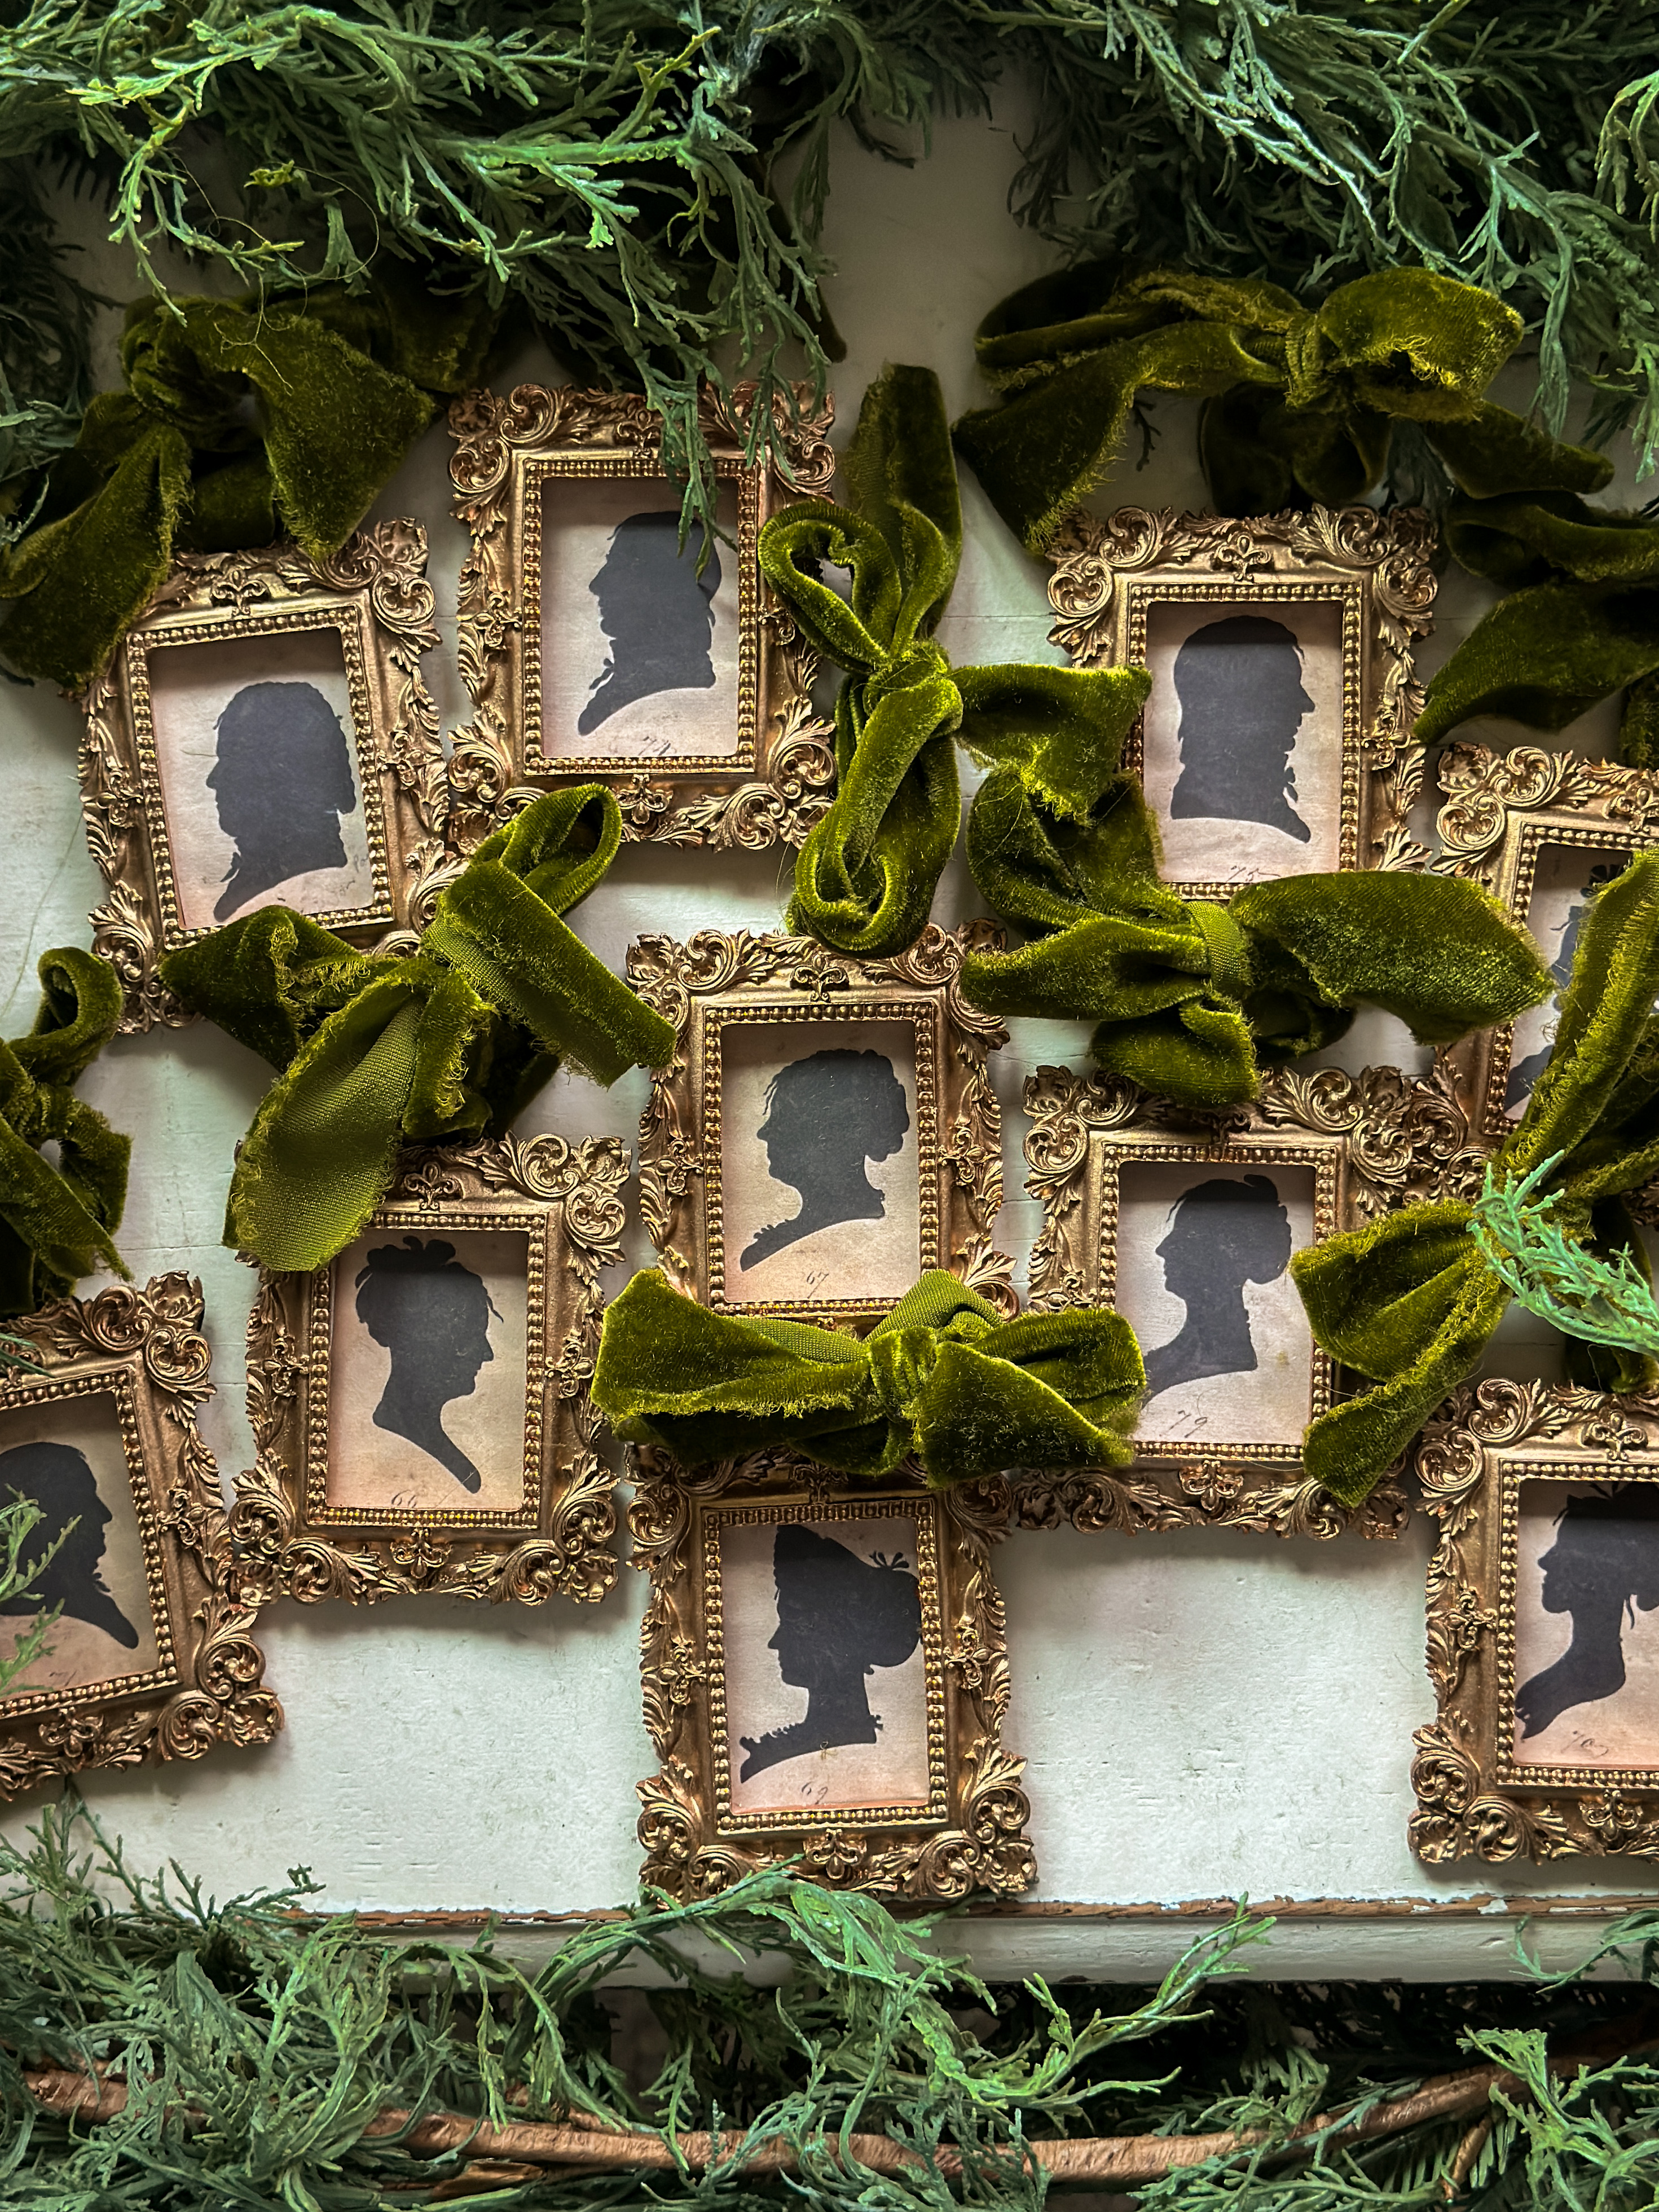
I first purchased all of my supplies off Amazon: 10 ornament frames, a book on silhouettes (I’m going to use the cover), some pretty ribbon, and some Rub ‘n Buff (I used the shade “European Gold”).
However, you could easily save yourself some money here if you were able to find some small frames or silhouettes thrifting, but, personally, I never have any luck finding either.
To begin, I applied a small amount of Rub ’n Buff on each frame to make them appear more aged and give them a more antiqued look. Nobody needs to know they’re from Amazon, right? To do this, I used a paint brush to Rub ’n Buff these but a paper towel would have worked well also. A little goes a long way. I applied a little at a time and let it dry in between layers until I was able to reach whatever look I desired (I only needed one layer here.) Once I finished, I laid all of my ornament frames out to dry and continued on to the next step.
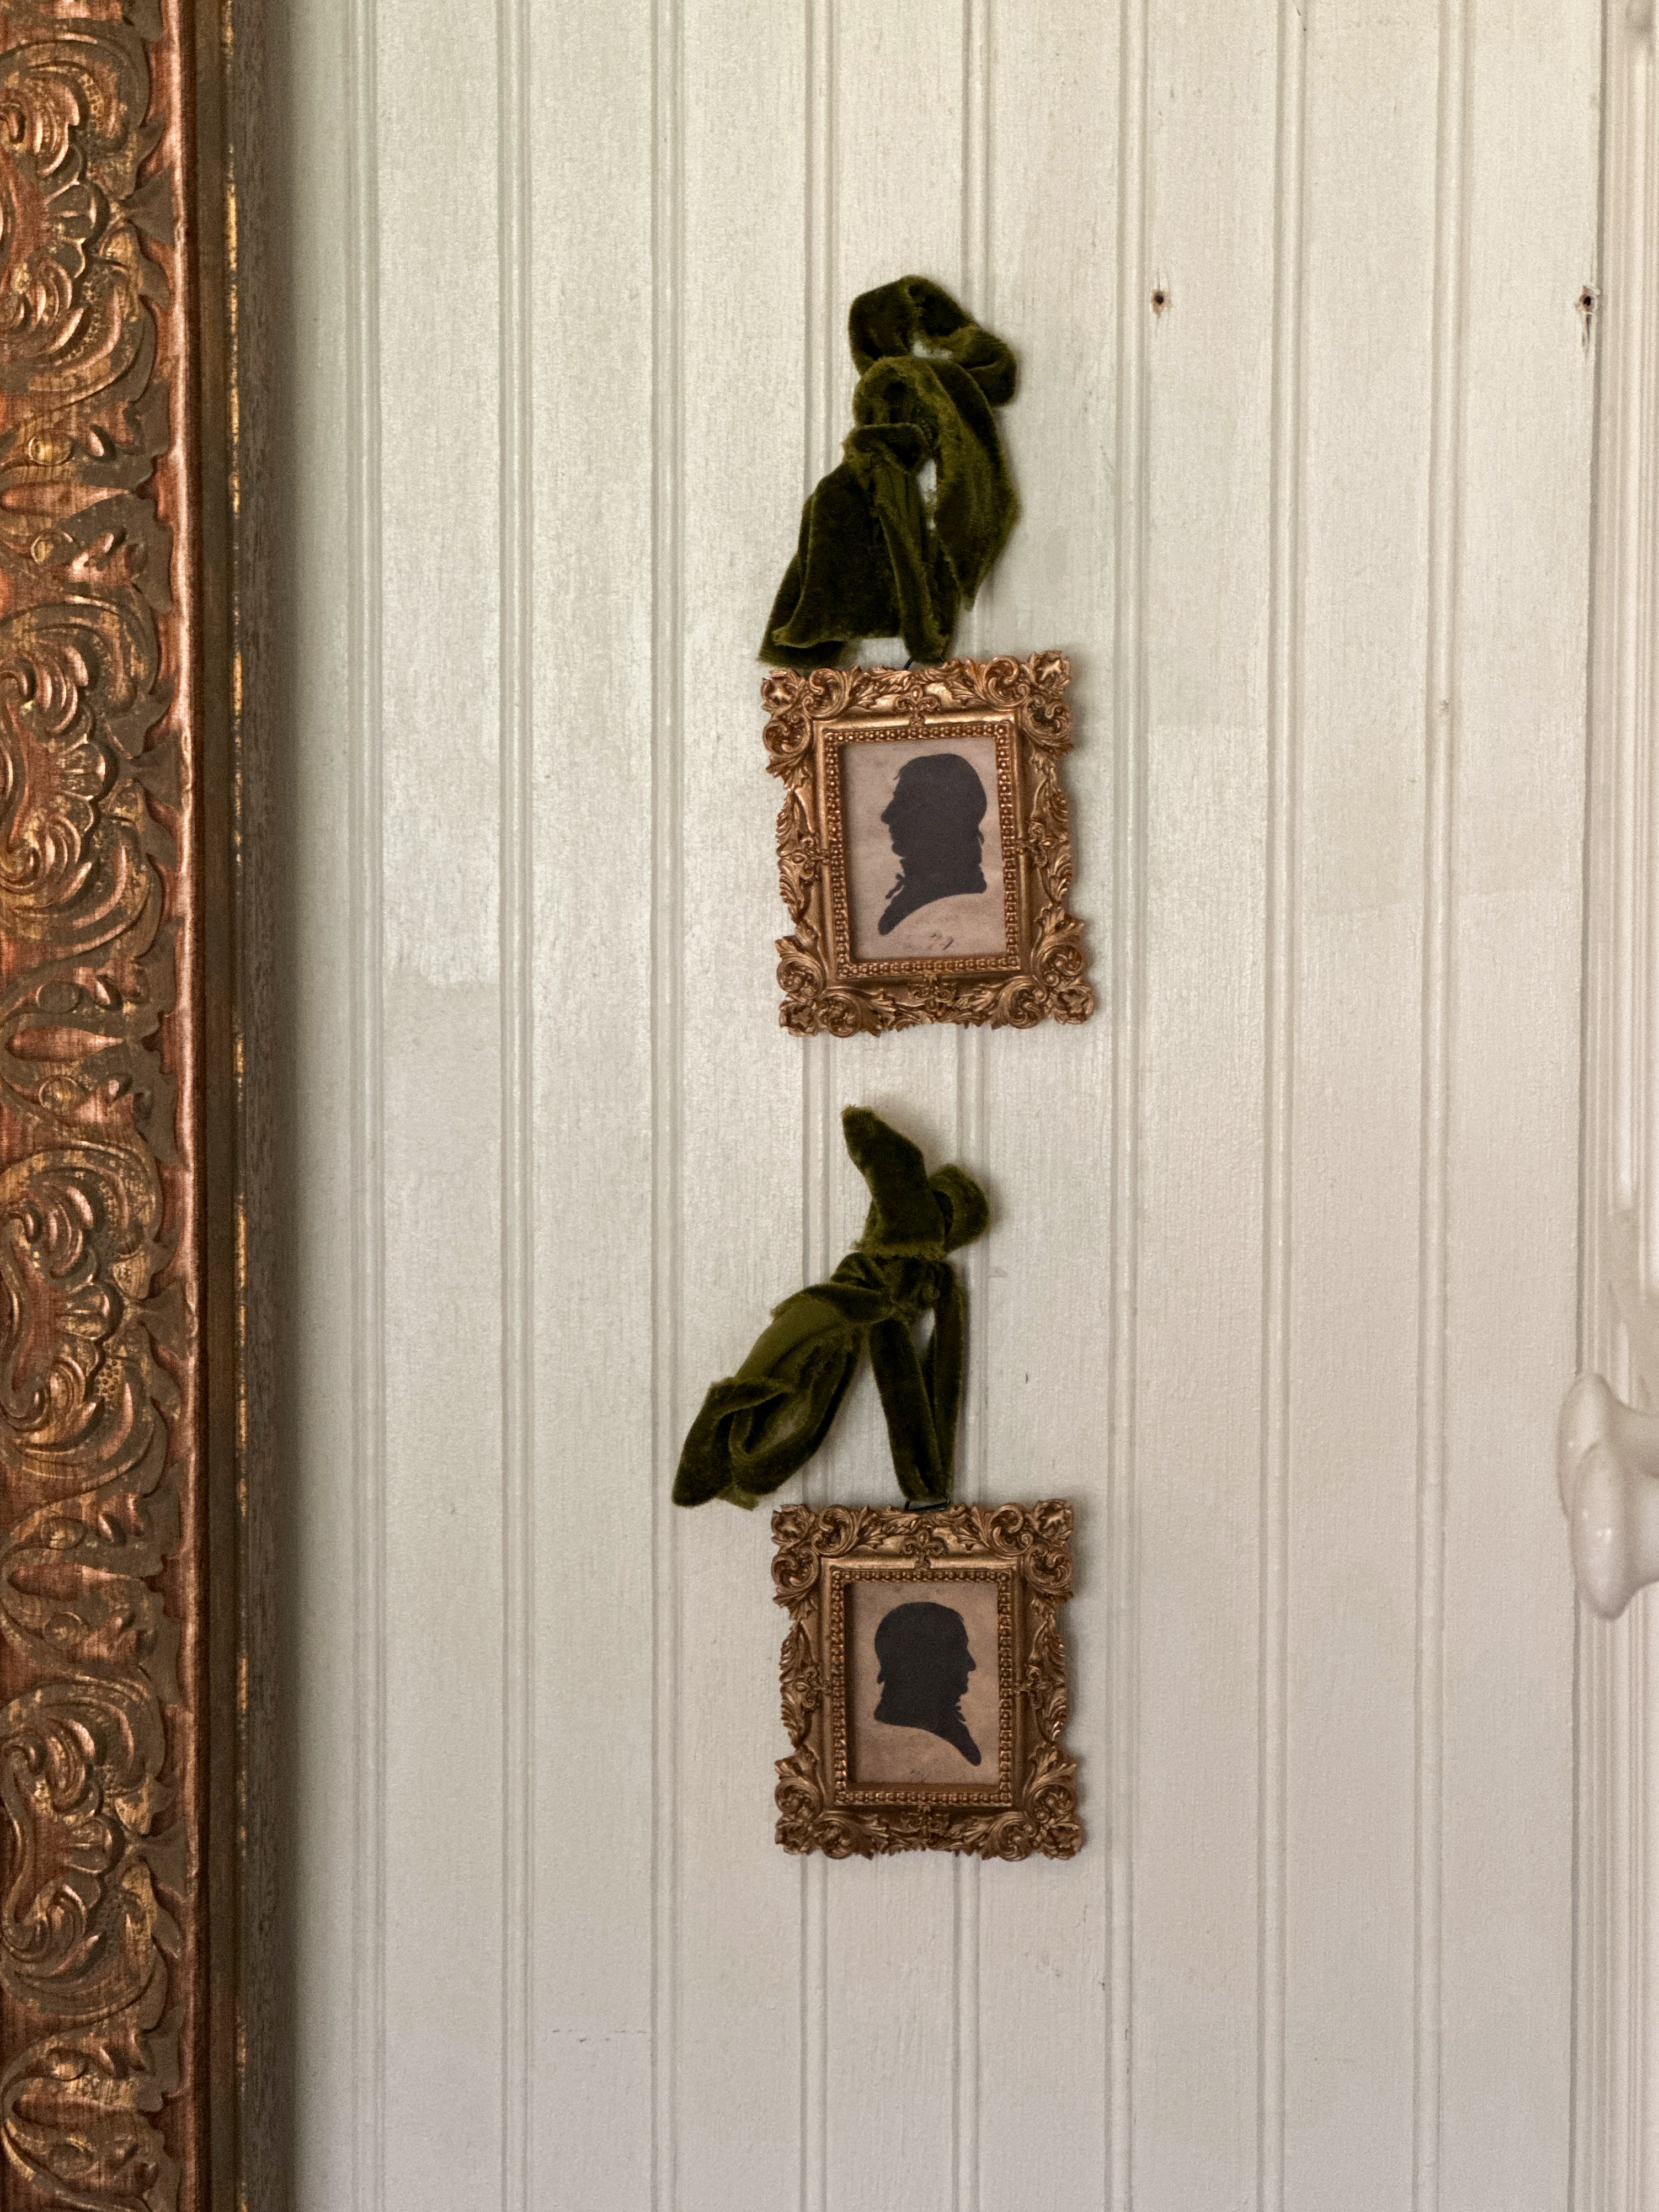
Next, I took the book sleeve off this book of silhouettes and measured out the size of my ornament frames to determine where to cut the page. As soon as I found the proper measurement, I began cutting out each silhouette to fit the space inside the ornament frames. Once I had all of my silhouettes cut out and ready to go, I checked to make sure my frames had fully dried before placing each one carefully inside and securing them closed.
At last, all that was left to do was carefully run one side of my uncut ribbon through the hanger on the back of the frame. I personally won ’t cut my ribbon until I can gauge exactly how much I need to tie a bow at the top. Once I feel I have enough ribbon to secure the ornament frame nicely to a branch on our Christmas tree, I will cut it and tie the ribbon into a bow for hanging. I prefer my bows to look effortless and a little messy, but you can play until you like it.
All that’s left to do is to turn them around and admire your beautiful work! I love an easy diy that is both timeless and useful! The best part is, these don ’t have to be specifically for Christmas. They are going to make incredibly beautiful ornaments for your Christmas tree, that’s true, but also, when the holiday season is over, you can hang them on your wall! You can even change out the ribbon for each season if you so desire. Just have fun with it! And the fact that they’re not real silhouettes can just be our little secret!