Candese Drexler
Use one beautiful vintage find as the starting point for a warm, layered table that feels gathered over time.
By Candese Drexler | Crafted Hive Culture
My love for antiques began long before I knew the language of collecting. In my family, old pieces were never simply objects. They carried memories, connected one generation to the next, and made a home feel personal. I am fortunate to own pieces that belonged to my grandmother and even my great great grandmother. Their age and imperfections do not make them less valuable to me; they are the very reason I treasure them.
That love of searching for something special continues with my mother. We spend time together at antique shops, flea markets, and estate sales, never knowing what we may find. The brown transferware used on this table came from an estate sale auction my mother won, making the collection feel like another chapter in a tradition we have shared for years.
For this tablescape, I wanted those secondhand pieces to remain the focus. I layered the transferware with neutral dishes, woven textures, warm wood, aged brass, and a few quiet seasonal details. The steps below can be followed with any meaningful collection. The goal is not to reproduce my table exactly, but to create a setting that tells your own story through the pieces you have inherited or gathered over time.
What You Will Need
- Brown transferware plates, bowls, teacups, or saucers (mixed patterns are welcome)
- Neutral dinner plates or chargers to create a calm base
- Woven placemats or chargers
- A vintage textile, table runner, or length of patterned fabric
- Olive-green cloth napkins with simple brass or gold-toned napkin rings
- Vintage or vintage-inspired goblets and simple flatware
- Pears, walnuts, leaves, or another restrained harvest accent
- A brown transferware tureen or another lidded vintage serving piece
- A low wooden breadboard or other timeworn wooden base
- A pair of brass or gold-toned candlesticks with taper candles
- Optional: a neutral linen, pears, walnuts, or foraged branches
Before You Begin
Shop your home first. Pull together anything that shares the same warm palette: brown pottery, cream ironstone, woven pieces, amber glass, plaid fabric, aged brass, and small seasonal finds. You may not use everything. Seeing the pieces together will help you choose what supports the transferware without competing with it.
Step 1: Choose the Piece That Tells the Story
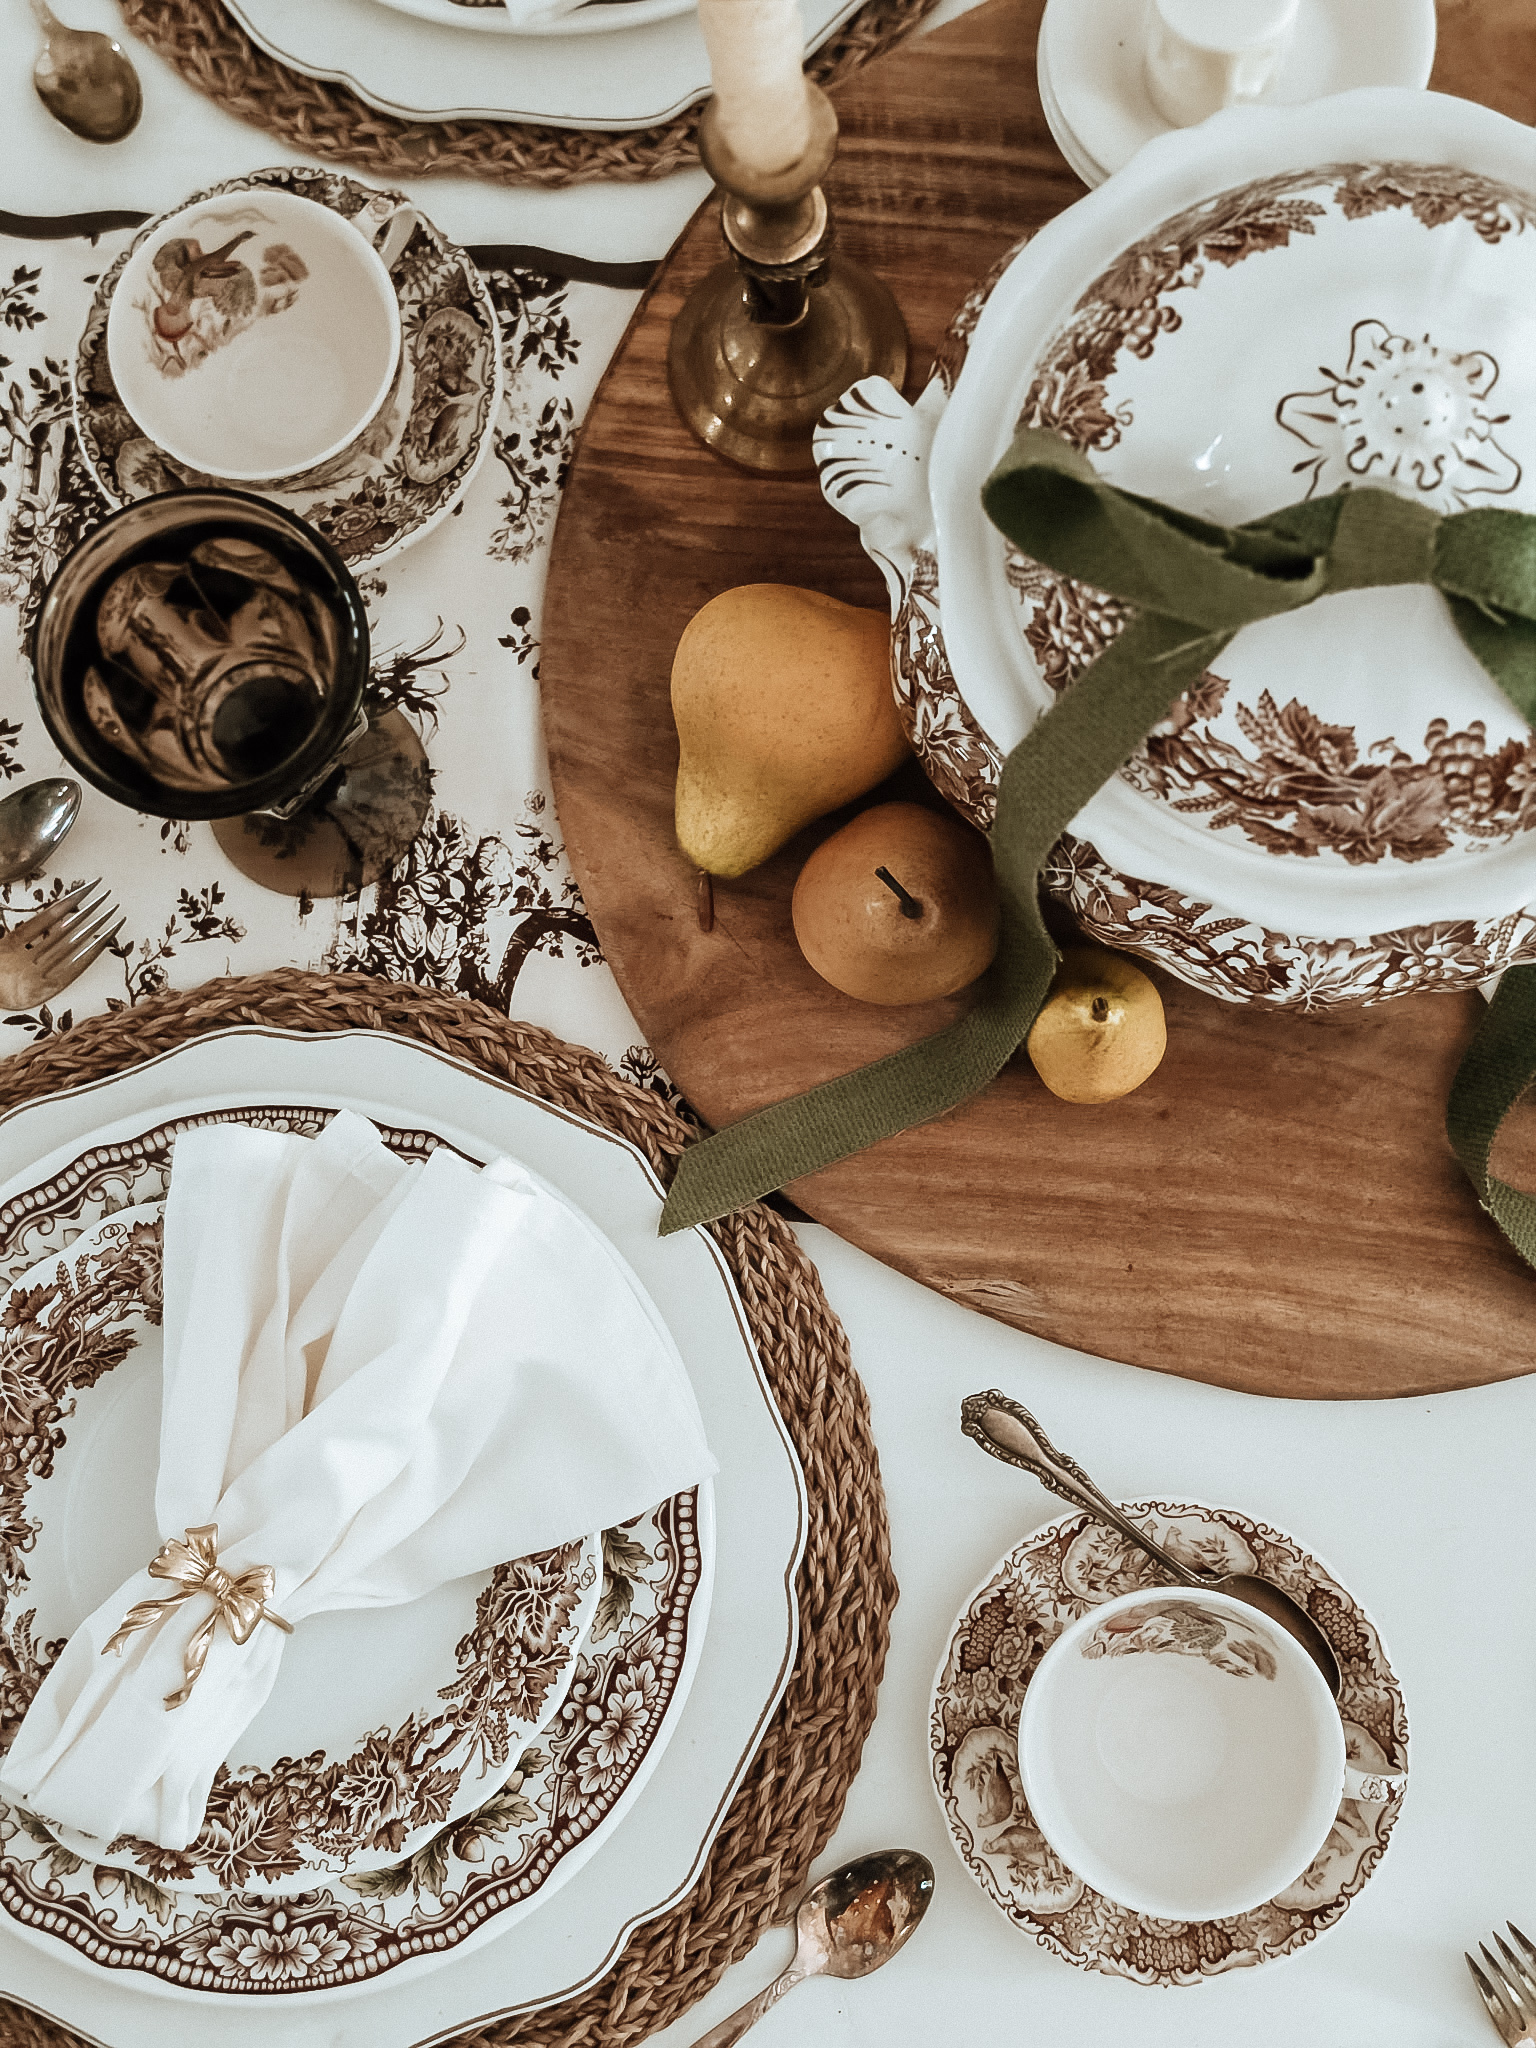
Begin with the vintage item you want guests to notice first. In this setting, the brown transferware is the hero. Its color establishes the palette, while the individual scenes and borders add the collected character. If your pieces come from different makers or patterns, do not hide those differences. Let the shared color family connect them.
Step 2: Create a Quiet Foundation
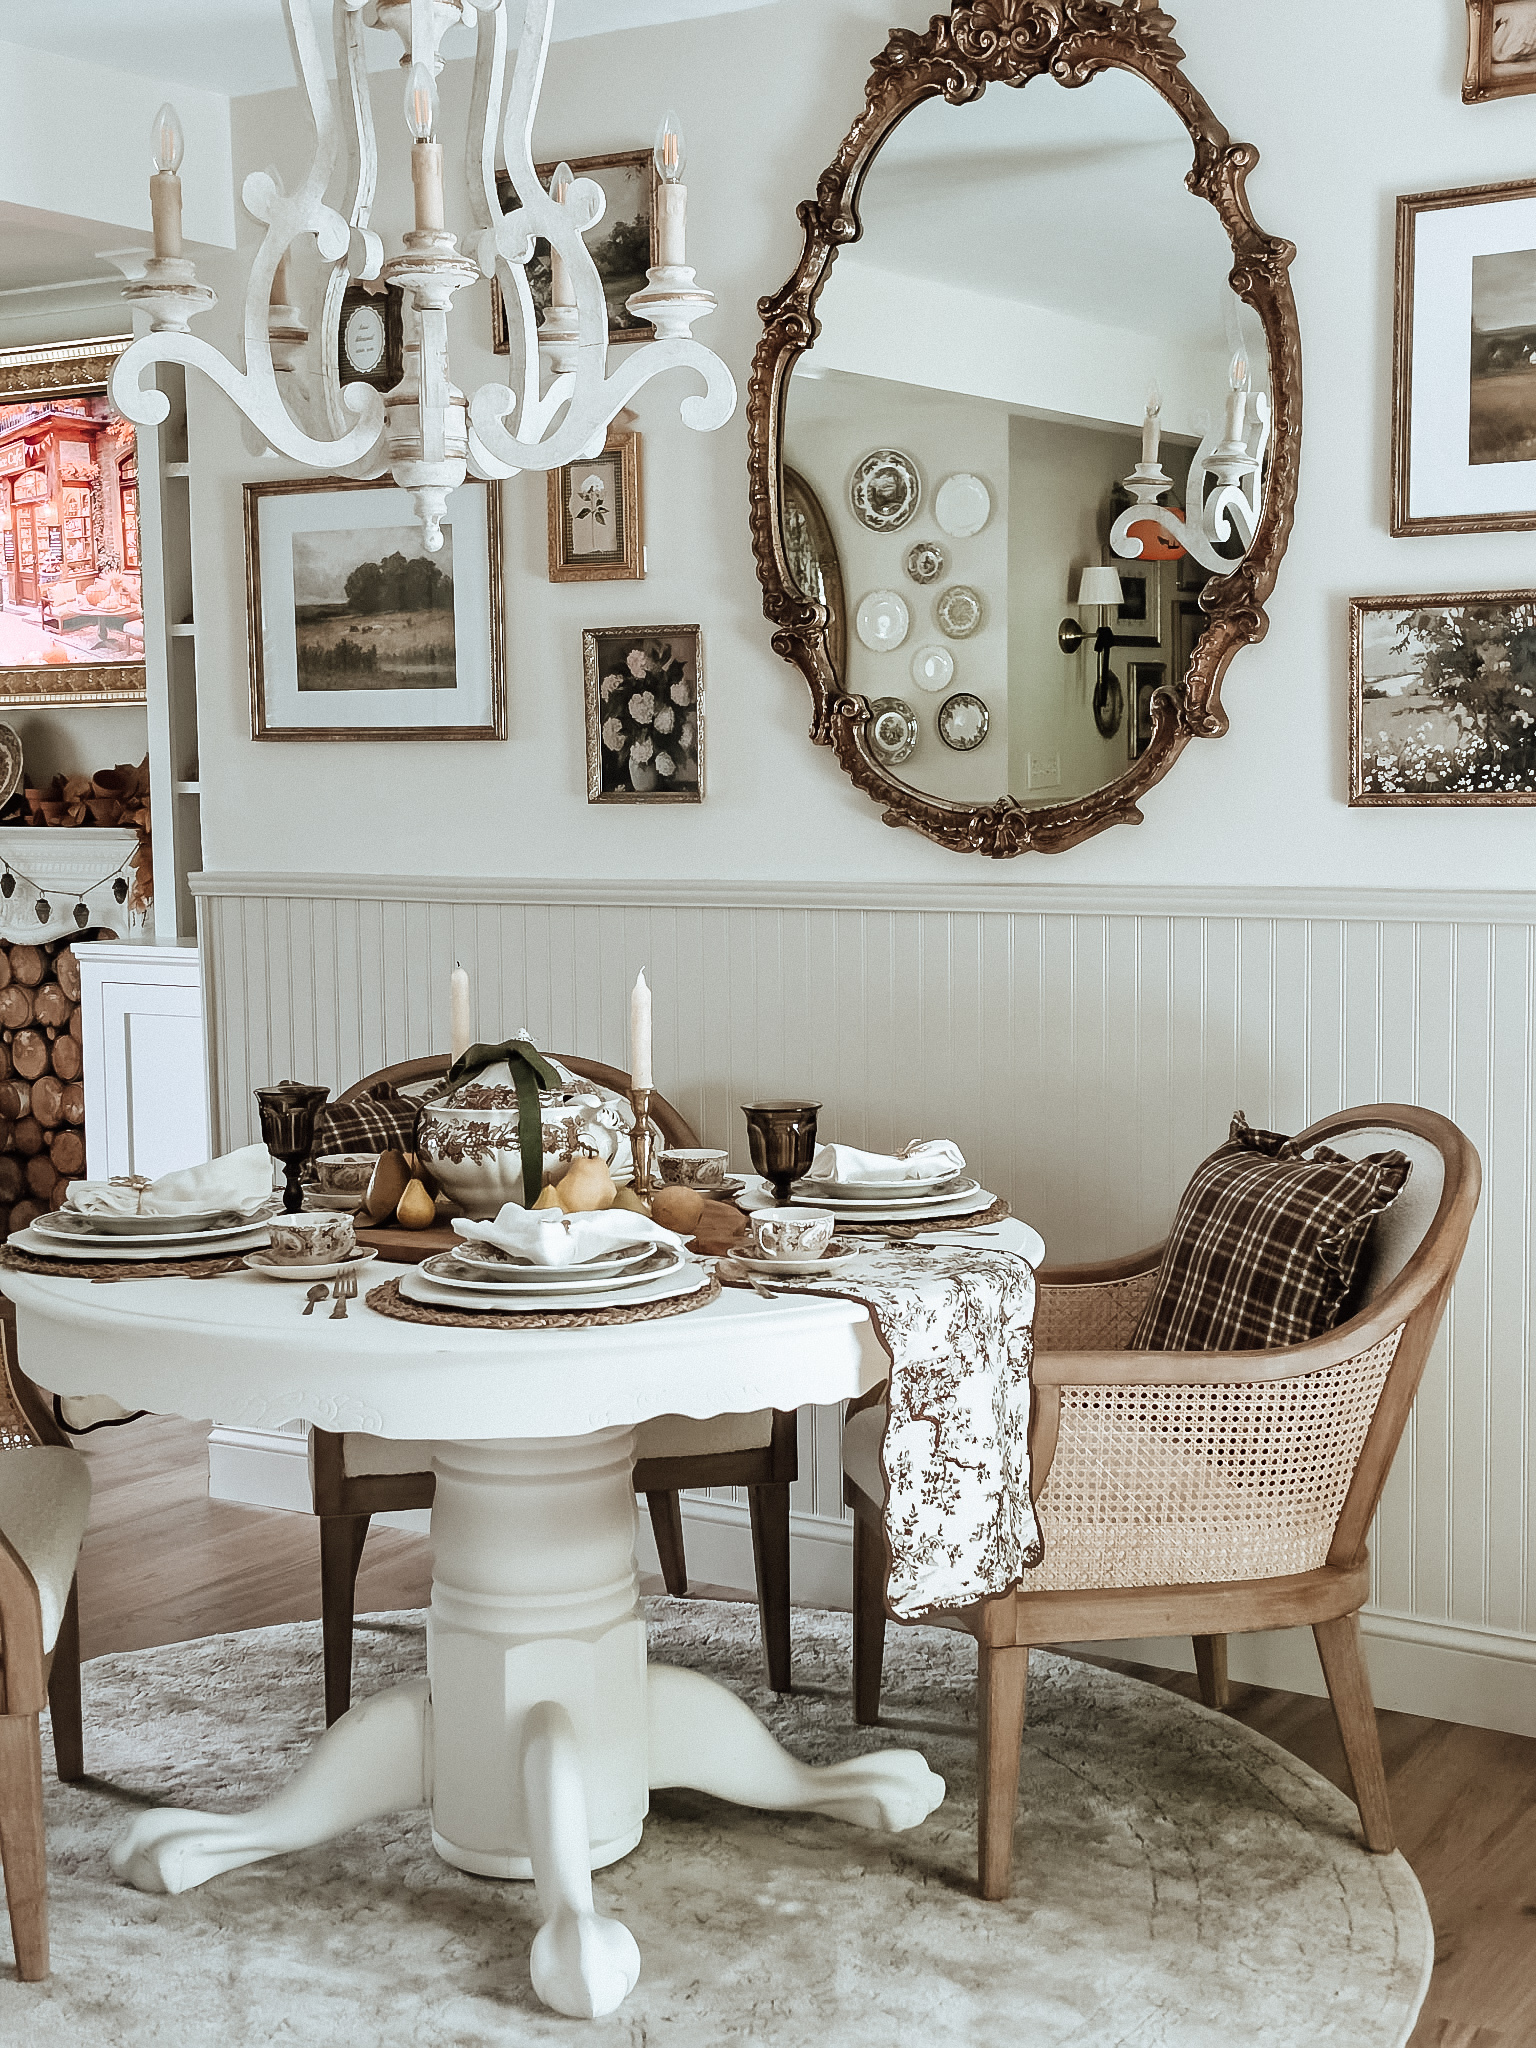
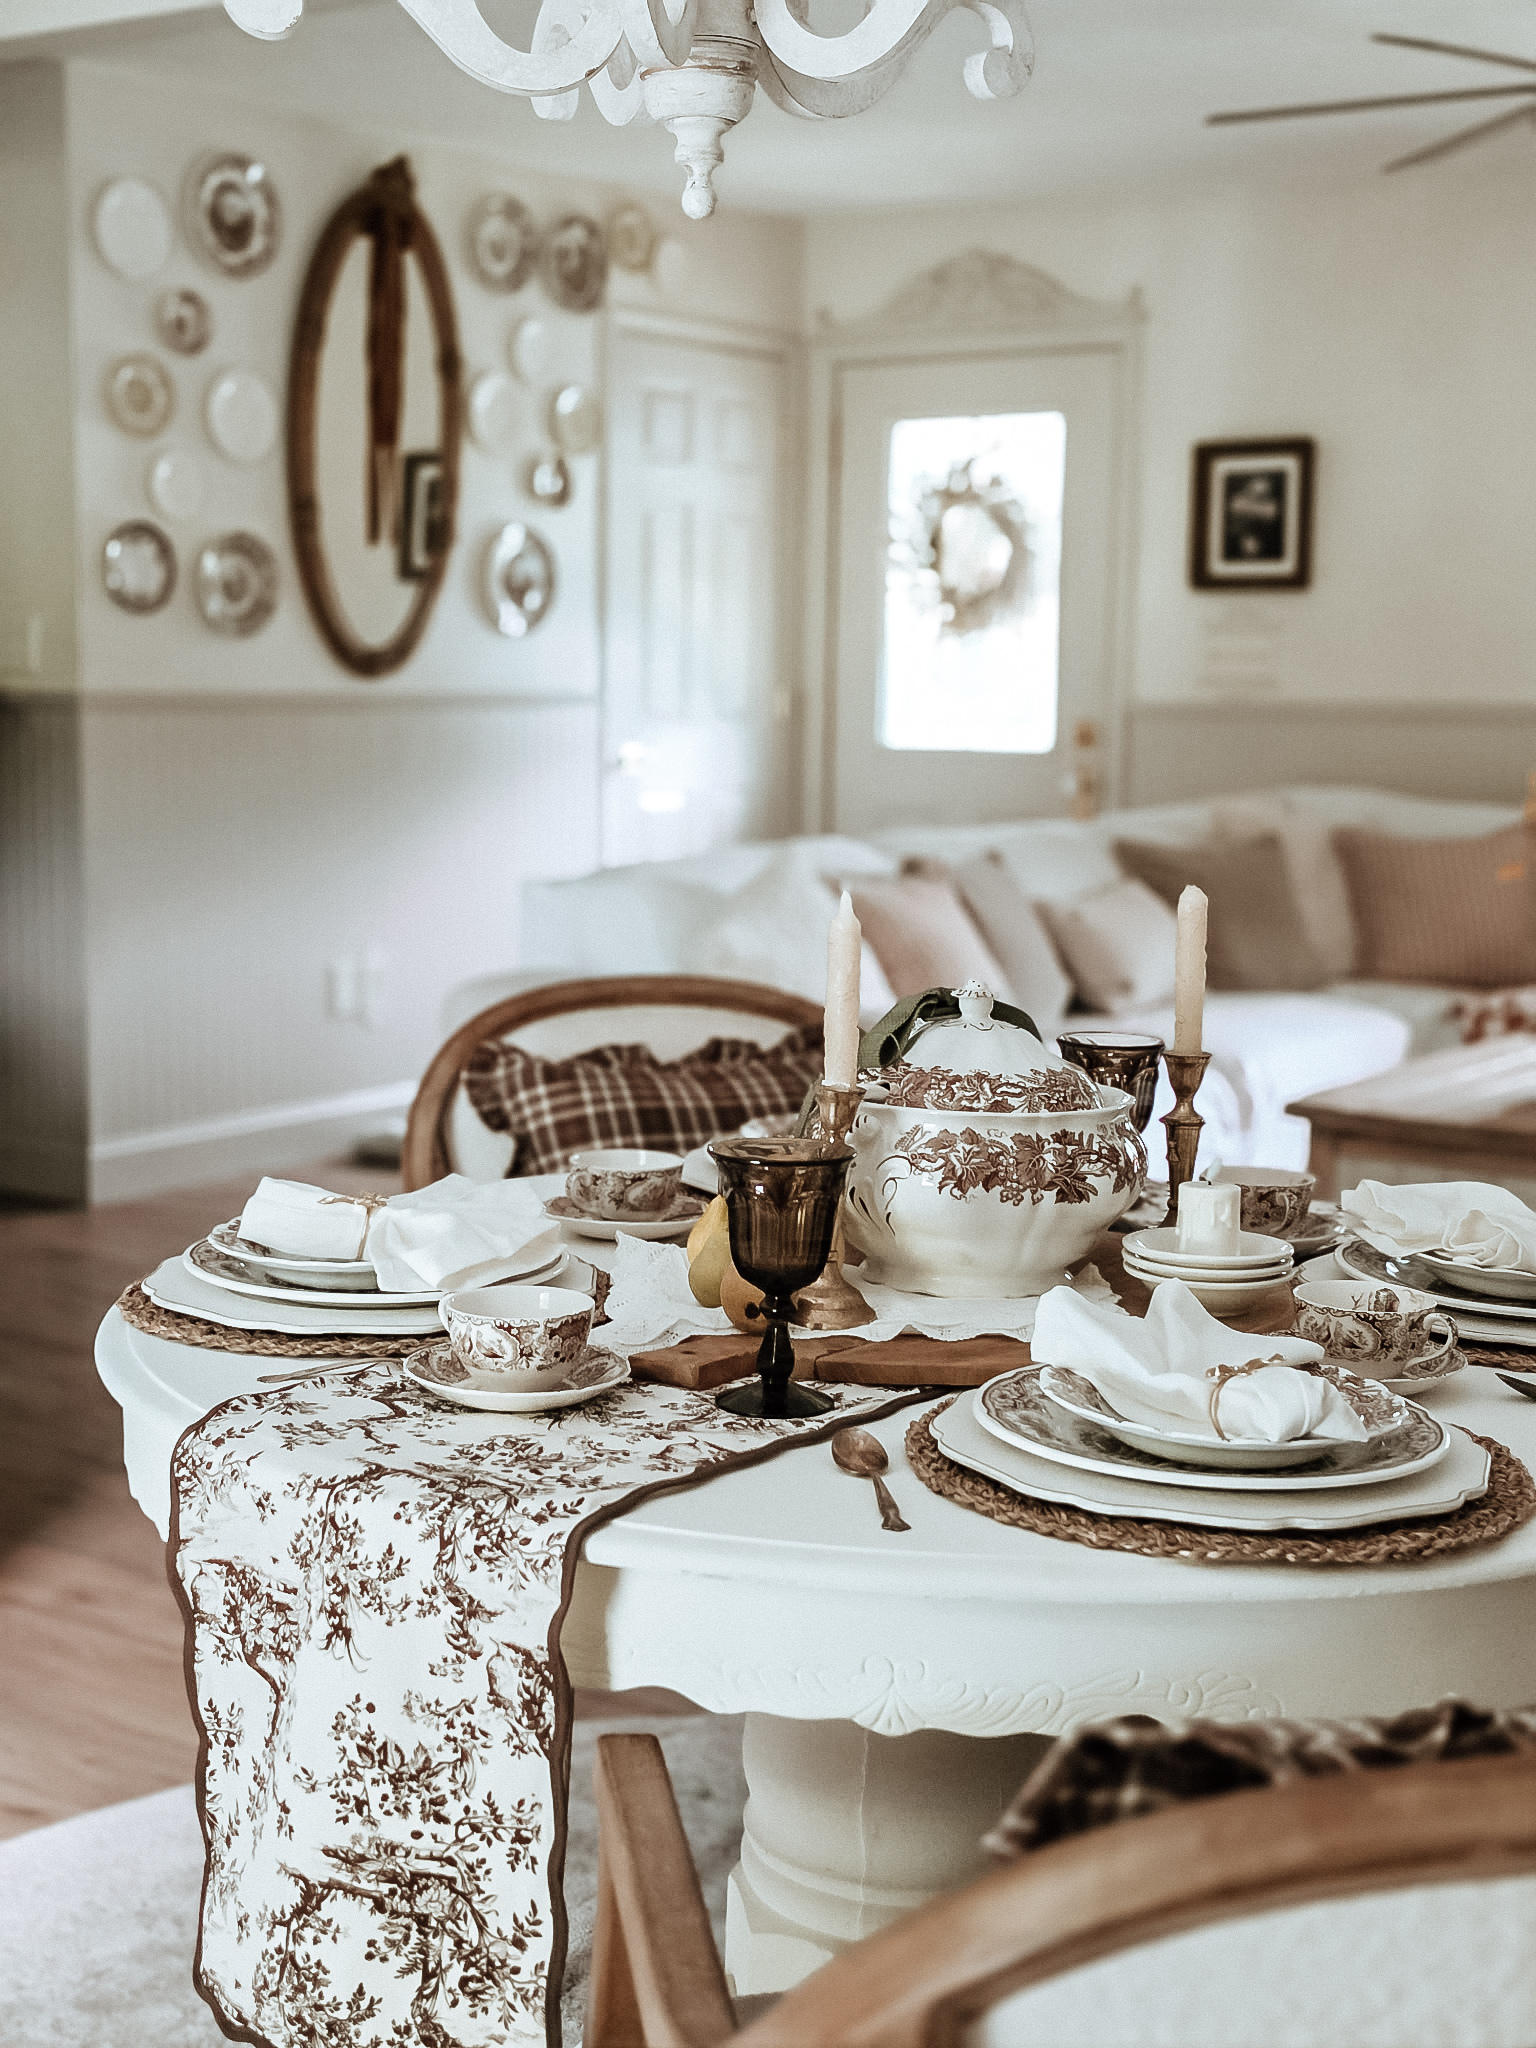
A simple background gives patterned dishes room to shine. I kept the white tabletop visible and began each setting with a round woven charger. The natural fiber adds warmth and texture, while a neutral base plate creates breathing room between the charger and the transferware. A narrow vintage textile or runner through the center adds another layer without covering the entire table.
Step 3: Layer Each Place Setting
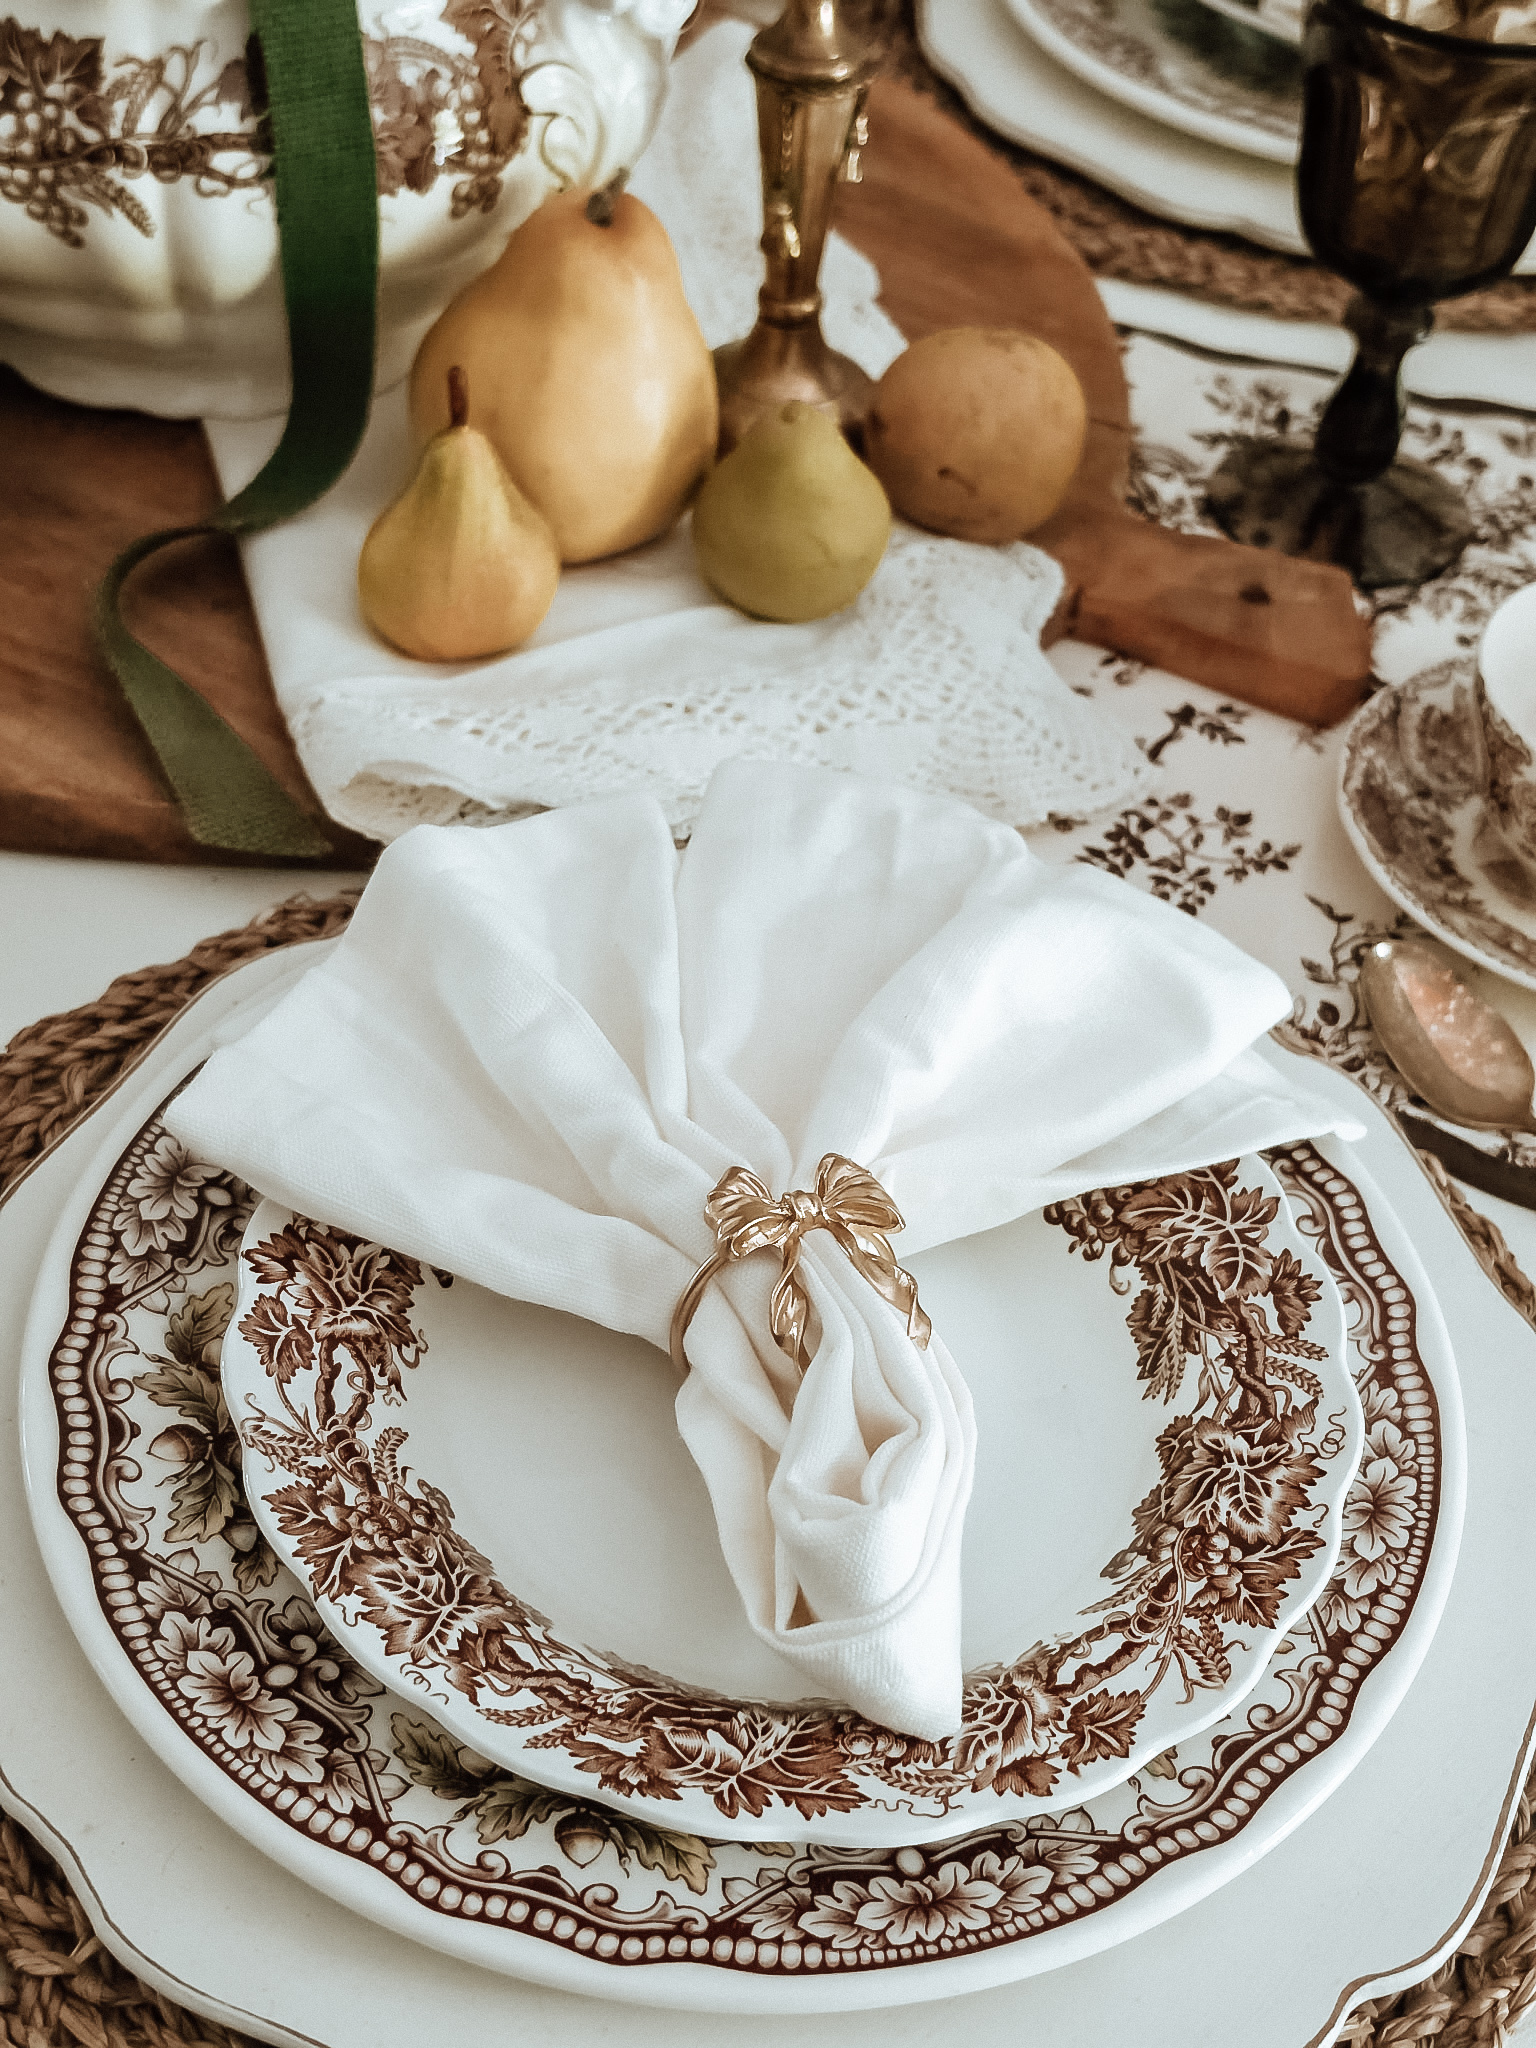
Build each place setting from largest to smallest: woven charger, neutral plate, transferware dinner plate, then a smaller plate or shallow bowl. The pieces do not have to be identical at every seat. Keep the number of layers and the overall colors consistent so the table feels intentional. Place a transferware cup and saucer beside each setting, then add a drinking glass and flatware. Loosely fold an olive-green cloth napkin, slip it through a simple brass napkin ring, and center it on the top plate or shallow bowl.
Collected, not cluttered. When several patterns are in use, repeat the same shape or color at every place setting. Repetition is what makes mismatched vintage pieces feel cohesive.
Step 4: Build a Centerpiece from Secondhand Finds
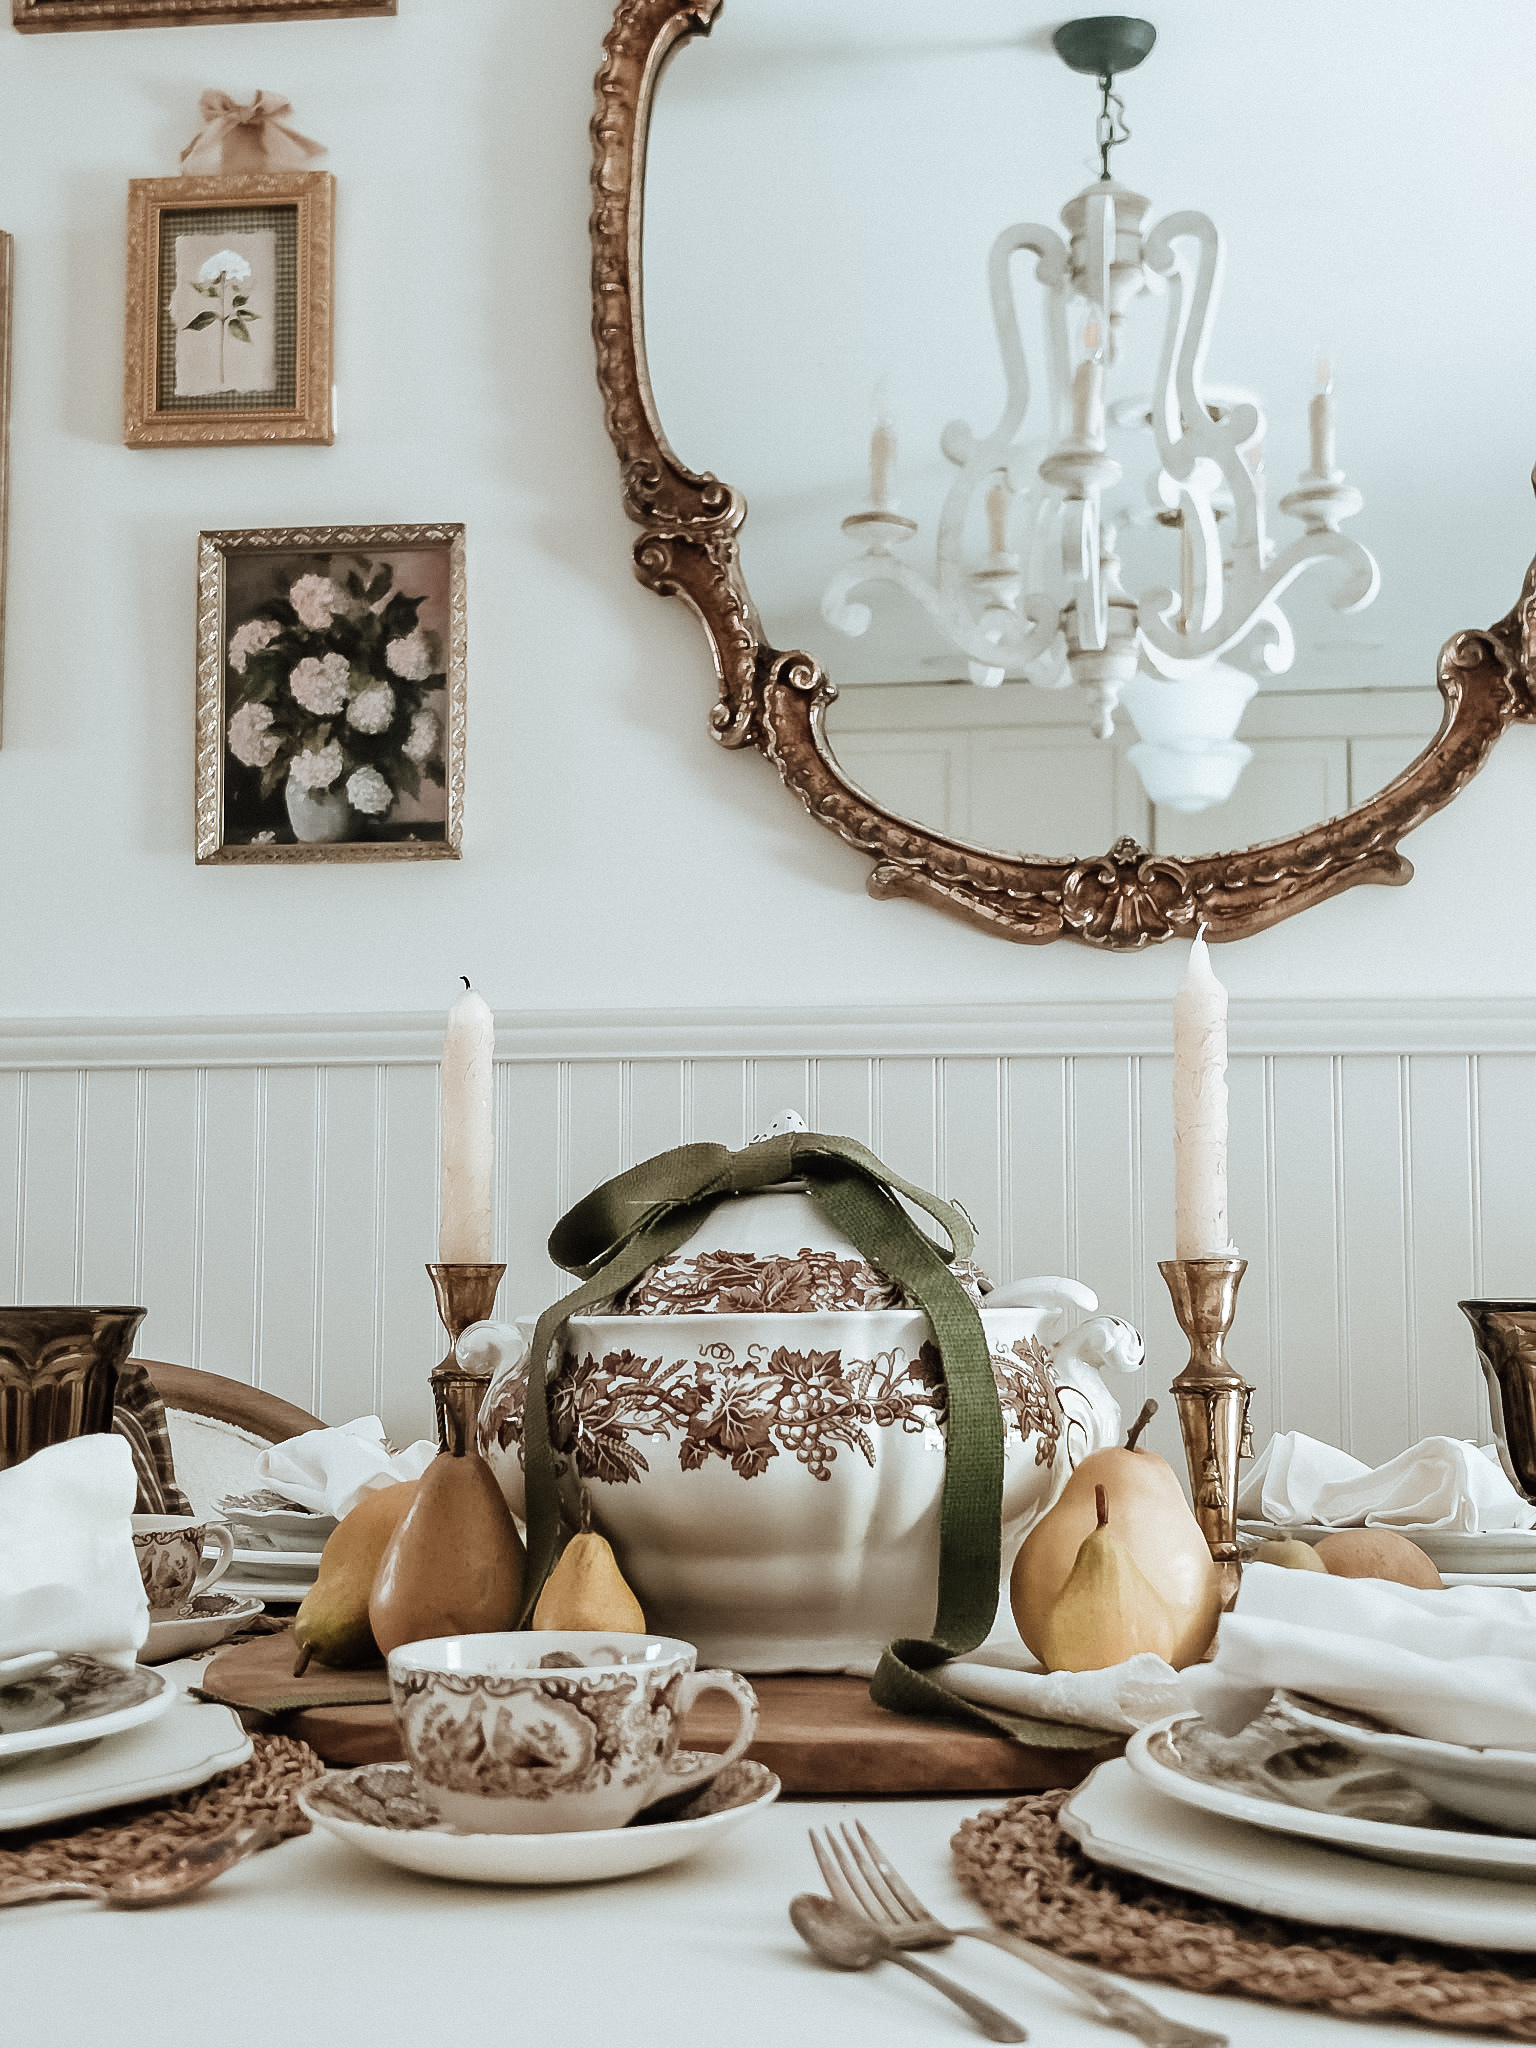
A centerpiece should support the story of the table rather than overpower it. I placed the brown transferware tureen on a low wooden breadboard, allowing the worn wood to ground the detailed pattern and give the tureen a little presence without lifting it too high. An old English breadboard, a simple round cutting board, or another secondhand wooden base can create the same effect.
I flanked the tureen with two brass-toned candlesticks and cream taper candles. Their warm finish repeats the tones in the room while their slender shape adds height without hiding the transferware. A casually folded neutral linen, a few pears, and walnuts can be tucked around the base for softness and an understated harvest detail. Keep the arrangement loose and slightly asymmetrical so it feels gathered rather than overly formal.
Step 5: Add Soft Contrast with Napkins
Center one softly folded olive-green napkin on each place setting and secure it with a simple brass or gold-toned napkin ring. The green breaks up the brown-and-cream palette while the warm metal quietly repeats the candlesticks in the centerpiece. Keep the folds relaxed rather than overly formal so the table still feels gathered and approachable. Repeating the same napkin treatment at every seat gives the mismatched vintage dishes a calm, cohesive finish.
Step 6: Repeat Color and Texture
Step back and look at the entire room. I repeated brown through the transferware, woven chargers, wooden breadboard, and plaid chair cushions, then used cream and white to keep the arrangement light. Small touches of olive and aged brass add contrast. Repeating each major color or finish at least twice helps the table feel connected to the room around it.
Step 7: Edit the Table
The last step is often removing something. Sit in each chair and check that guests have room for their hands, glasses, and plates. Turn patterned pieces so their most interesting details face outward, straighten the spacing, and remove any object that blocks the transferware or makes the table feel crowded.
Helpful Styling Notes
- Mix patterns by color. Different scenes and borders work together when their dominant tones are similar.
- Vary the height carefully. Keep the tallest element near the center and balance it with lower objects around the table.
- Leave useful negative space. A little open tabletop allows each vintage piece to be noticed.
- Embrace age. Gentle wear and patina are part of the character of secondhand finds.
- Use vintage dishes thoughtfully. Check older ceramics for chips, cracks, heavy crazing, or unknown food-safety history. Reserve uncertain pieces for decorative display, or layer them over modern food-safe dinnerware.
A Table with a Past – and a Place in the Present
The beauty of decorating with inherited, flea market, and estate sale finds is that no two tables will ever tell the same story. When I set this table, I see more than patterned dishes. I see afternoons spent antiquing with my mother, the women in my family who taught me to value what came before us, and pieces that may one day become part of someone else’s memories.
A worn platter, a mismatched cup, or a timeworn breadboard can bring history into the everyday. By beginning with something meaningful and layering natural textures and seasonal details around it, we can create homes that feel beautiful without erasing the past. For me, that is the heart of flea market decor: finding new ways to live with old things and allowing their stories to continue.