Katie Van Liew
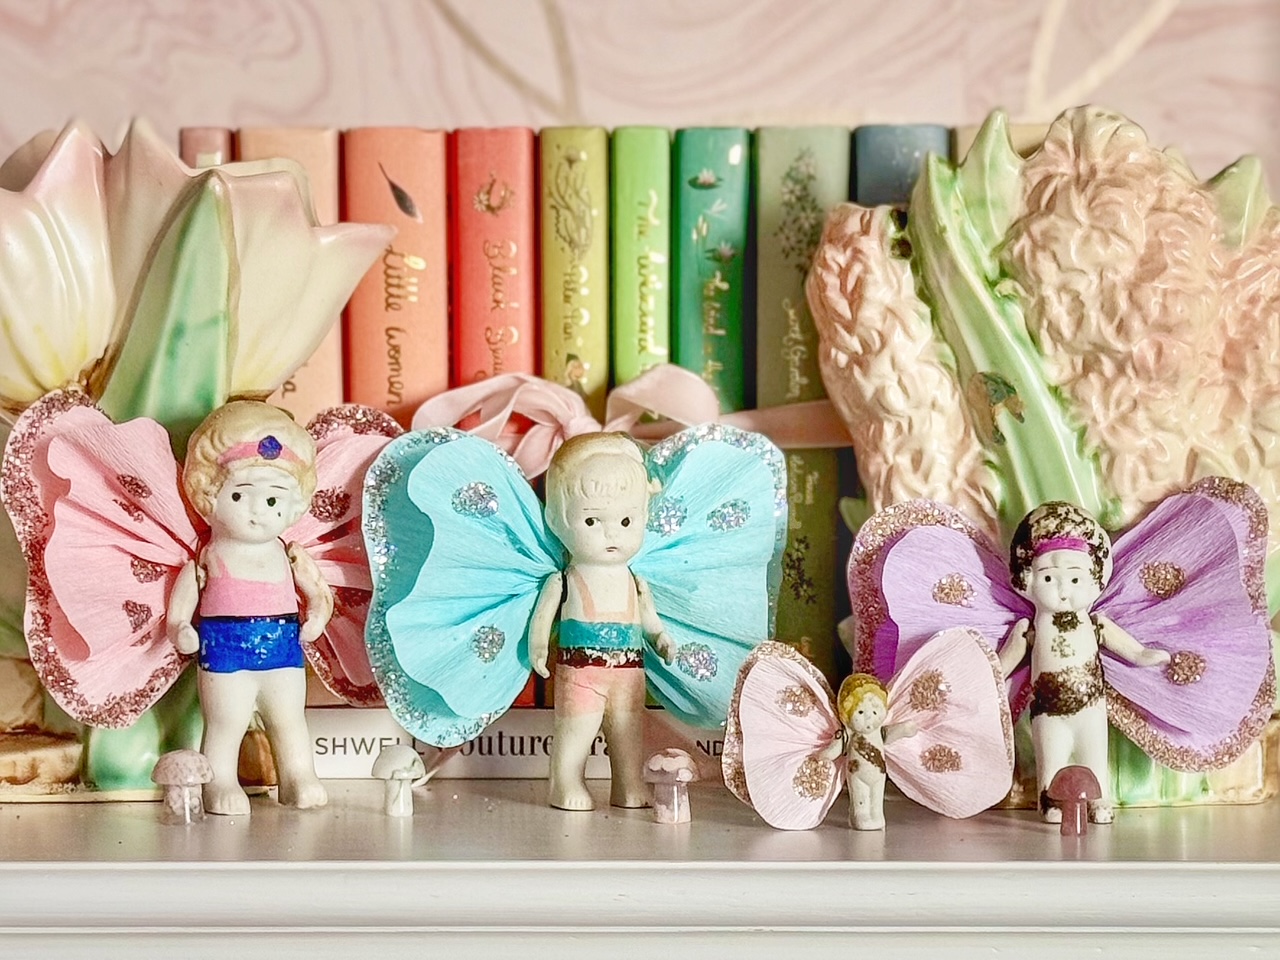
There’s a special kind of magic in turning timeworn treasures into something new. Vintage bisque Frozen Charlotte dolls—those tiny, wide-eyed cuties once tucked into little hands and trinket boxes—make the perfect muse for this sweet little upcycle. Handmade from bits of paper, glitter, and time-worn charm, your fairy is a gentle reminder that beauty often hides in the smallest, most unexpected things. With just a few simple supplies and a sprinkle of imagination, you can give your doll a delicate set of fairy wings and a new story to tell.
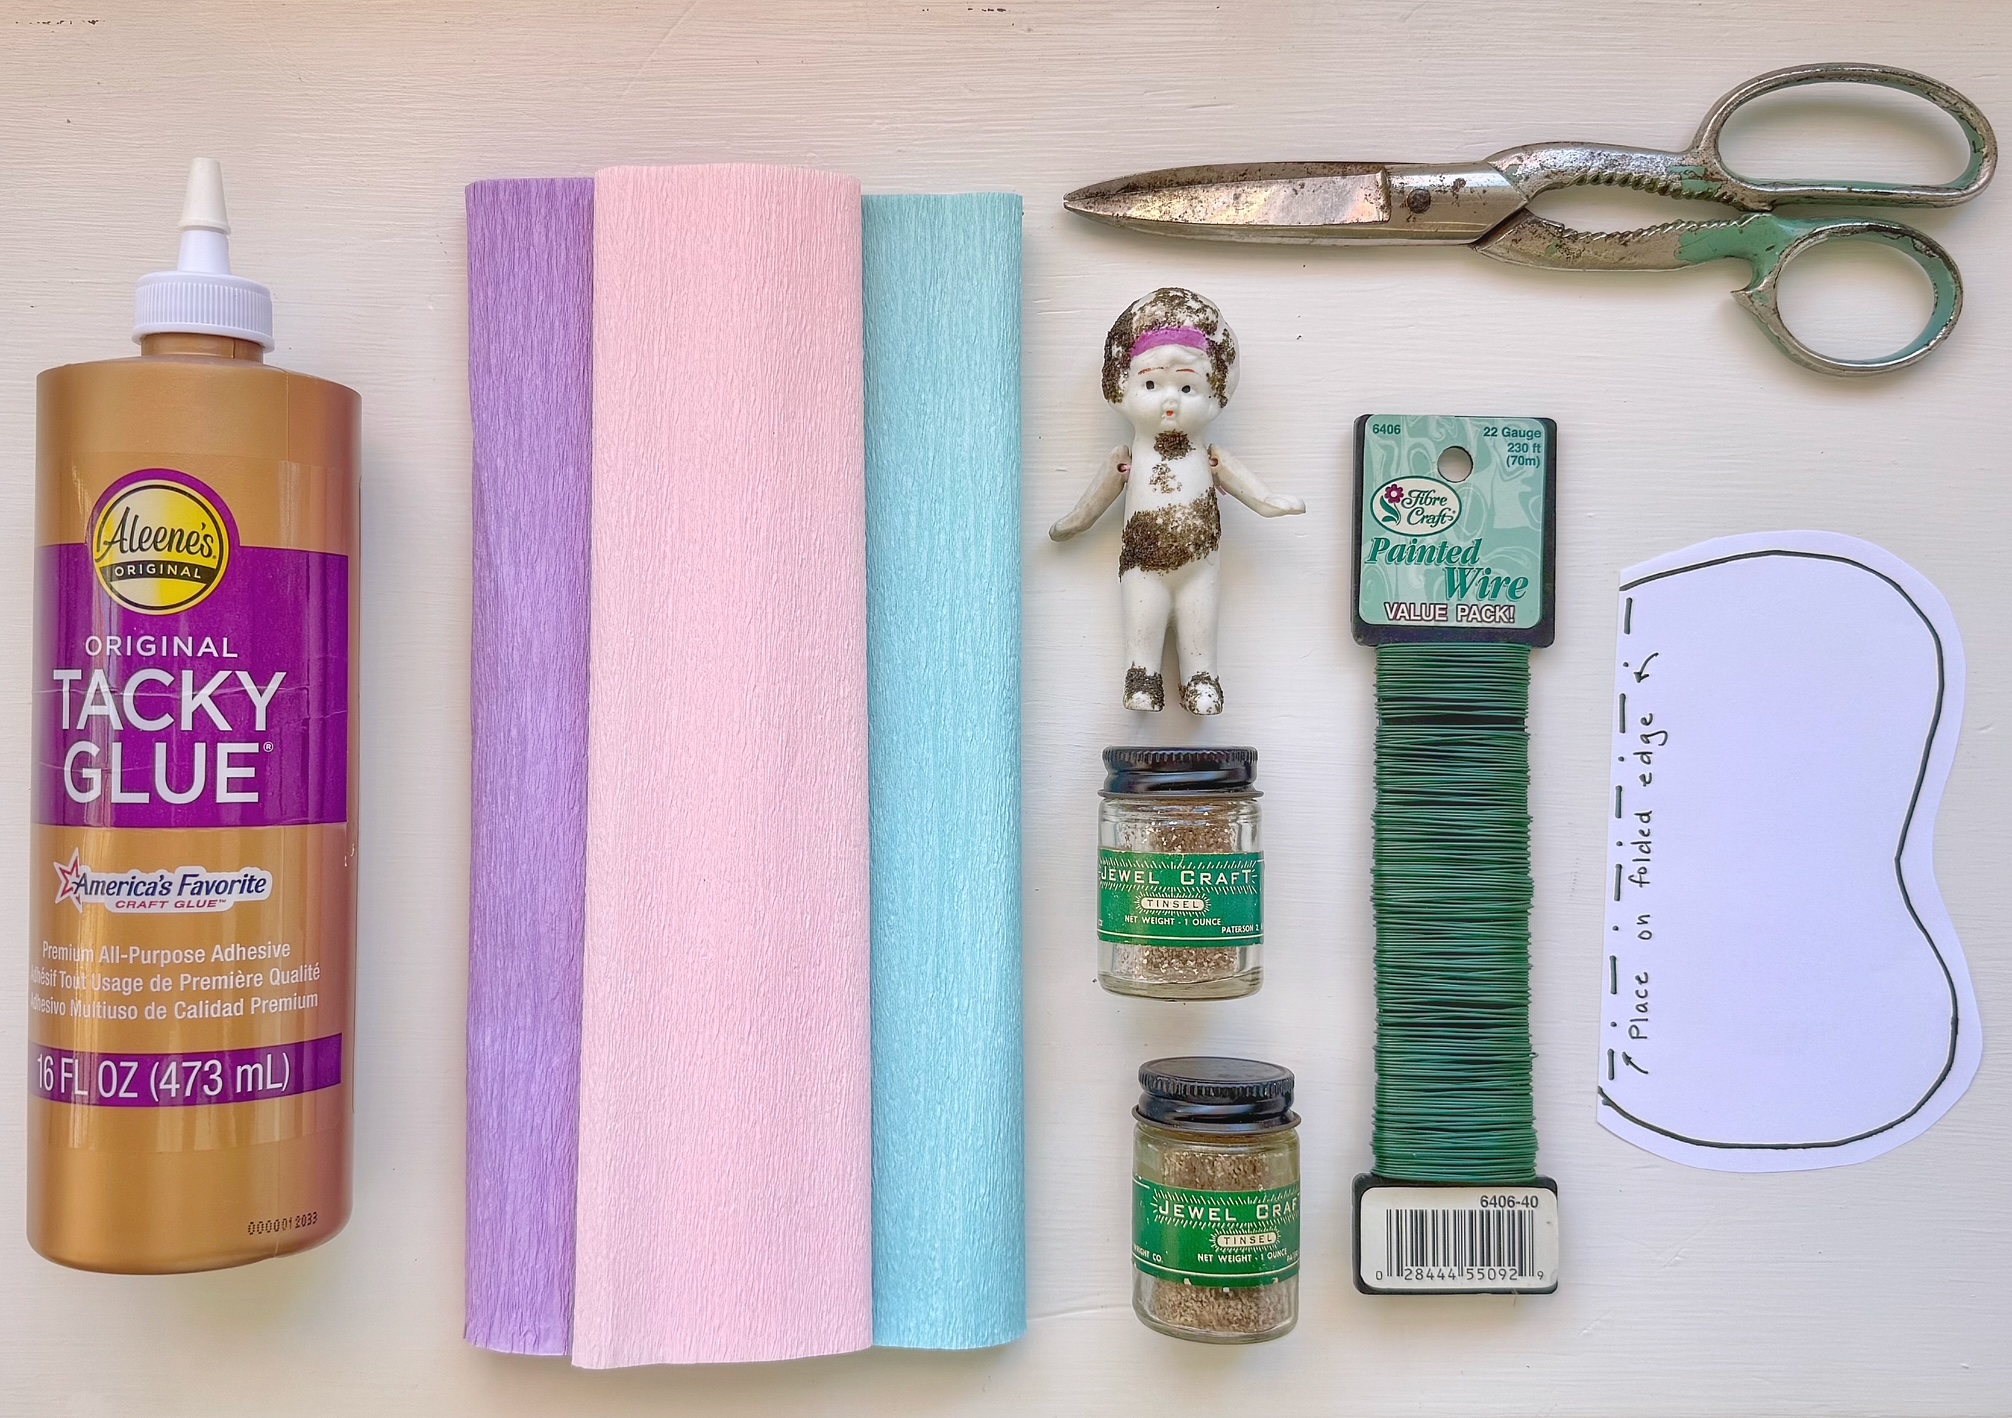
Materials
- Vintage bisque Frozen Charlotte doll
- Printed wing template
- Light cardboard or card stock (a cereal box works great!)
- Crepe paper (two pieces)
- Scissors
- Glue
- Glitter
- Floral wire
- Parchment paper (for workspace)
Instructions
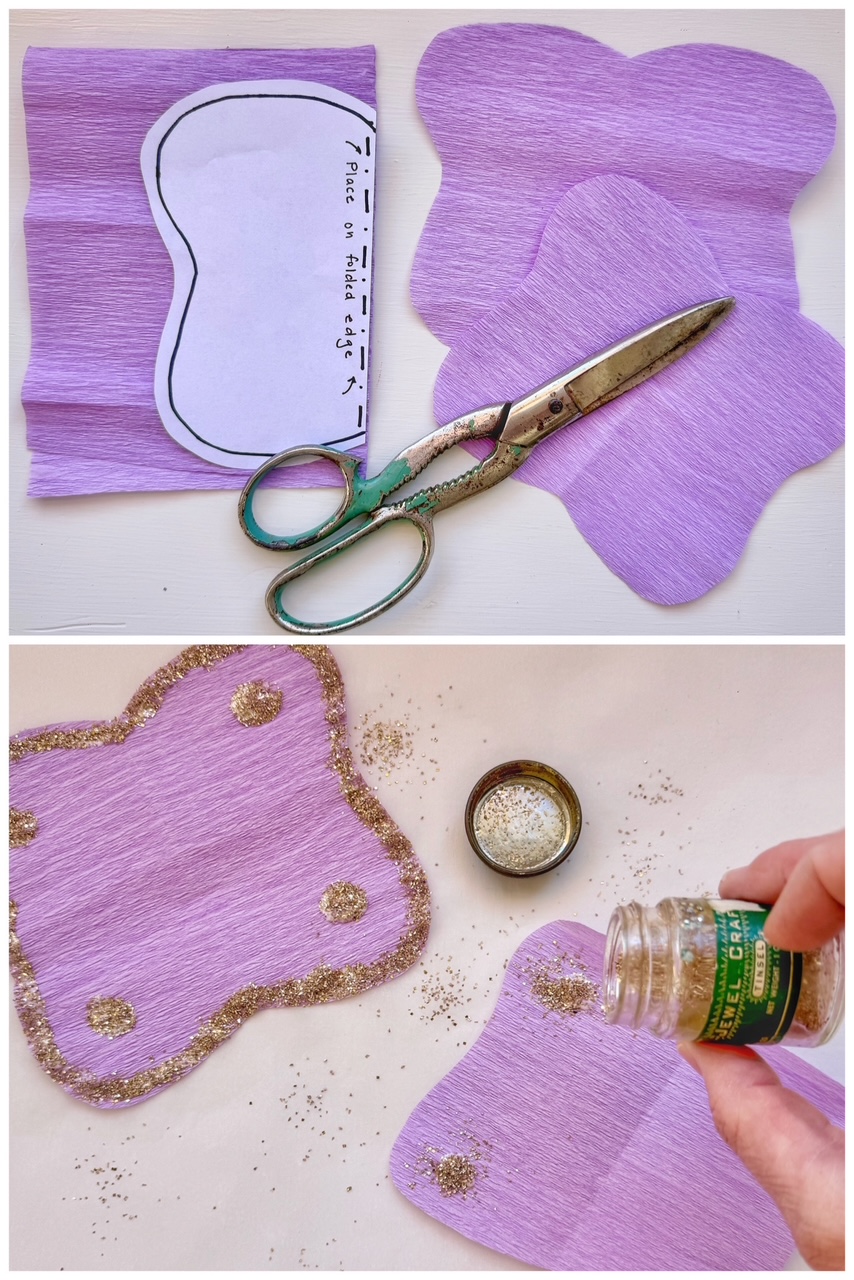
- Prepare the template. Transfer the template design onto light cardboard or card stock. (I used a cereal box.)
- Cut the crepe paper. Cut two pieces of crepe paper large enough that, when each piece is folded in half, it will fit your template.
- Fold the crepe paper. Fold each piece of crepe paper in half so that the lines (grain) of the crepe paper run horizontally.
- Cut out the wings. Place the template so that the straight edge is aligned with the folded edge of the crepe paper. Cut along the template outline.
- Repeat for the second piece. Repeat Step 4 with the second folded piece of crepe paper to create two identical sets of wings. (Tip: Trim the second set just slightly smaller than the first to create a pretty layered effect, giving the wings more depth and dimension.)
- Add glue and glitter. Spread glue on each wing in any pattern you like—then sprinkle with glitter! (I like to work on a sheet of parchment paper for quick and easy cleanup.)
- Let dry completely. Allow the wings to dry before moving on.
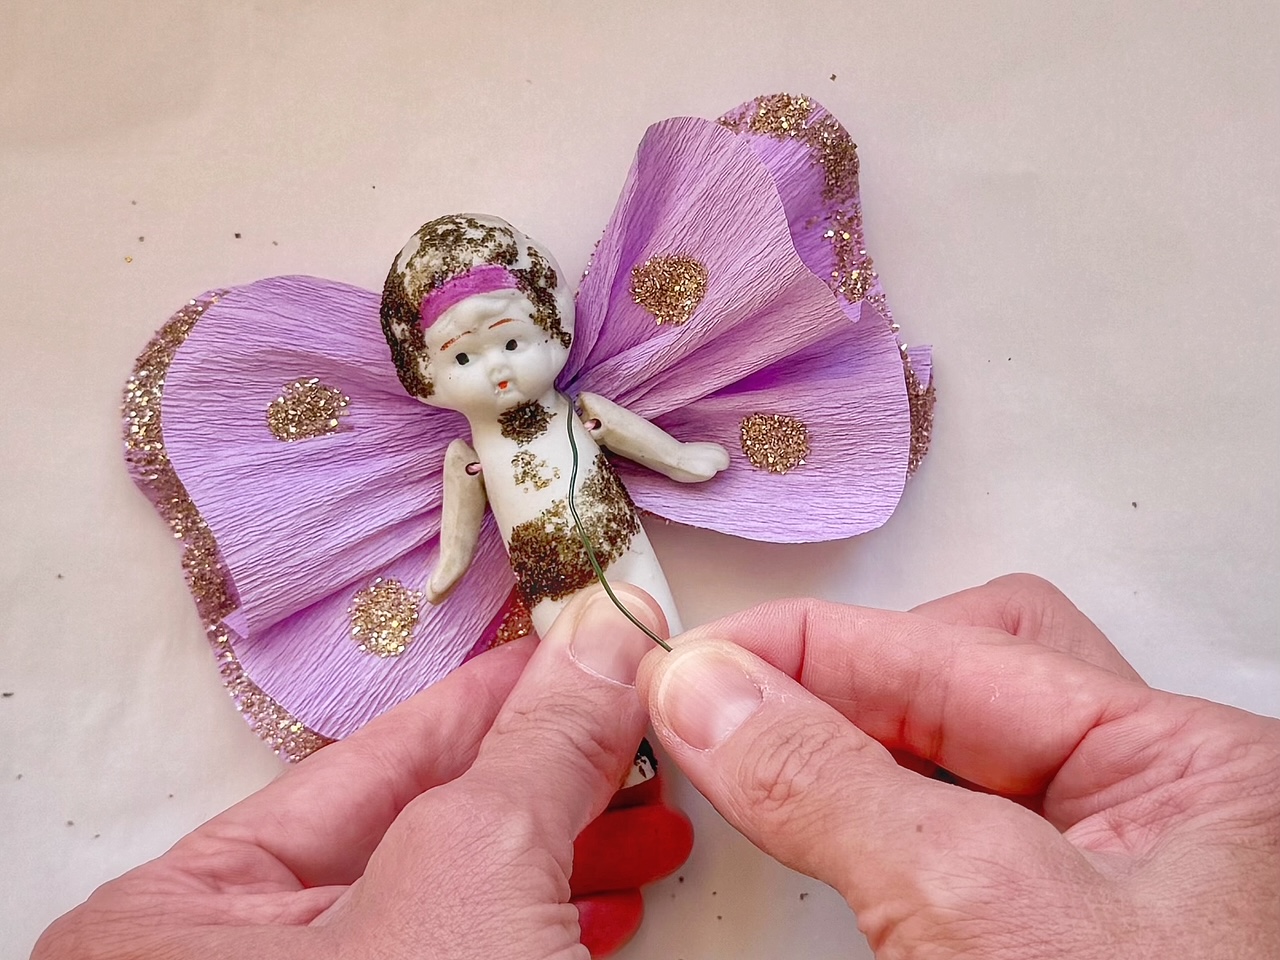
- Cut your floral wire. Cut a piece of floral wire several inches long—long enough to wrap securely around the doll’s shoulders and arms. The length will depend on the size of your doll.
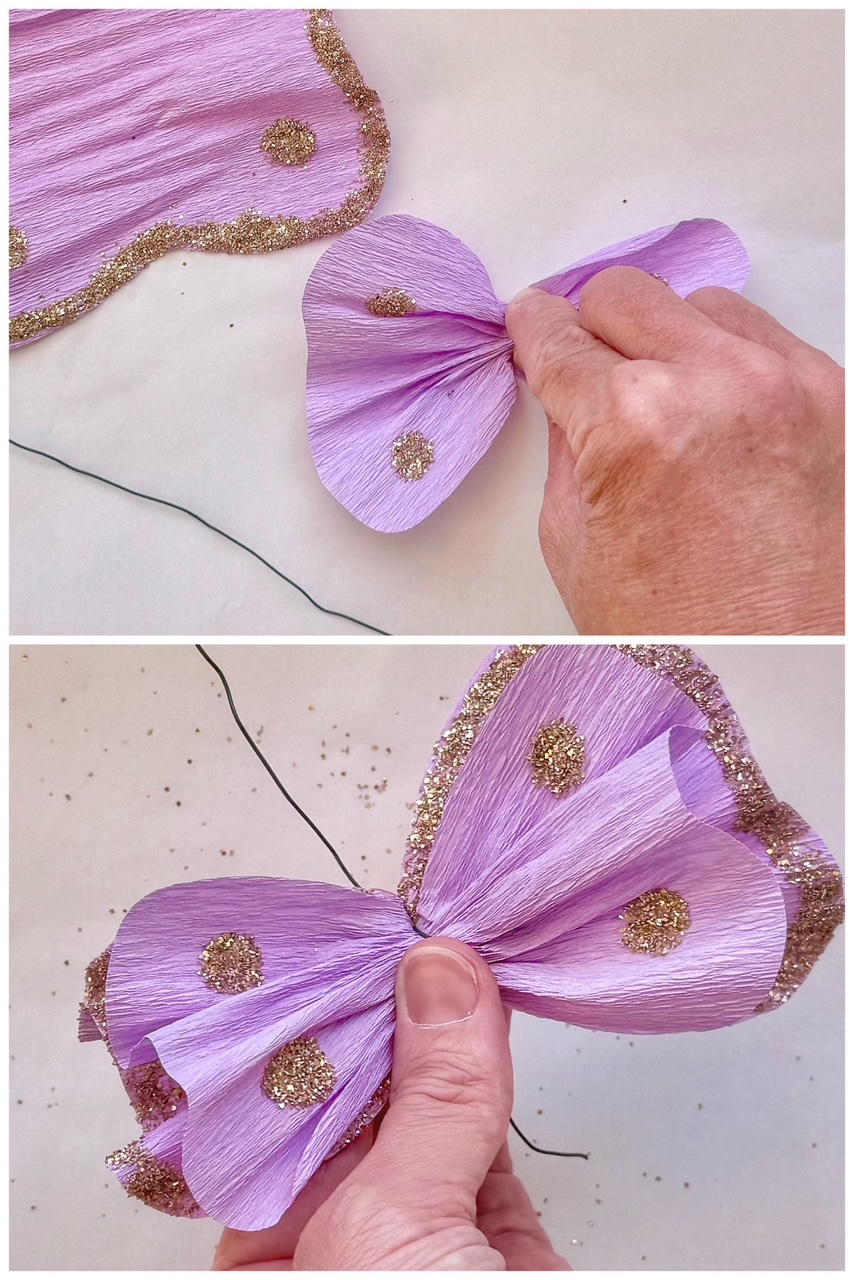
- Assemble the wings. Gently gather each wing along the center line. Stack the wings, placing the smaller set on top if you made one.
- Secure with floral wire. Hold the gathered wings together in one hand. With the other, wrap the floral wire around the center and twist to secure, leaving two longer loose ends.
- Attach to the doll. Position the wings on the doll’s back where her shoulder blades would be. Wrap each loose wire end around her arm joints to secure the wings.
- Fluff and shape. Adjust and “fluff” the wings until they look just right.
Pro Tip: For an extra touch of magic, search estate sales or thrift stores for vintage craft glitter—it often
has a larger flake size and unique sparkle that gives your fairy wings a truly timeless shimmer.
Once your little fairy’s wings are fluffed and sparkling, she’s ready to take her place among your favorite finds. Nestle her in a teacup, perch her on a stack of old books, or let her dance among your houseplants and curiosities. Each one turns out a little different—just like the treasures we rescue from flea markets and estate sales—and that’s where the magic lives.